Create advanced schedules
Create a schedule and use parameters to control its appearance.
Tutorial resources
These downloadable resources will be used to complete this tutorial:
Step-by-step guide
Create a schedule and use parameters to control its appearance.
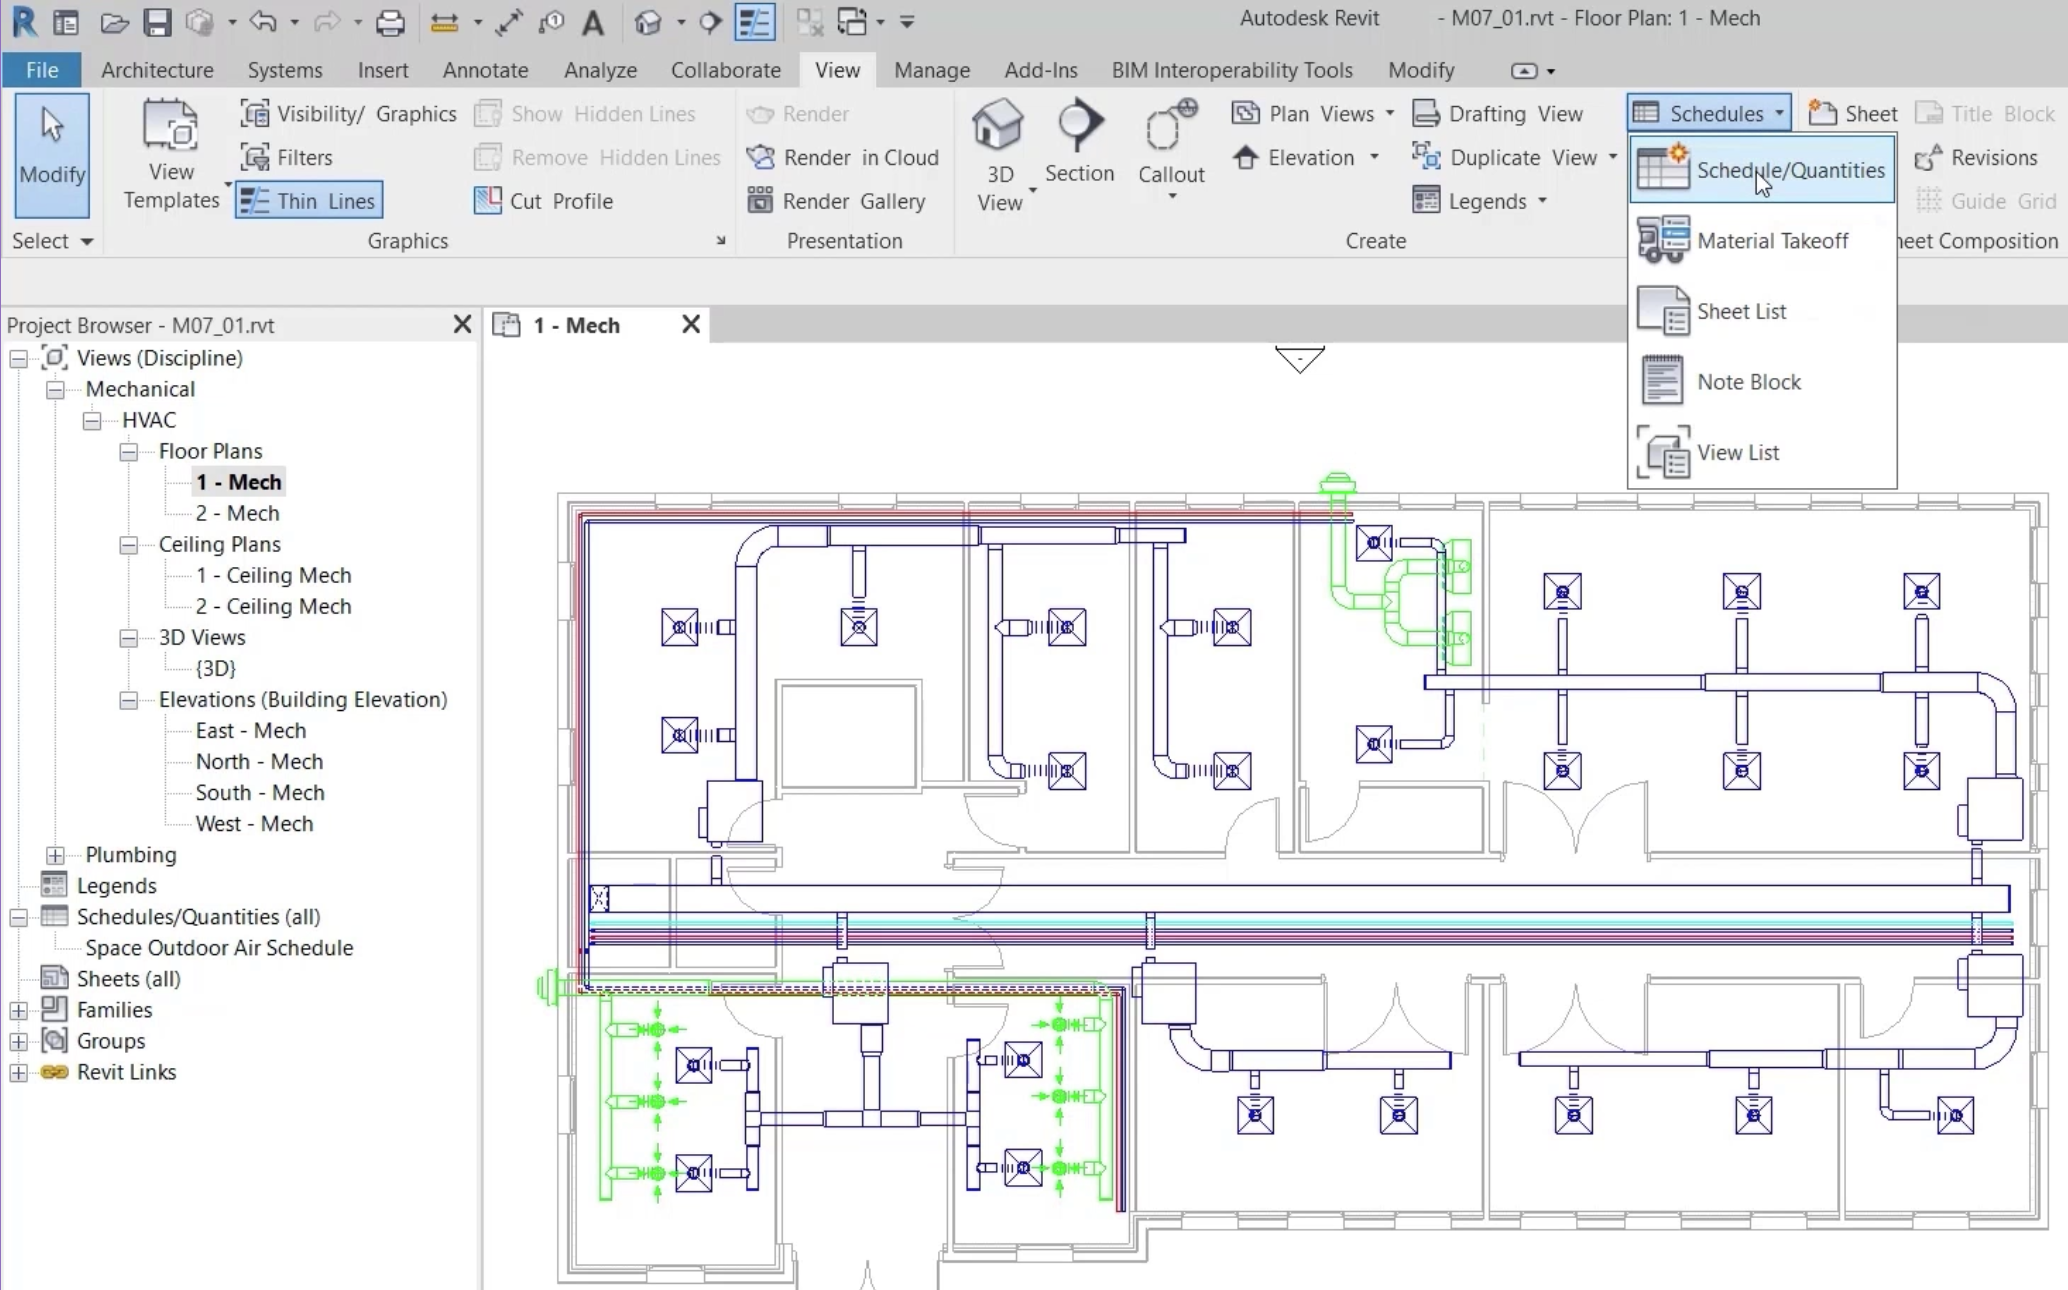
- Open the project M07_01.rvt.
- Ensure that the current view is HVAC > Floor Plans > 1 – Mech.
- On the ribbon, View tab, click the Schedules drop-down and select Schedule/Quantities.
- Name the new schedule "Air Changes".
- Click OK.
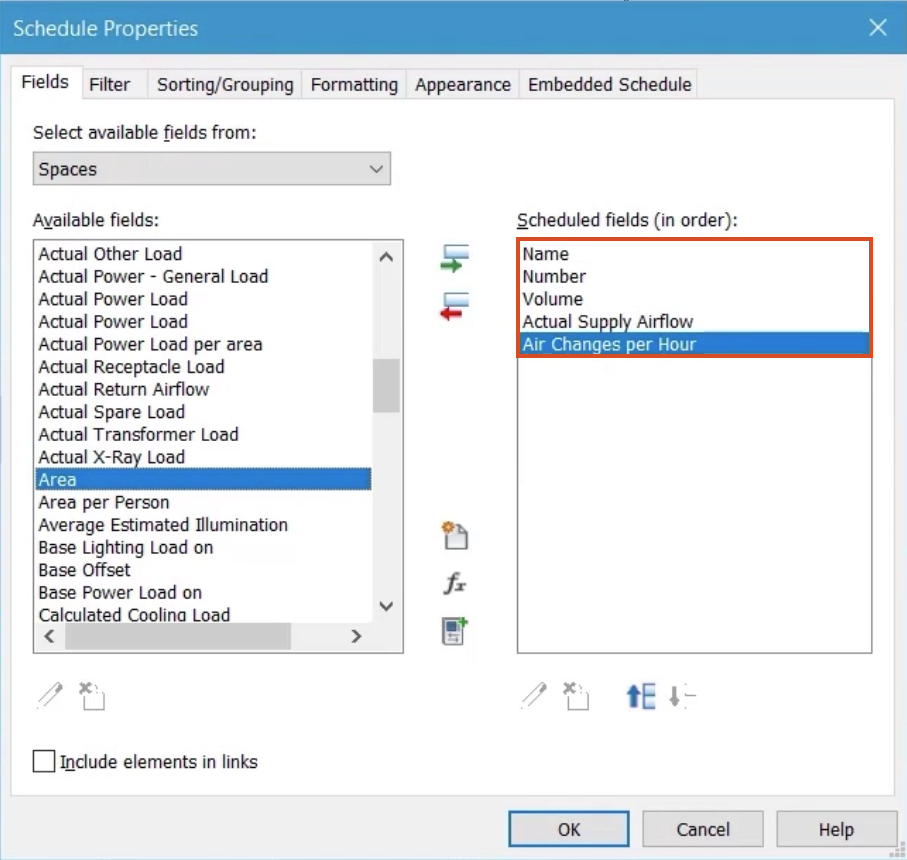
- In the Schedule Properties dialog box, under Available fields, select the Name field.
- Click the Add Parameter arrow to add it to the Scheduled fields list.
- Repeat steps 6 and 7 to add the following fields:
- Number
- Volume
- Actual Supply Airflow
- Air Changes per hour
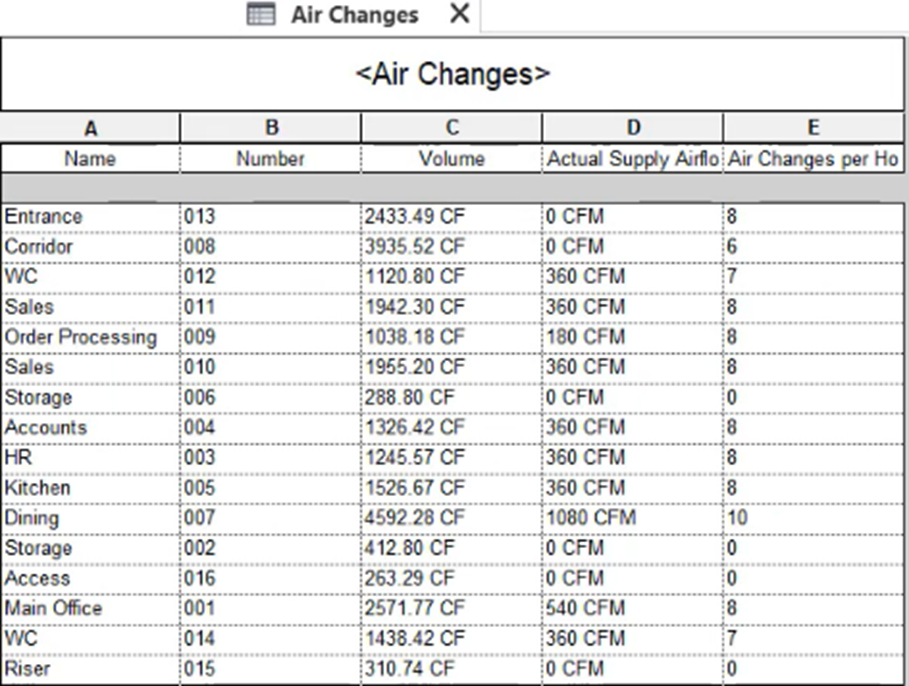
- Click OK to review the schedule.
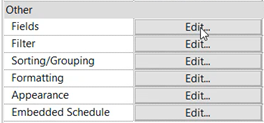
- In Properties, next to the Fields parameter, click Edit.
- In the Schedule Properties dialog box, click the Combine Parameters button.
- Name the combined parameter "Space id".
- From the list of Schedule Parameters, select Name.
- Click Add Parameter to add it to the Combined parameters.
- Repeat steps 13 and 14 to add the Number parameter.
- For each Combined parameter, in the Separator column, delete the forward slash (/).
- In the Name row, Separator column, add a dash (-).

- Click OK.
- In the Schedule Properties dialog box, Fields tab, move the new Space id combined parameter to the top of the list.
- On the Sorting and Grouping tab, set the Sort by drop-down to the Number of the space.
- On the Formatting tab, for the Name parameter, enable Hidden field.
- For Number, enable Hidden field.
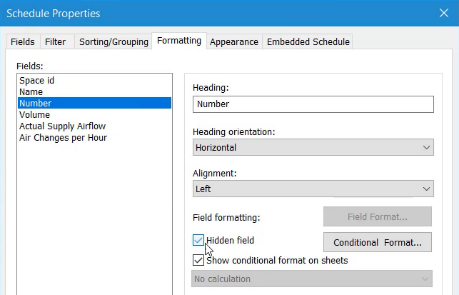
- Click OK.
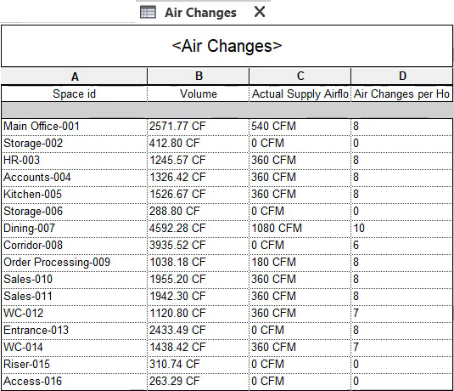
- Review the combined parameter and the updated formatting for the schedule.
- Next to the Fields parameter, click Edit.
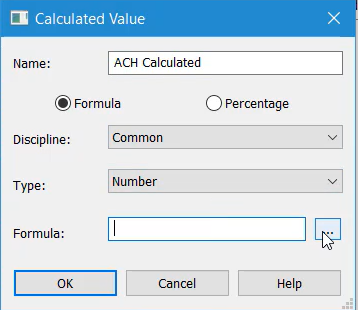
- In the Schedule Properties dialog box, click the Add calculated parameter button.
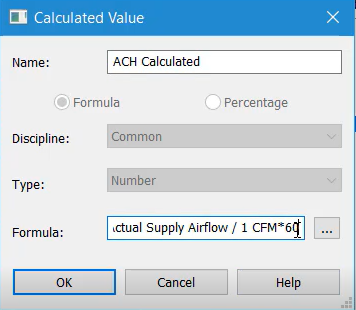
- Name the calculated parameter "ACH Calculated".
Next, build a formula to calculate the actual number of air changes per hour based on the volume of the space and the actual supply airflow. This can then be compared against the allocated value for the space.
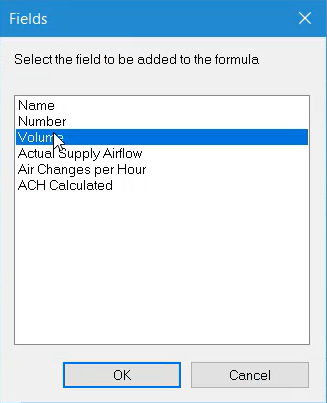
- Next to the Formula field, click Browse (…) to open the Fields dialog box.
- From the list of available fields, select Actual Supply Airflow.
- Click OK.
- In the Formula field, type "/1" to divide the value by 1. This accounts for the inconsistent units that will appear in this formula.
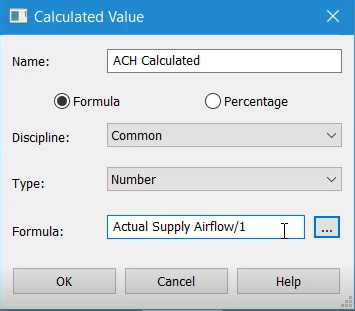
- Click OK.
- In the Schedule Properties dialog box, below the Scheduled fields list, click Edit parameter to continue with the calculated parameter.
Notice that the unit of measure CFM is added to the formula.
- Type "*60" to multiply by 60, so the formula reads: Actual Supply Airflow/1CFM*60.
Next, divide by the space volume:
- Click Browse (…).
- In the Fields dialog box, select Volume.
- Click OK.
The completed formula reads: Actual Supply Airflow/1CFM*60/Volume.
- Click OK to close all dialog boxes.
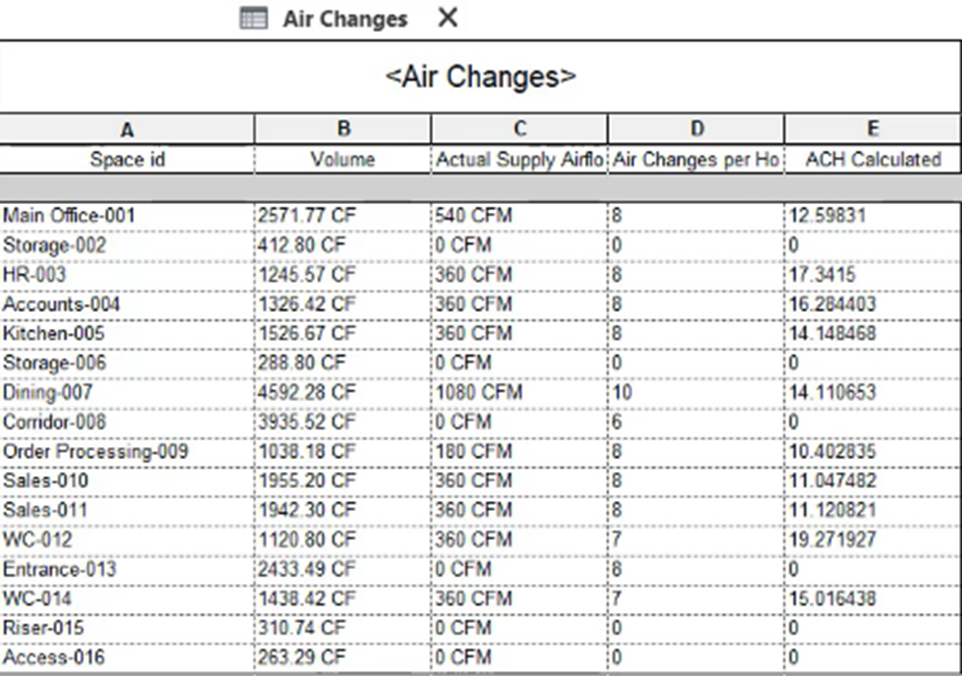
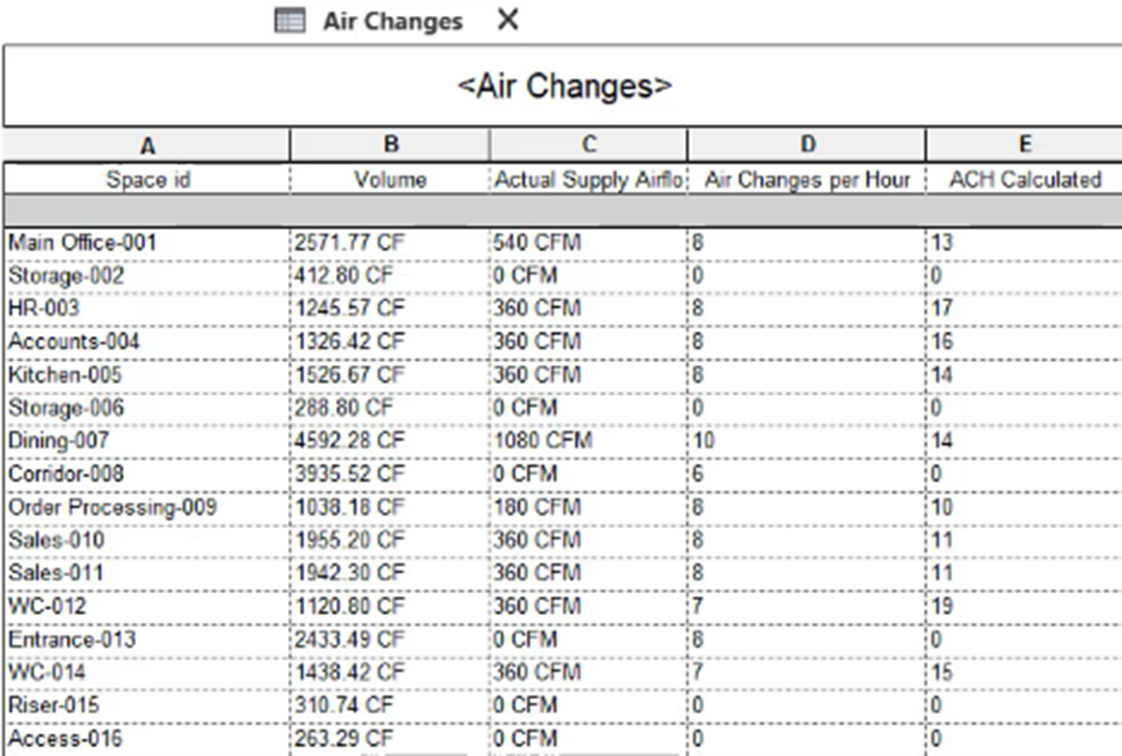
- Review the schedule with the added ACH Calculated parameter.
To set the number of decimal places to zero:
- Next to the Formatting parameter, click Edit.
- In the Schedule Properties dialog box, select the ACH Calculated parameter.
- Click Field Format.
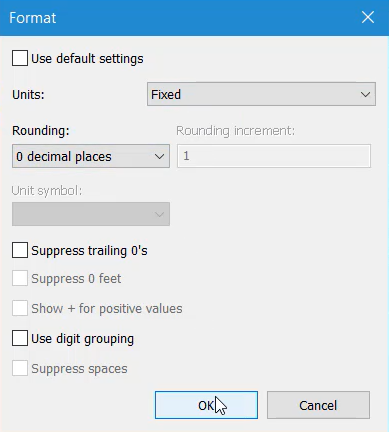
- Deselect Use default settings.
- Set the Units to Fixed.
- Set the Rounding to 0 decimal places.
- Click OK.
The final schedule provides a comparison between:
- The number of air changes per hour as defined in each space.
- A calculated value based on the physical dimensions of each space and the airflow from the systems within each of those spaces.
- Save the project.