Codeblocks - set parameter minimums, maximums, and increments
Use code blocks to set parameter minimums, maximums, and increments in the Informed Design Codeblocks Rule Editor.
Step-by-step guide:
In Informed Design, code blocks can be used to set parameter minimums, maximums, and increments, as well as to edit labels and add messages.
Adopted parameters can be configured to include a minimum and maximum value range by applying the Min and Max functions within the parameter blocks.
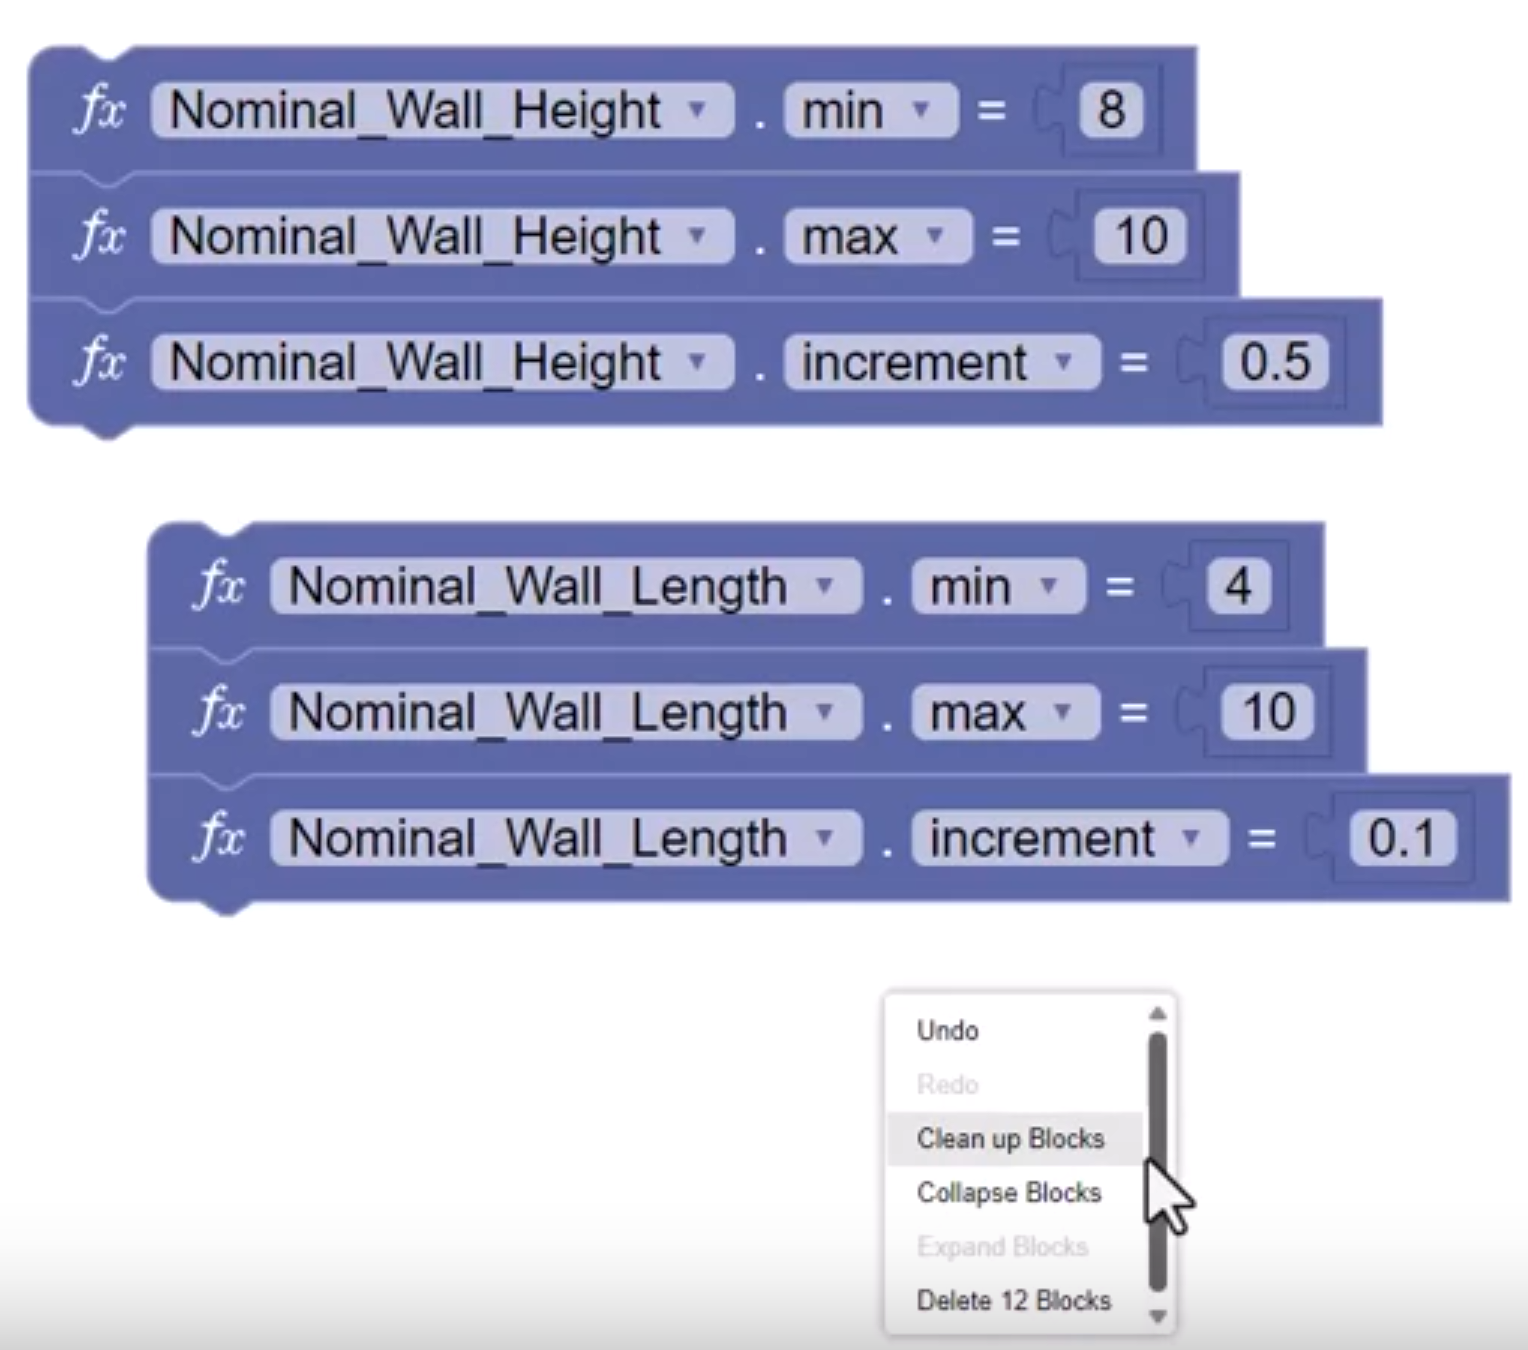
Begin with blocks setting lists of values already created, as shown below.
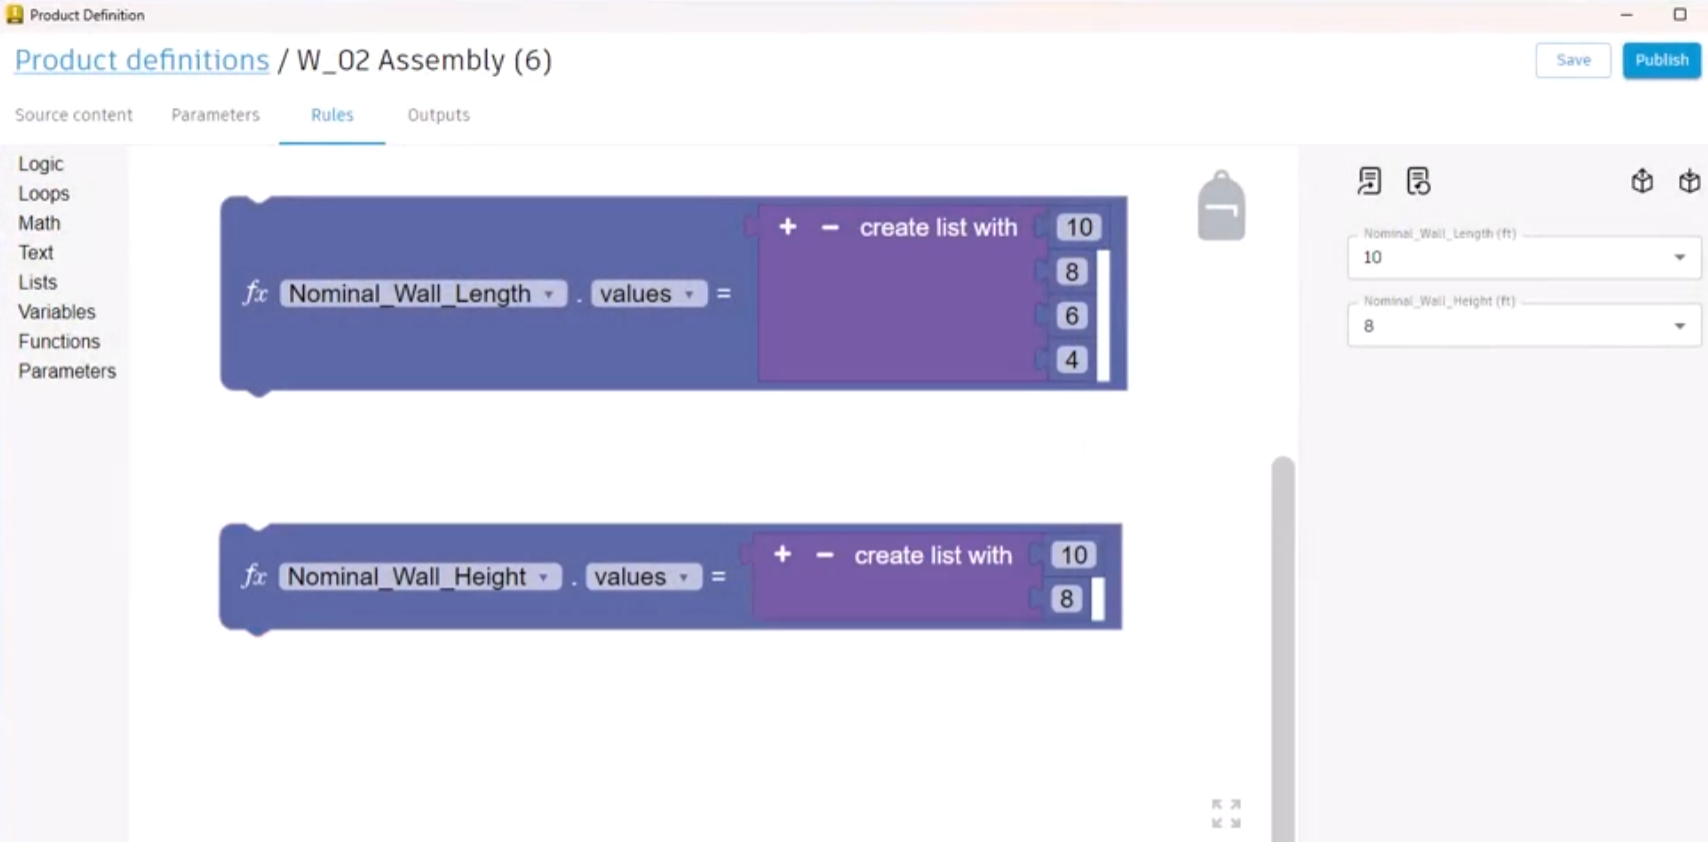
To create a minimum and maximum value range for the Nominal Wall Height parameter:
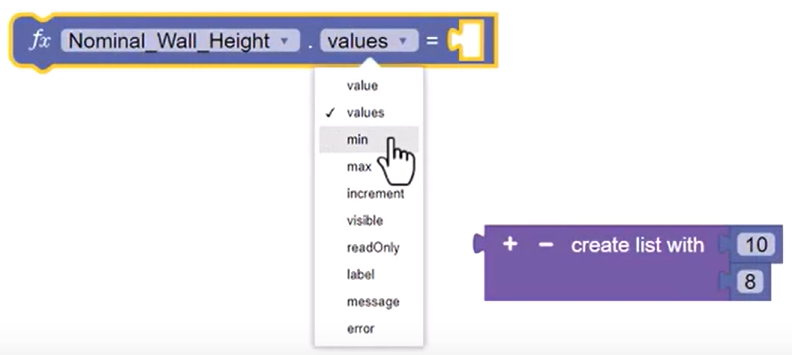
- Remove the Create List With block.
- Set the input drop-down to min.
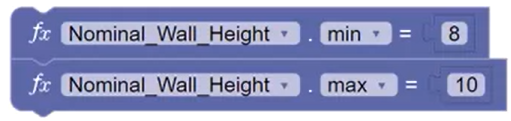
- Add a Math Number block and set the value to 8.
- Right-click the block and select Duplicate, change the input drop-down to max, and set the value to 10.
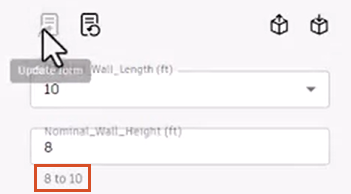
- Click Update form to test the logic.
The minimum and maximum value range is displayed as an informational label below the Nominal Wall Height input.
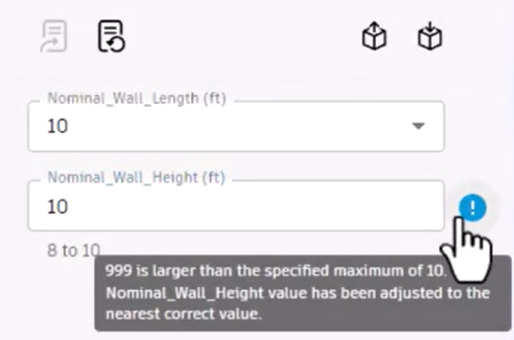
- Test the parameter with a value that is above the maximum, such as 999.
The parameter resets to the maximum value, with a message that explains the adjustment.
- Enter a value below the minimum, such as 1, and the parameter resets to the minimum value.
To set a Min and Max for the Nominal Wall Length parameter:
- Right-click the block and select Duplicate Connected to recreate the Min and Max blocks.
- Change both parameters to Nominal Wall Length, set the minimum value to 4, and discard the existing Length Values List block.

- Click Update form to test the logic.
The minimum and maximum value range appears below the Nominal Wall Length input, and testing values outside the range confirms that it is working correctly.
Next, use an increment value in a parameter block to specify the increments available within the minimum and maximum value range.
- Duplicate the Nominal Wall Height parameter max block, change the input drop-down to increment, and set the value to 0.5.
- Follow the same steps to add an increment block to the Nominal Wall Length block, and set the value to 0.1.
- Right-click the canvas and select Clean up Blocks to align the blocks.
- Click Update form to test the logic.
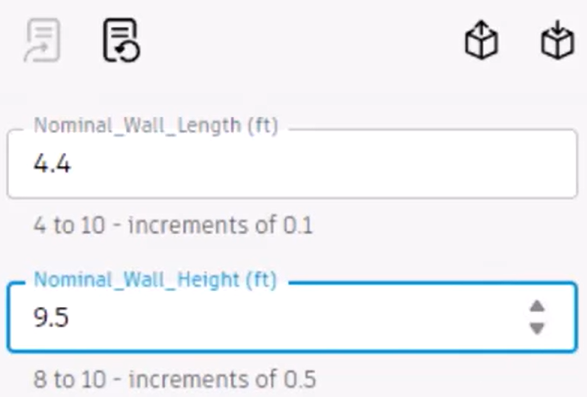
The increment information displays below the input controls, and using the up and down arrows verifies that the increments are working as intended.
Next, adjust the default form labels by removing the underscores and applying a reader-friendly label:
- Duplicate the Nominal Wall Length max block and change the input drop-down to label.
The parameter block automatically removes the Math Number block, because it is the incorrect data type.
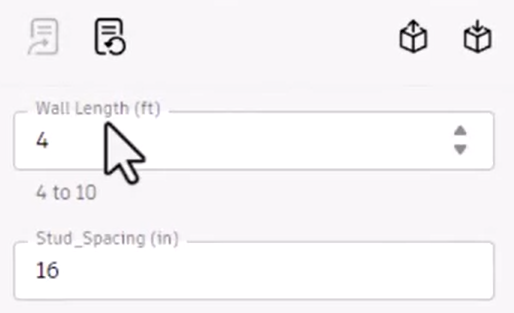
- Add a Text block and enter a reader-friendly label string, such as "Wall Length".

- Click Update form to display the new label.
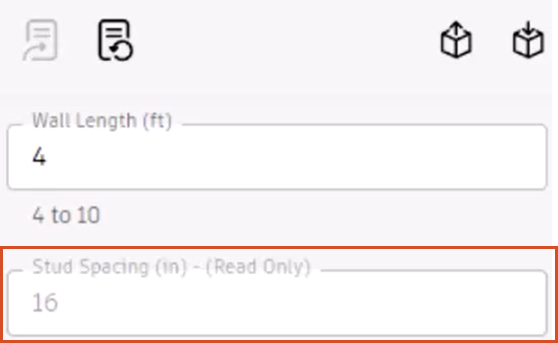
Now, update the Stud Spacing parameter to be read-only and remove the underscore from its label:
- Duplicate the Nominal Wall Length parameter block and change the drop-down to Stud_Spacing.
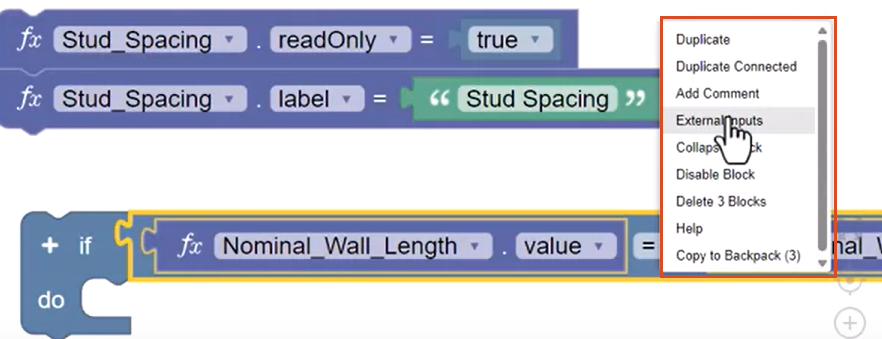
- Change the input drop-down to readOnly.
The block automatically removes the Math Number block, prompting placement of the correct data type.
- Add a True False block with the value set to true.
- Duplicate the Nominal Wall Length label block, change the parameter to Stud_Spacing, and add it below the read-only block.
- Update the Text block to "Stud Spacing".

- Click Update form.
The label updates, and the Stud Spacing parameter is now read-only.
To control the visibility of parameters in the form, based on a specified condition:
- Add an If Do block and an Operation block, with Nominal Wall Length value blocks on both sides of the equation.
- Right-click and select External Inputs to wrap the code block for a better fit.
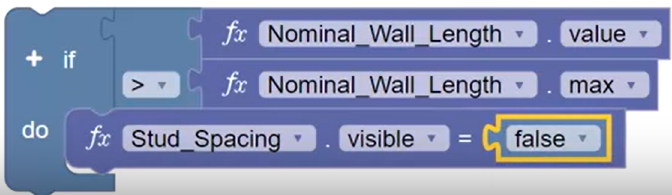
- Set the operation to greater than (>), and set the second input drop-down to max.
- Duplicate the Stud Spacing read-only block and add it to the Do portion. Set the input drop-down to visible and the value to false.
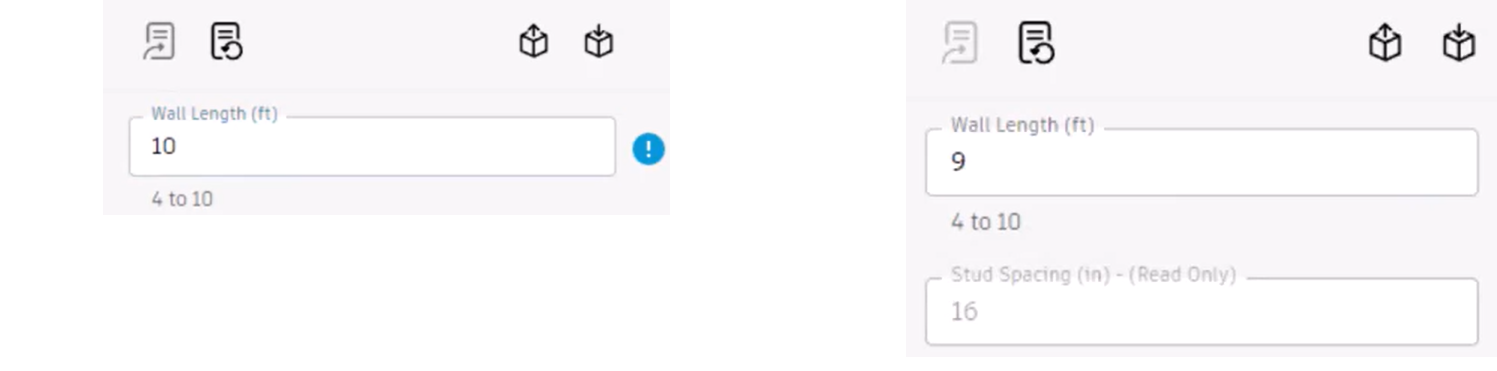
- To test the logic, in the form, set the Wall Length parameter to a value that exceeds the maximum, such as 999. The Stud Spacing parameter is no longer visible, the Wall Length parameter resets to 10, and a message icon displays.
- Set the parameter to a value less than the max, such as 9, and the Stud Spacing control becomes visible again.
Next, add messages to the parameter controls:
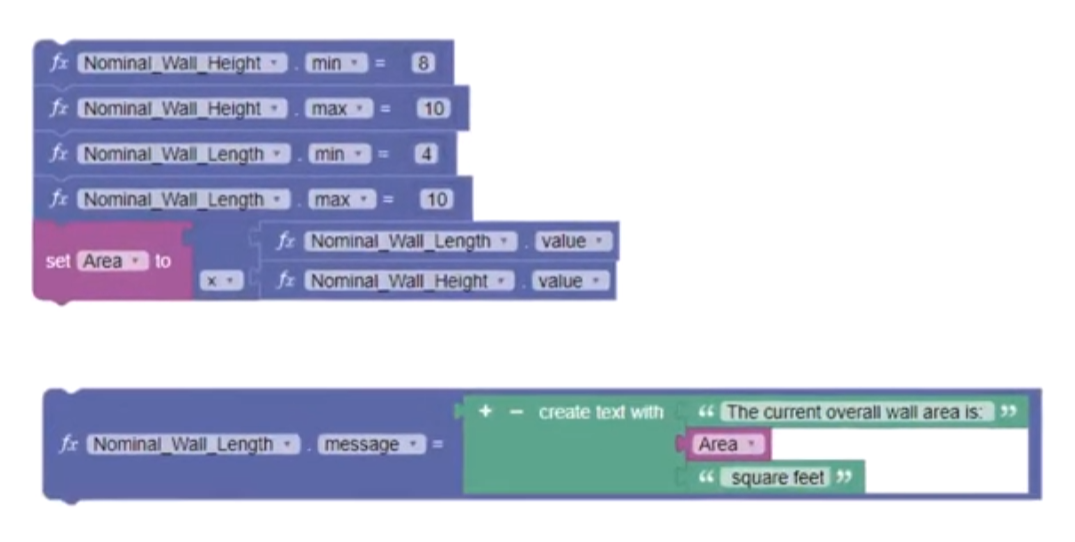
- Begin with a variable already created to calculate the area of a wall.
- Duplicate the Nominal Wall Length max parameter block and set the input drop-down to message.
- Use the Create Text With block to set up a text message that combines static Text with the calculated Area value pulled from the area variable.
- Update the Text block to read "The current overall wall area is:", then add another Text block that reads "square feet" and place it below the Area block.
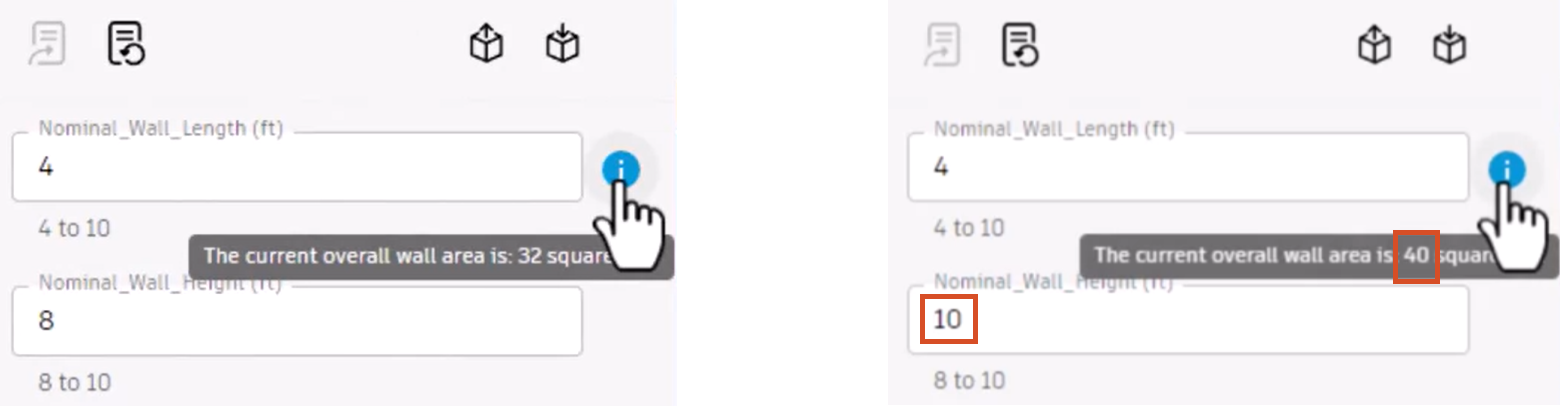
- Click Update form, then place the pointer over the message icon to display the area calculation. Changing the parameter updates the area calculation and message.
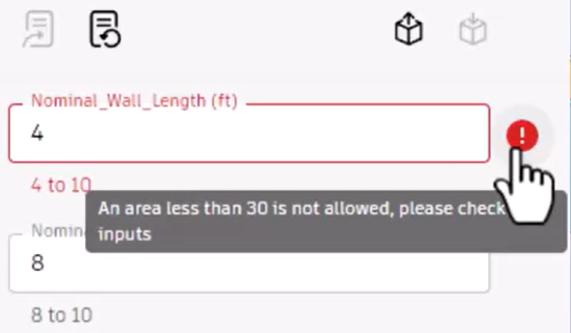
Next, add an error message to the parameter input, based on a specific condition:
- Set up the If Do block, so that when the calculated area variable is less than 35, the specified error message displays.

- Click Update form.
When the condition is true, the Wall Length parameter in the form turns red and displays the specified message.
In summary, there are various ways to adjust and control parameters using code blocks. You can define minimums, maximums, and increments for acceptable parameter values, customize parameter labels, and set parameters to be read-only or not visible. Furthermore, you can use code blocks to add dynamic information and error messages that display when specific conditions are met for parameters.