Product Definition - identify source content
Learn how to create a product definition with Informed Design and specify the Inventor model files that will be uploaded to the Informed Design service.
Step-by-step guide
With the Informed Design add-in for Autodesk Inventor, use Product Definitions to create a predefined set of parameters and rules to constrain the variants that can be generated and output types that can be extracted. This allows the publication of Inventor product models to the Autodesk platform to be leveraged in Revit designs or through the Informed Design web app.
- With an Inventor model open, on the Informed Design tab, select Product Definition. In this example, the active Inventor model is a staircase.
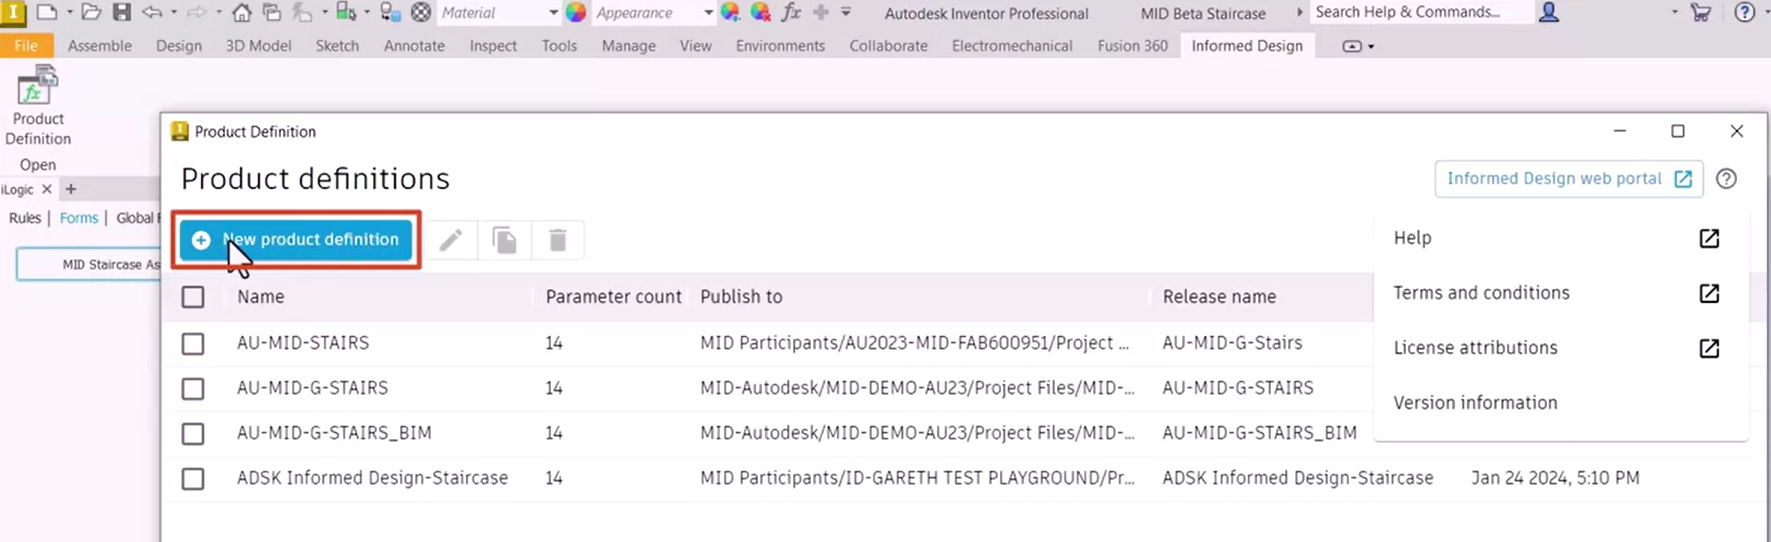
The Product Definitions dialog box opens with a list of new and existing definitions, including the one from the active Inventor model.
To create a new product definition for this model:
- Click New product definition.
This opens a tabbed interface, where it is typical to work from left to right to define Source content, Parameters, and Rules, and then proceed to the Outputs tab to publish the model.
- Click Save at any time during creation to save the product definition.
The Publish button becomes available after the required data has been entered.

On the Source content tab, identify the content to be used:
- Type a Product definition name.
- Verify the Base model location.
Note that this is a read-only field identifying the active Inventor model, which must be saved locally.
- Define the Root folder.
Be sure to select the root folder location containing all the necessary local dependent files, such as parts, drawing templates, and the IPJ. Be aware that Informed Design requires that all files required are saved in the root folder, including files such as content center components.
- Click Select to identify the Inventor project file related to the associated components.
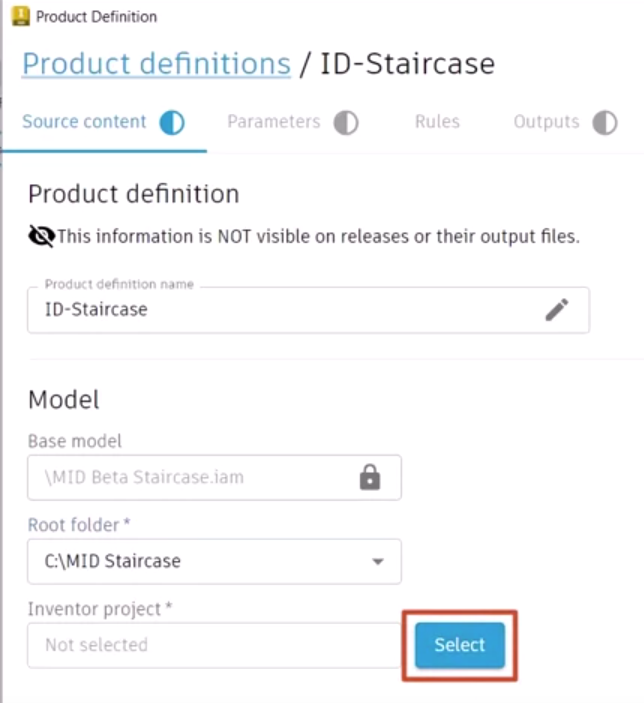
The Open dialog box displays, and since a Root folder was identified, the correct location is already selected.
- Select the .ipj file.
- Click Open.
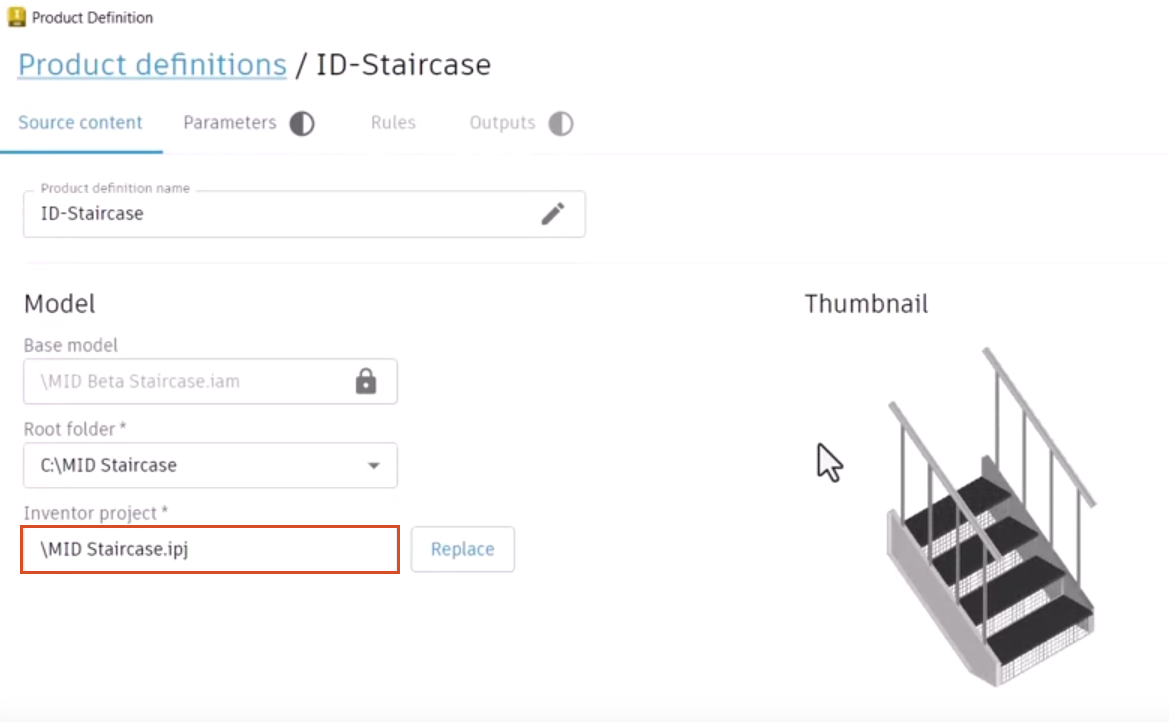
A preview of the model displays in the Thumbnail view.
- Scroll down to Output sources.
- Select any drawing template files that have been defined and saved in the same project file to make the documents available as output types in the web portal. In this example, select all files.
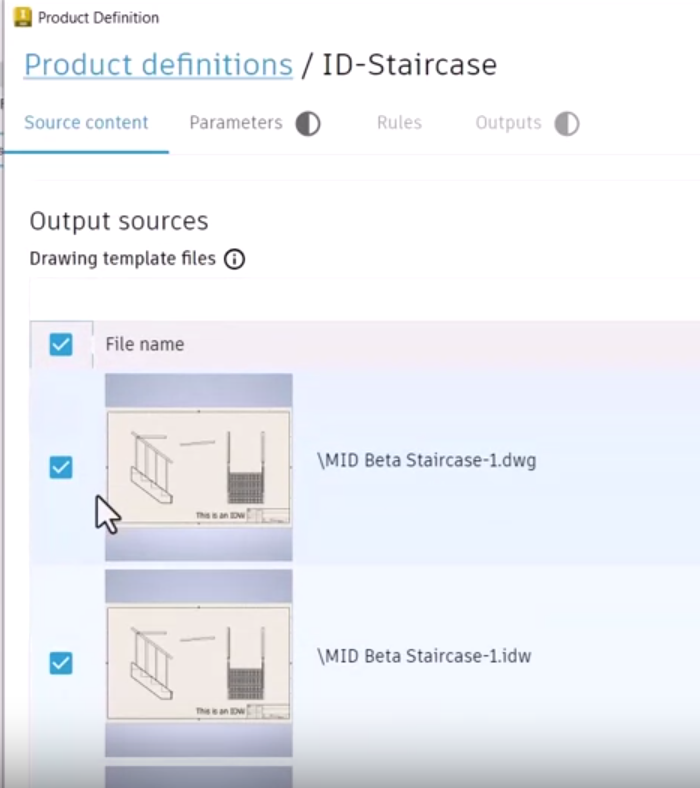
- With the source content defined, Save the product definition locally.