Informed Design for Revit - create variants from manufacturer's configurable models
Load a published product definition that was created in Inventor and generate new variations.
Step-by-step guide
Informed Design in Revit allows the loading of a published Inventor product definition, as well as trying multiple variants, while still respecting the design parameters set by the product manufacturer.
- In Revit, navigate to the Informed Design tab.
- Click Product.

- In the Customize and Insert dialog box, under Select product, use the drop-downs to select the account and project where the product definitions are saved.
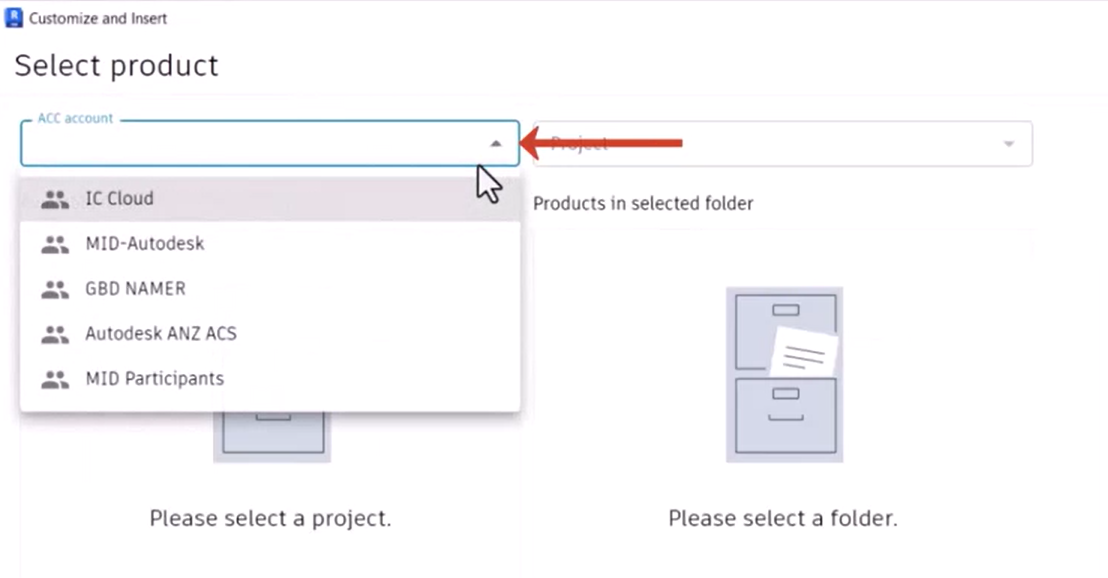
Note that proper permissions are required to access Forma Data Management project folders containing Informed Design products.
Once you select the project you need, the available folders appear.
In this example, the Stairs and Balcony product definitions are saved as sub-folders in the 01.ID.PRODUCTS folder.
- Expand 01.ID.PRODUCTS and select STAIRS.
Under Products in selected folder, any product definitions saved and published from Inventor are listed.
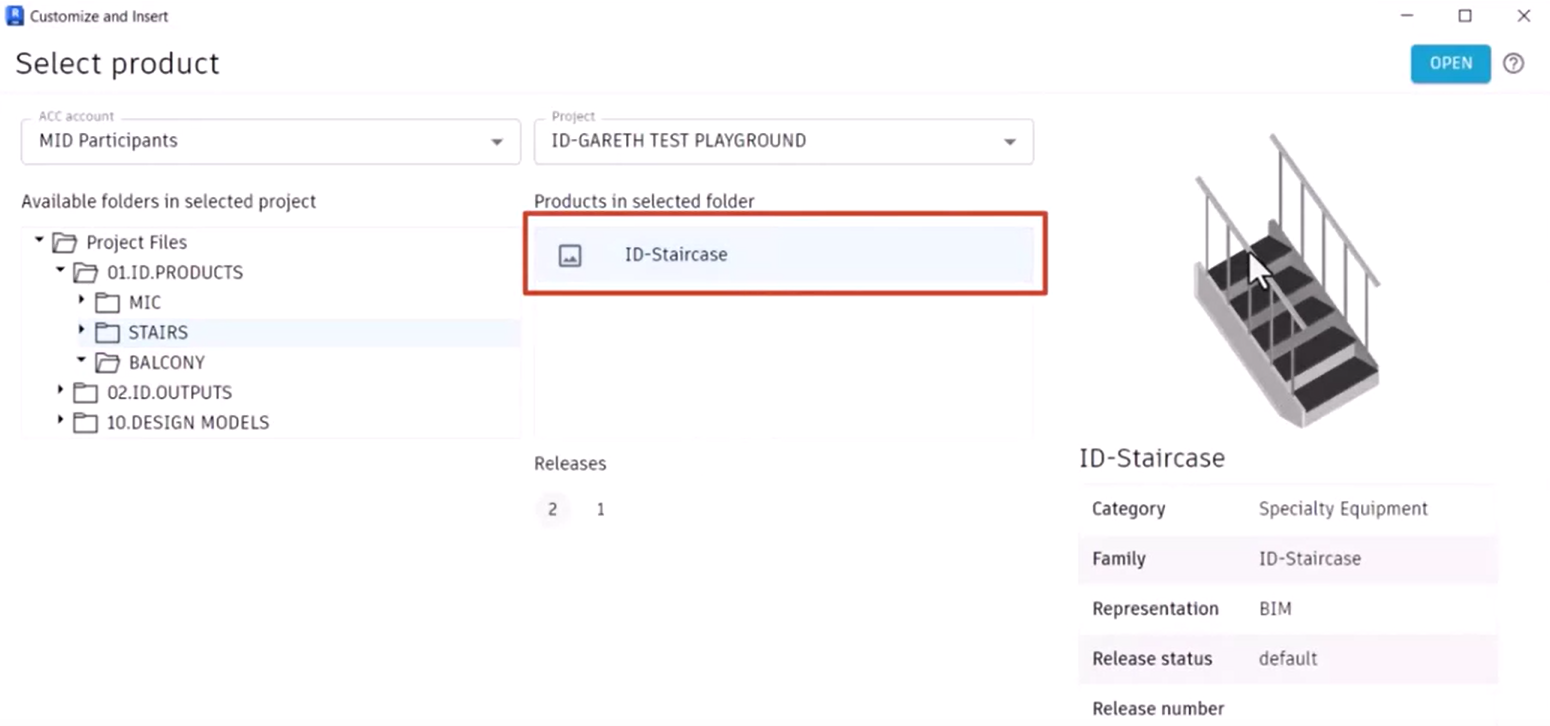
- Select ID-Staircase. A thumbnail and details of the product definition display.
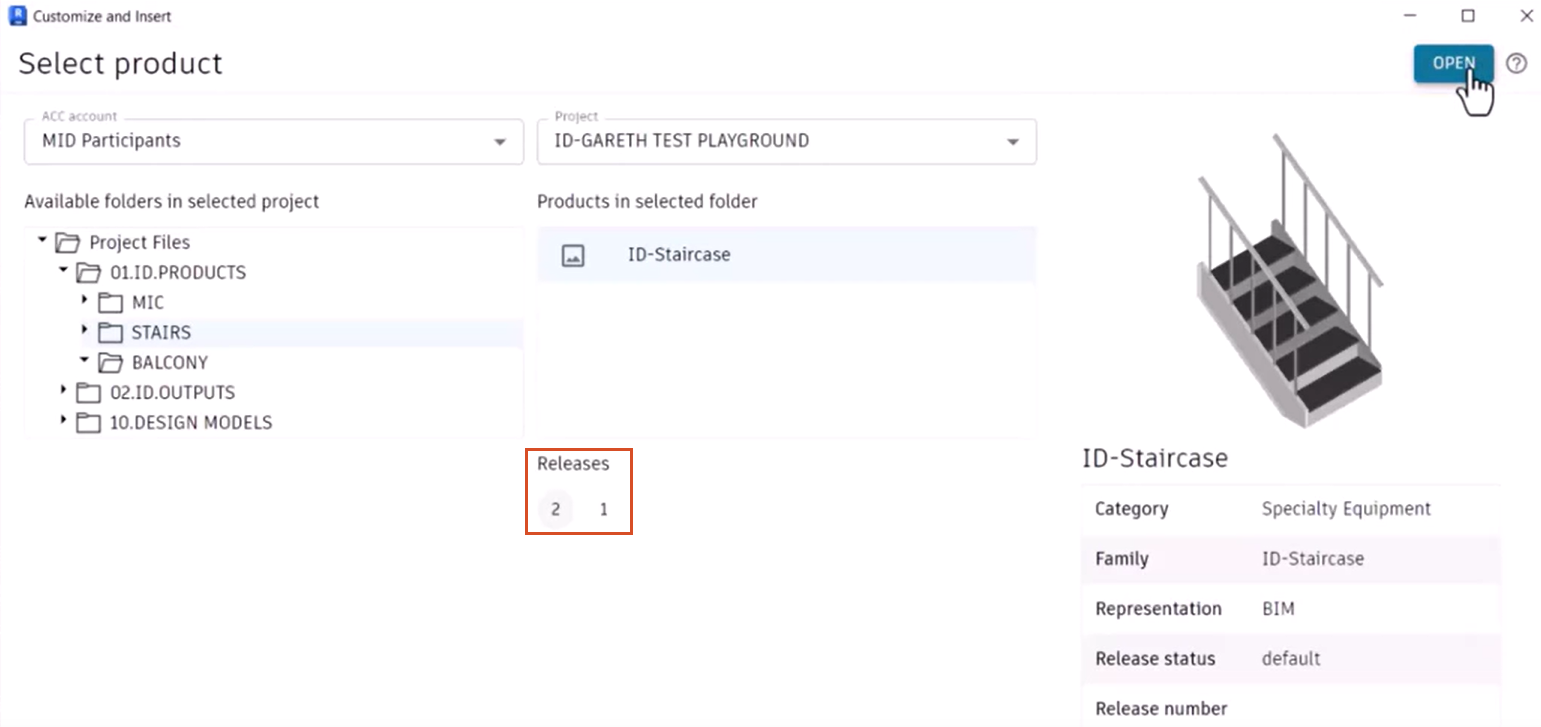
If multiple releases are available for the selected product, select your preferred release.
- In this case, select release 2.
- Click Open.
The dialog box changes to show the New and Existing tabs, and the product definition opens, with the specifications listed on the left and the thumbnail and product details on the right.
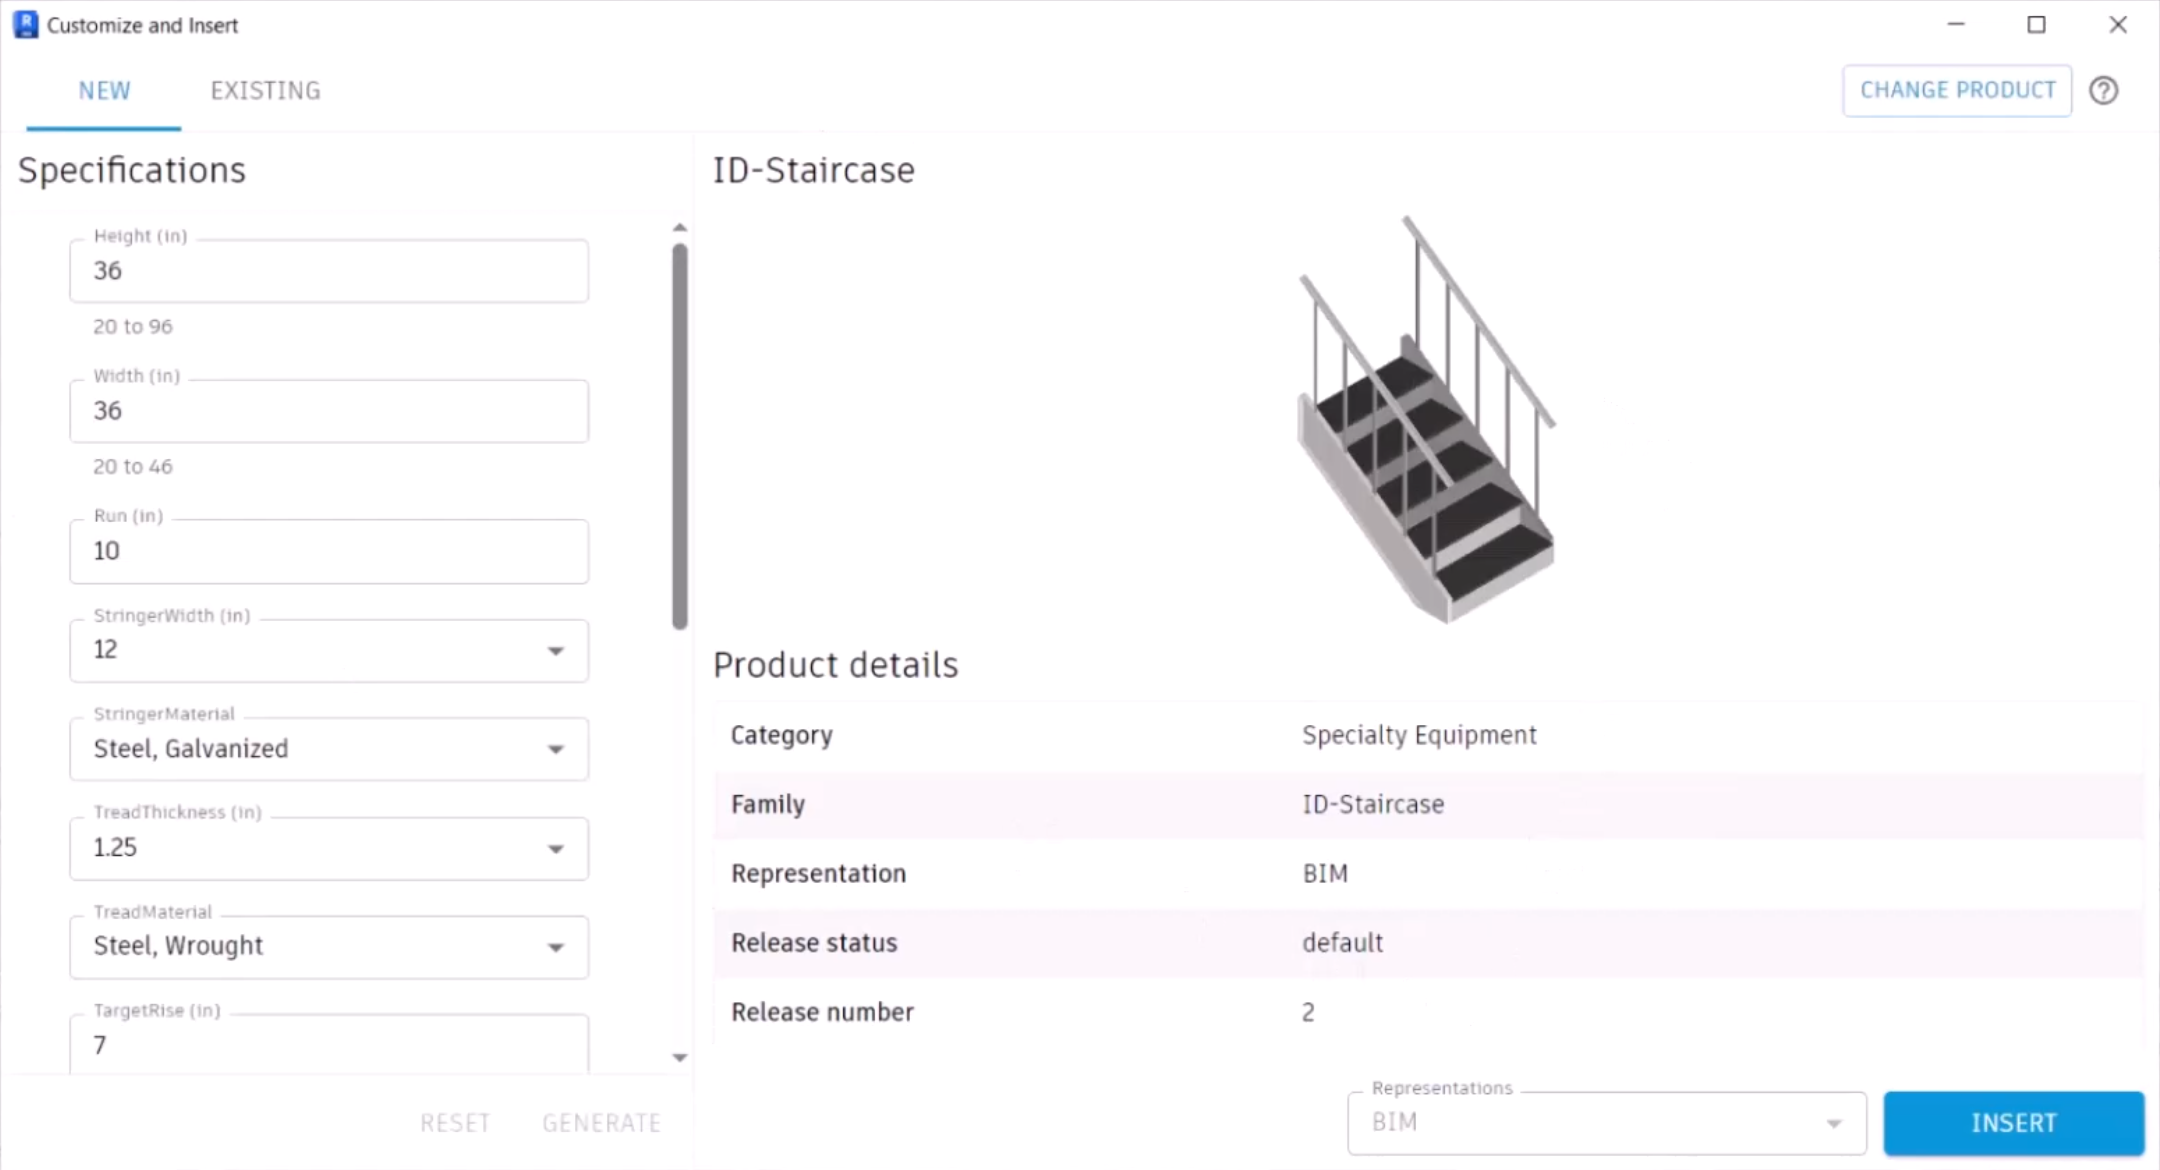
The staircase assembly can now be customized. Note that height and width restrictions were added to the product definition when it was created in Inventor. These are displayed below the Height and Width parameters.
To customize the assembly:
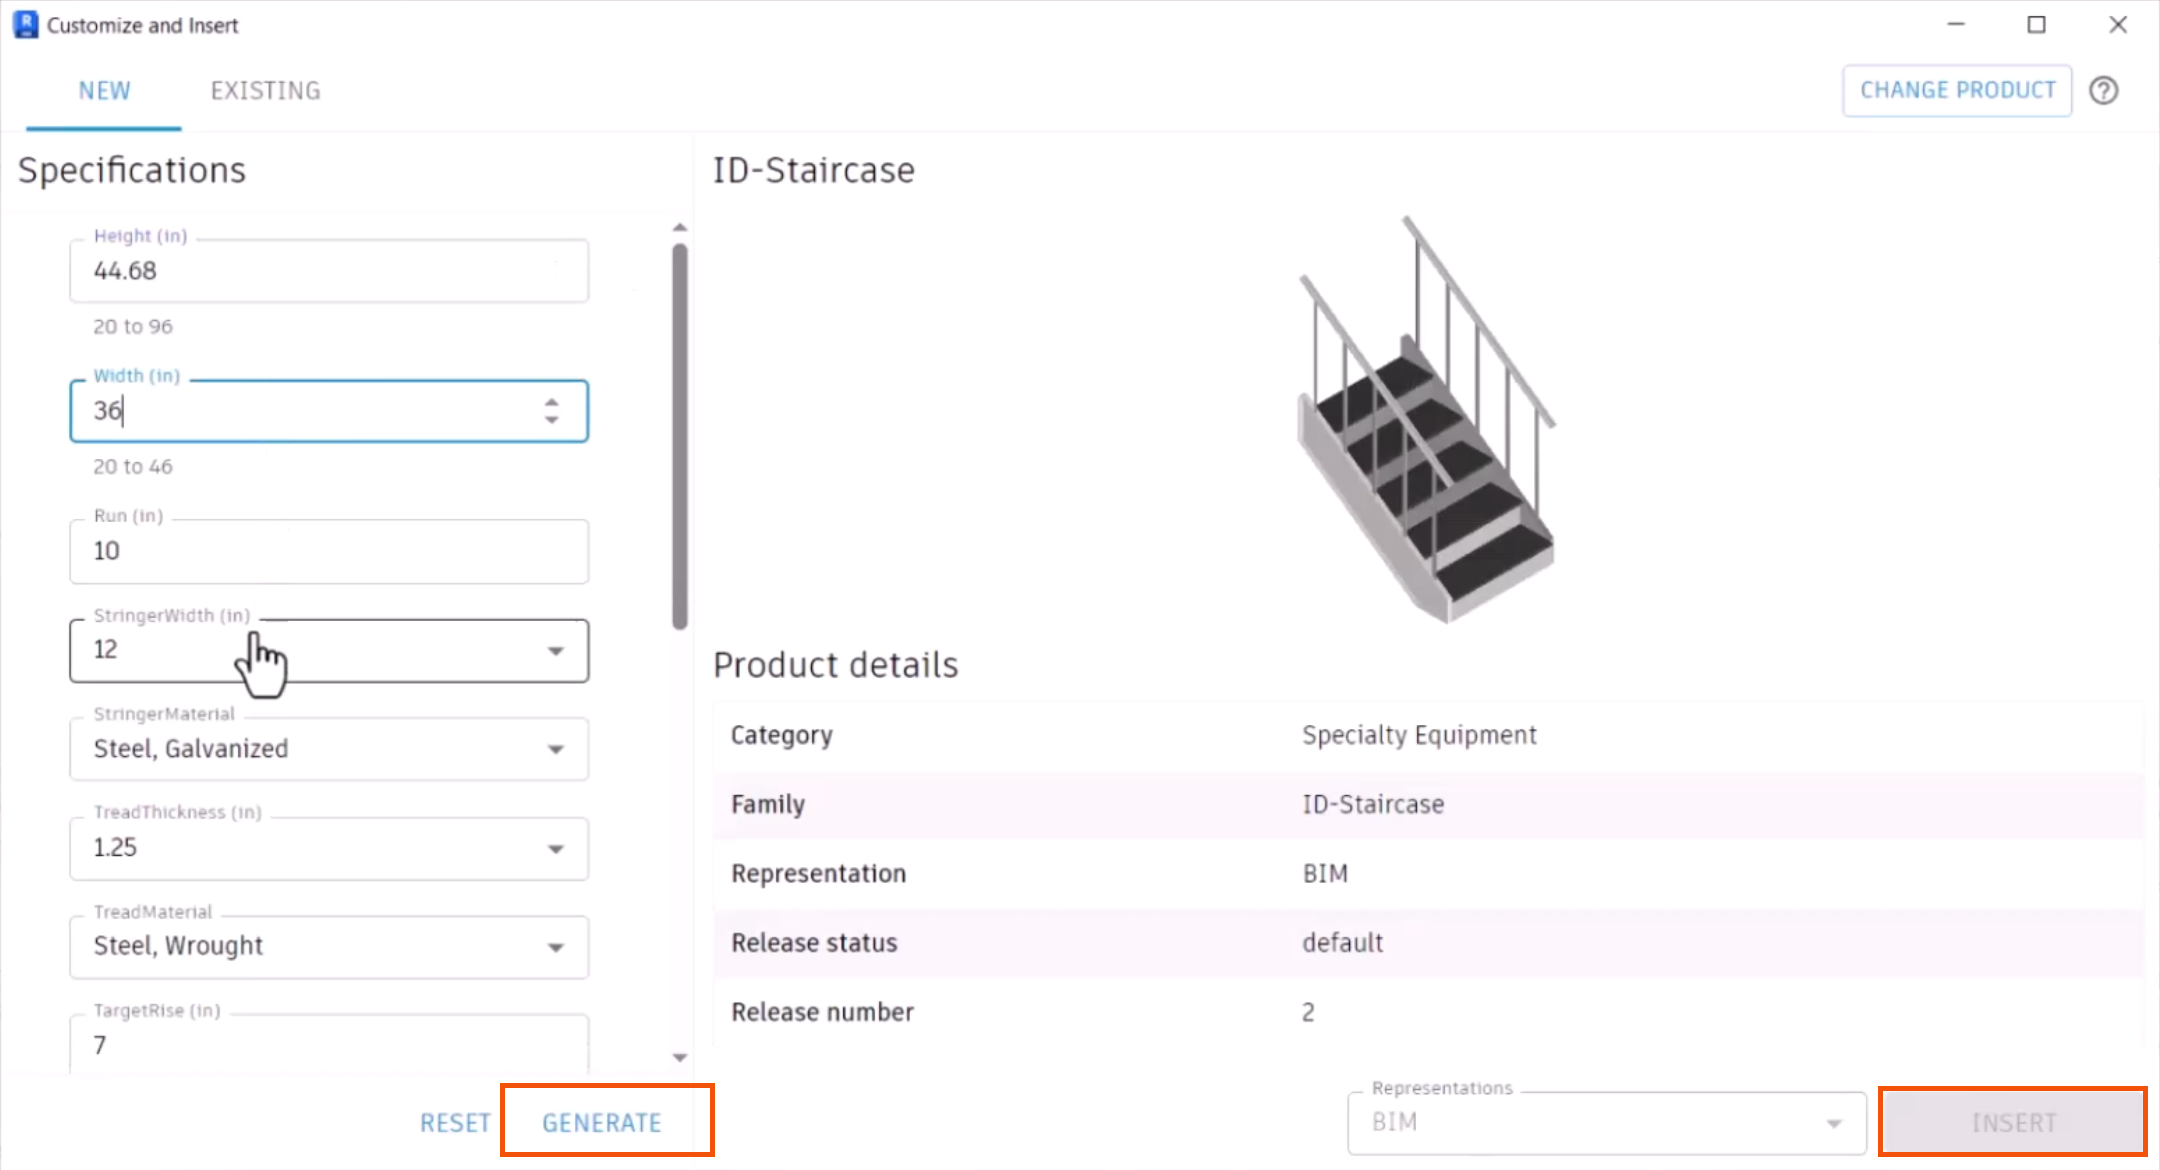
- Change the Height to a value between 20 and 96, such as 44.68.

Other specifications can also be changed as needed. Note that the Insert button is not available, because this is the first variant instance.
- Click Generate to initiate the process.
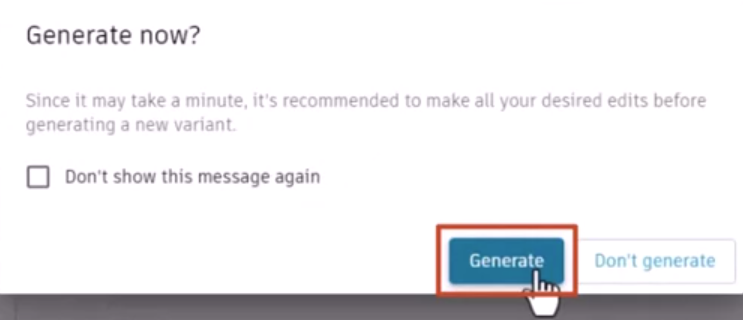
- In the popup, click Generate.
It can take a few minutes to generate a new variation, depending on product complexity. If needed, continue editing values and configuring additional variations of the same product while the generation process is underway.
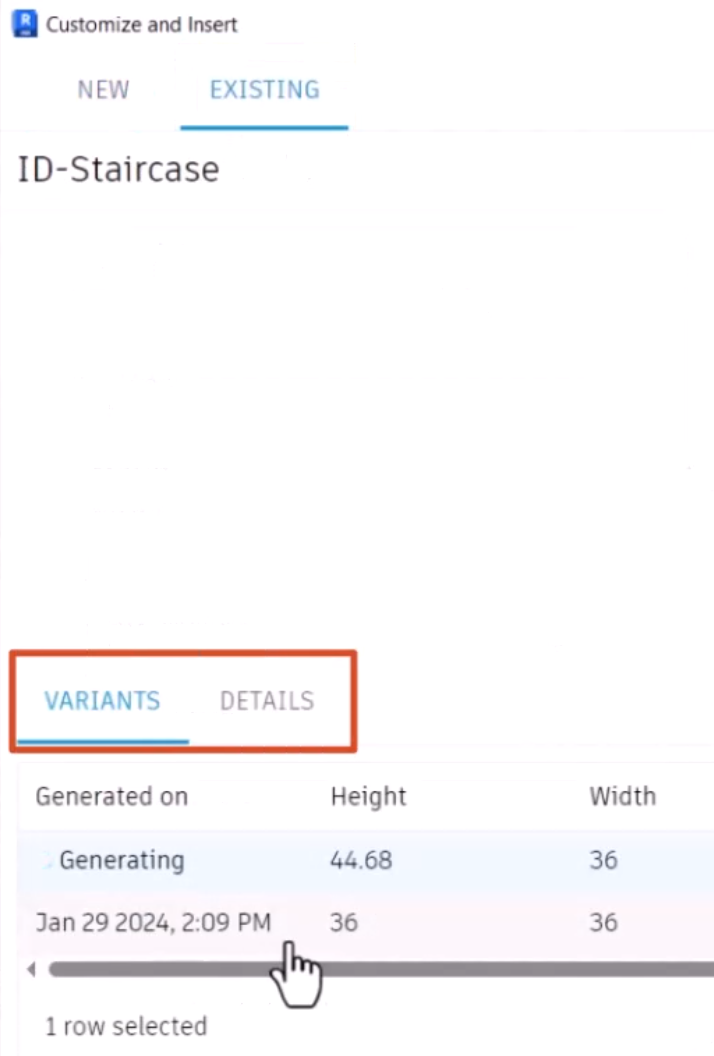
To view the progress:
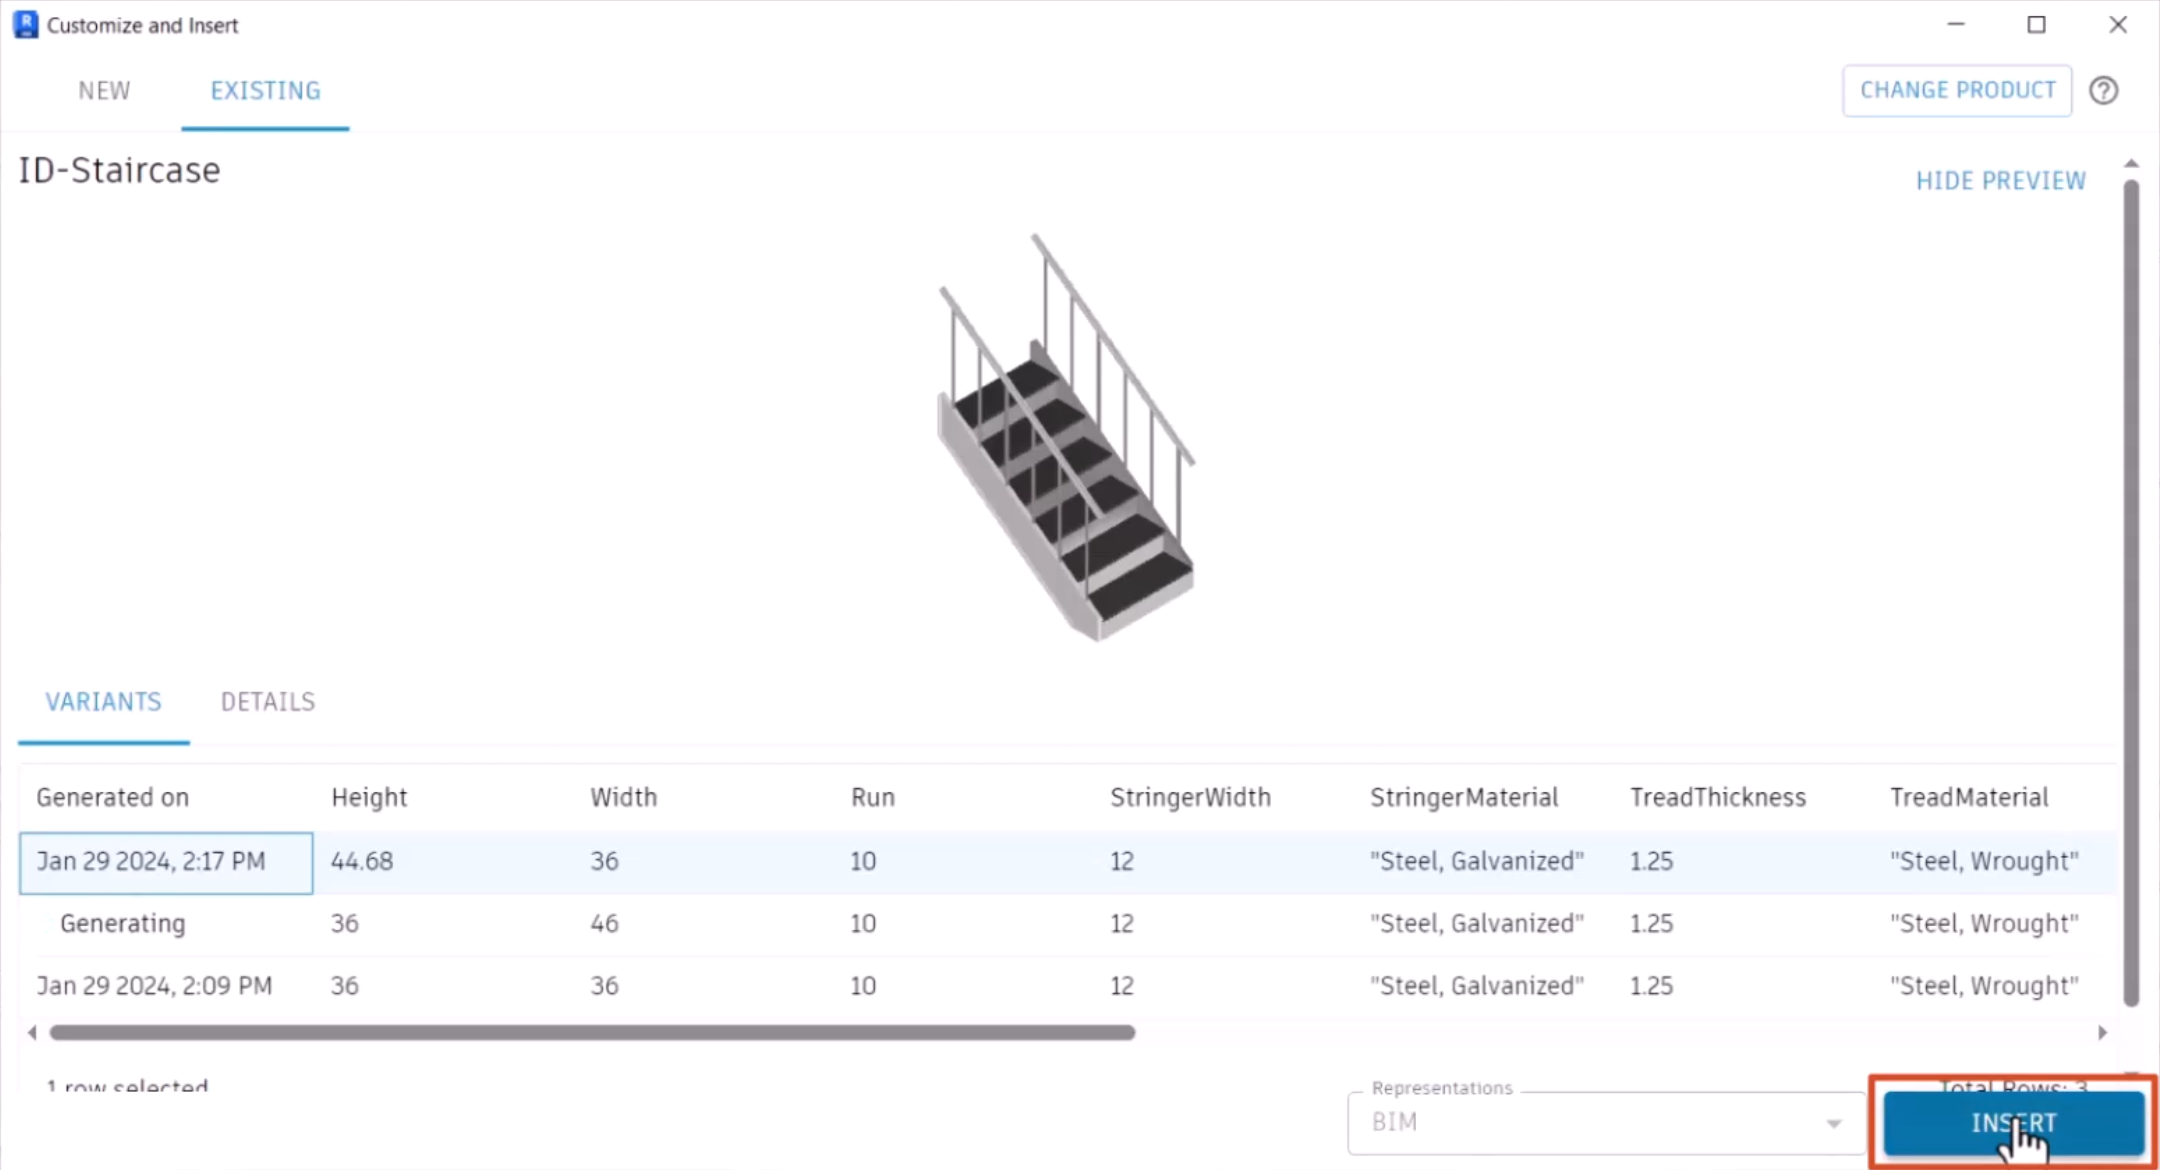
- Open the Existing tab.
- Click the Variants or Details tab.
- Return to the New tab.
- Click Reset to create another variant.
- Switch HasRiser, RightRail, and LeftRail to False.
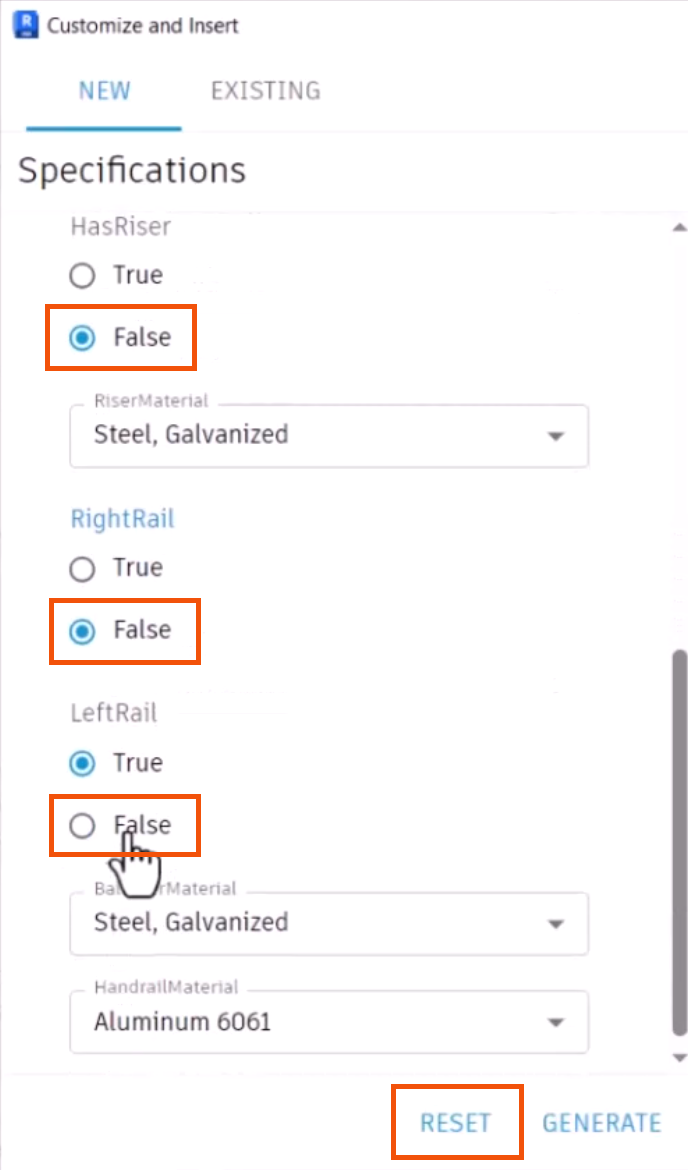
- Set the Width to 46.
- Click Generate to initiate this variant.
- Once the variants are generated, on the Existing tab, select a variant.
- Click Insert.
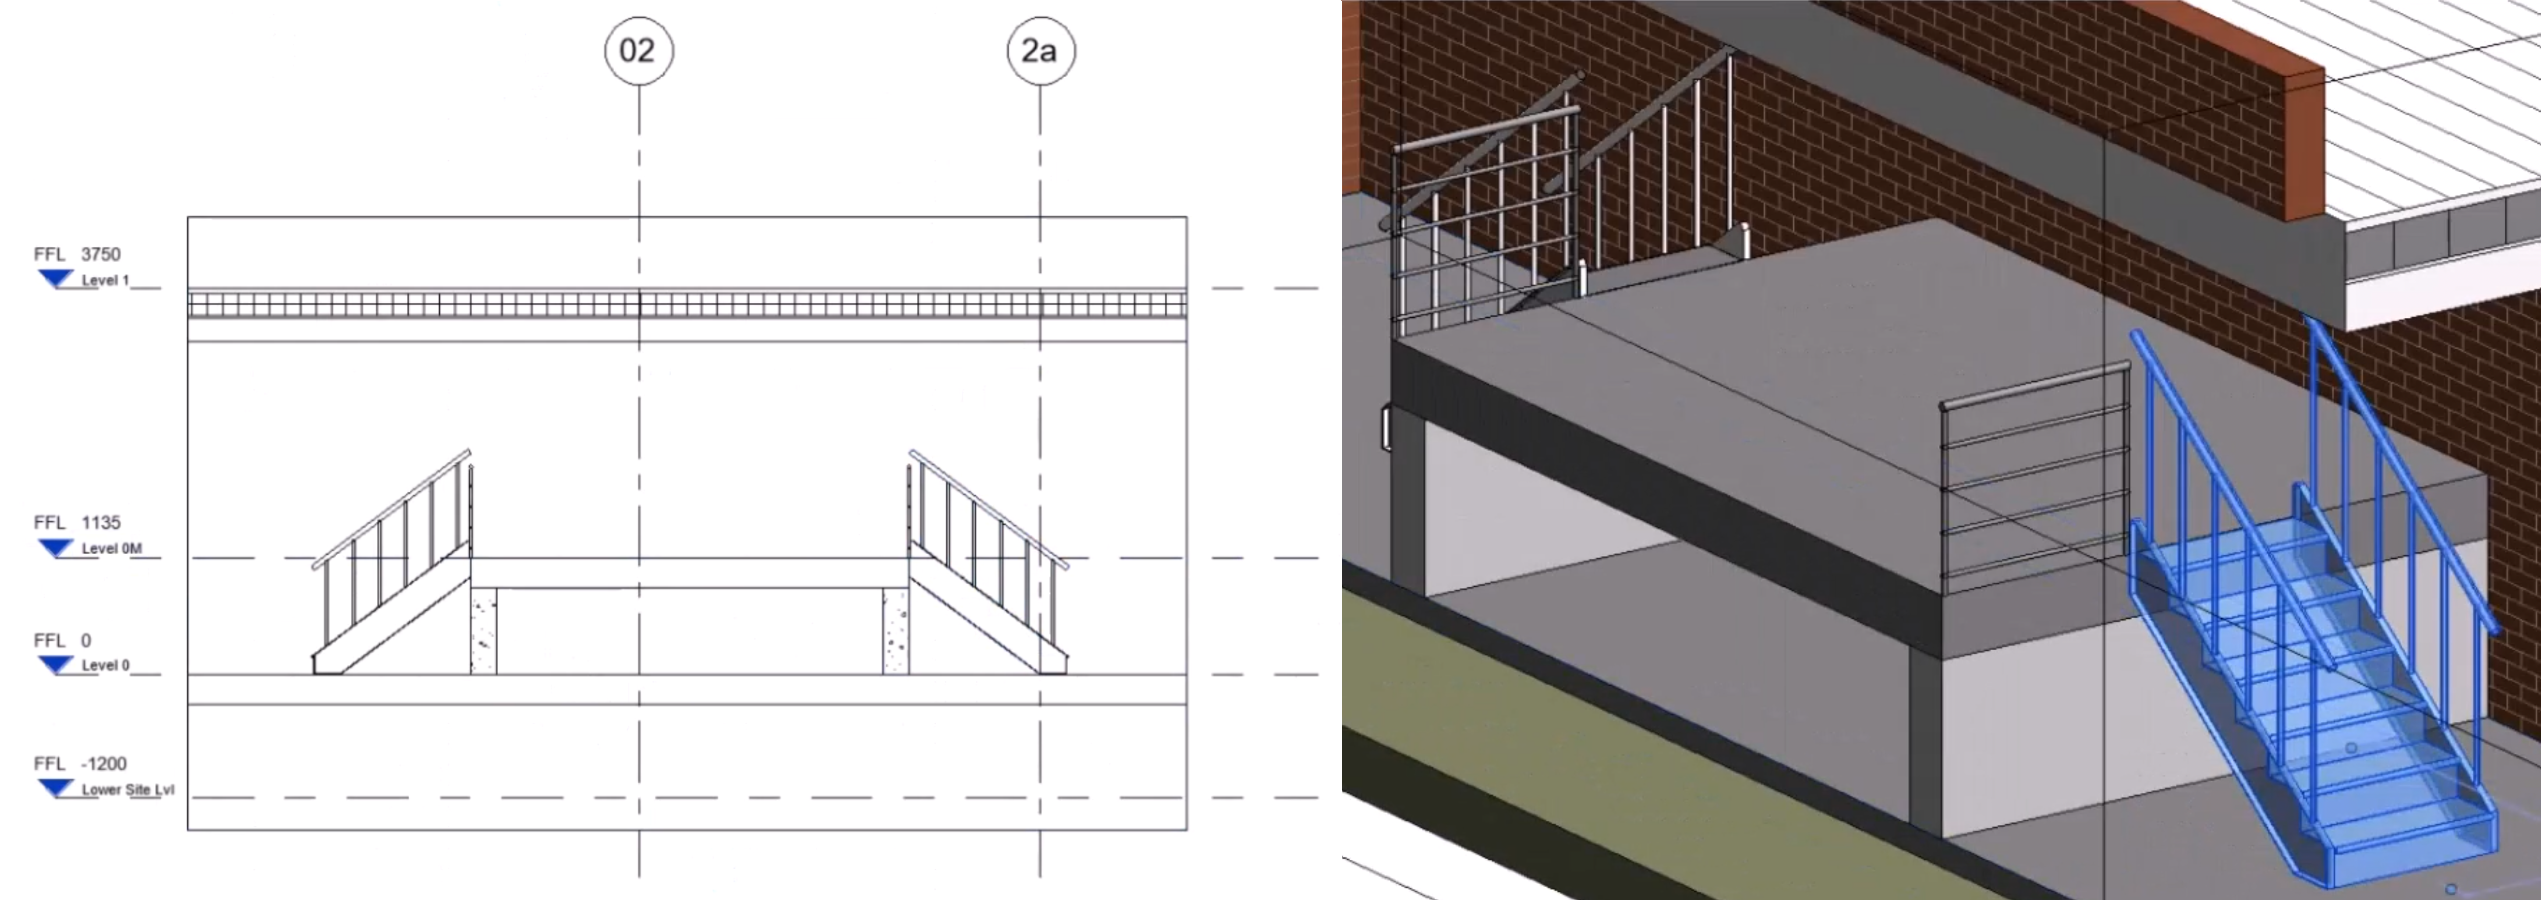
This staircase variant can now be placed into the model using the typical features and functions inside Revit.
- With the variant placed as a Revit element, select it to view its Properties.
- Review the Section and 3D views.
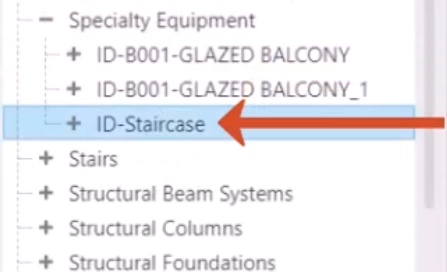
- Because the product definition was created as a loadable Revit Family, in the Project Browser, expand the Families folder to locate the definition.
- In this example, open Specialty Equipment to see the ID-Staircase definition.