Informed Design BIM definition workflow - RFA output
Learn how to use the RFA output option in the Informed Design BIM definition to export a Revit Family file directly from Inventor.
Step-by-step guide
With Autodesk Inventor, export a model as a Revit loadable family, or RFA, using the BIM definition Export RFA command.
RFAs produced using this command are not configurable in Revit. To create an RFA that is configurable in Revit, publish the model to Informed Design.
To begin the export process, you must sign into Inventor with an Autodesk ID and have an Internet connection.
To prepare the Revit family for export:
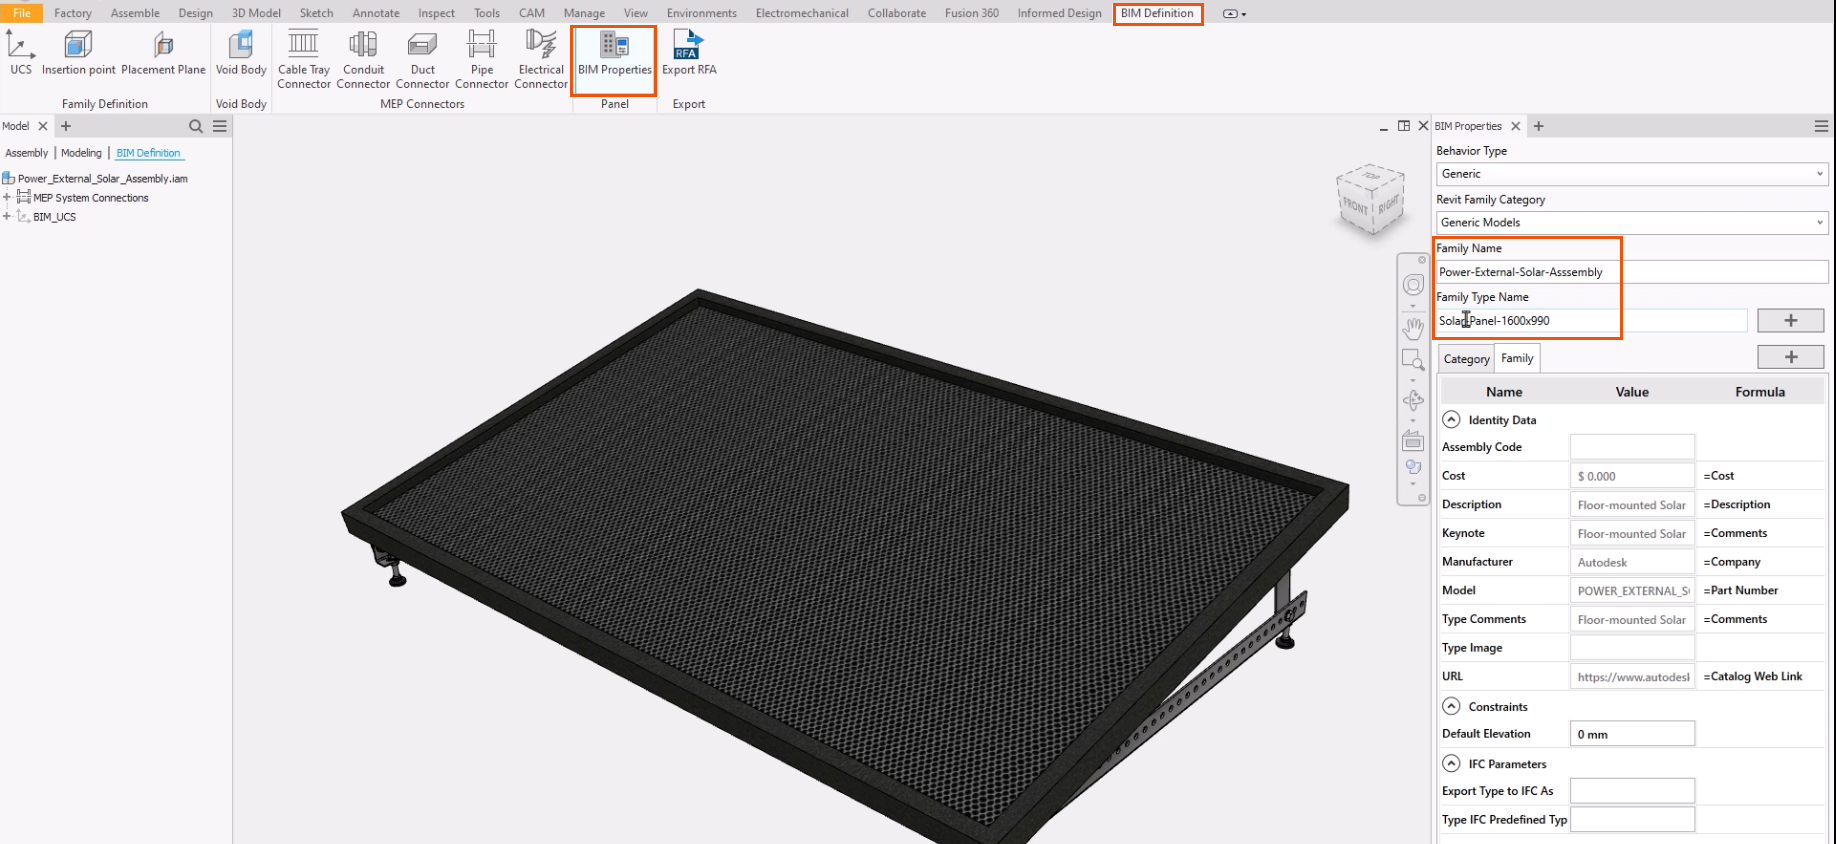
- On the ribbon, click the BIM definition tab.
- Click BIM Properties to open the BIM Properties panel. Category and Family Name are required in the product definition > Outputs tab, and can only be added in the BIM properties panel.
- Make sure that the Revit Family Name and Family Type Name fields are filled in, as these are required.
- In the model browser, Assembly tab, activate the desired model state. In this example, right-click [Primary] and select Activate. Model states are used to provide simplified representations of manufacturing models for use in a BIM project. Multiple Model states can be published as part of the Product Definition, and can be accessed by the Revit user.
![In the model browser, on the Assembly tab, the context menu for the [Primary] model state expanded, with Activate selected.](https://files.upskill-dev.autodesk.com/public/informed-design/inventor-bim-definition-workflows/AVRF_M04U02_BIM_wflw_rfa_outpt_002.webp)
- On the ribbon, Export panel, click Export RFA.

Note that the model state is not editable in the dialog box.
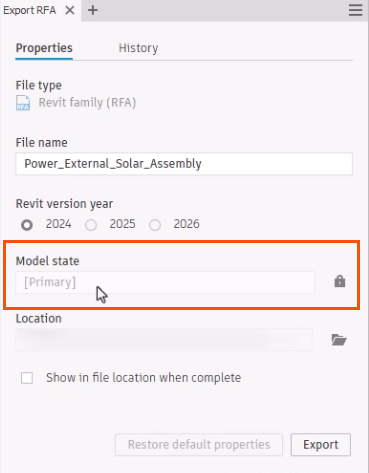
If the model state needs to be changed:
- Close the Export RFA dialog box.
- In the model browser, activate the appropriate model state, such as BIM.
- Reopen the Export RFA dialog box.
To finish setting up the export:
- Edit the File name, Revit version year, and Location, as needed.
Note that the Revit version year is independent of the Inventor version year. In this example, Inventor 2024 can export an RFA to Revit 2024, 2025, or 2026.
- Optionally, enable Show in file location when complete to easily find the generated RFA file.
- Click Restore default properties to undo any changes, if needed.
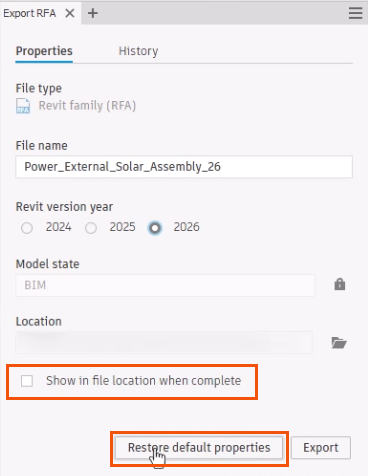
- Click Export.
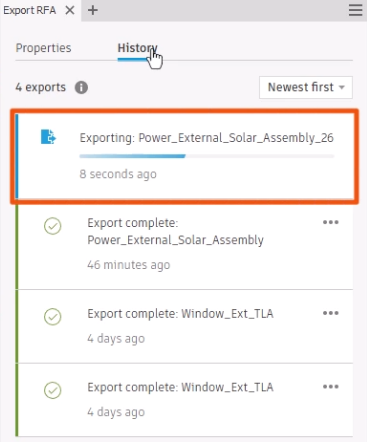
To manage exports or track the progress of current exports:
- Select the History tab. The current export displays at the top of the export list.
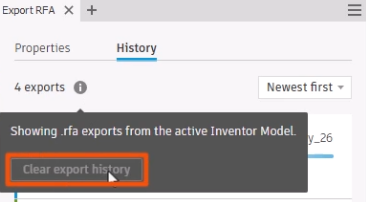
To clear the history, if needed:
- Hover the cursor over the information icon to display the message.
- Click Clear export history.
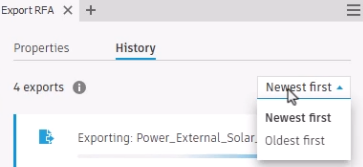
- To sort the export history, expand the drop-down and select Newest first or Oldest first.
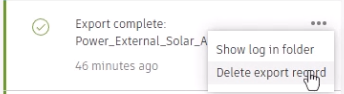
- Next to a completed export, click the More (…) menu to delete the export record or to review the export log.