Codeblocks - learn commands
Learn common commands for working with blocks, including how to add, remove, enable, disable, reuse, organize, and add comments to blocks in the Informed Design Codeblocks Editor.
Step-by-step guide
In Codeblocks, it is important to understand the general commands available to work with code blocks.
There are three primary ways to delete a block:
- Drag a block and drop it on the waste receptacle.
The receptacle lid appears ajar, indicating that it is no longer empty.
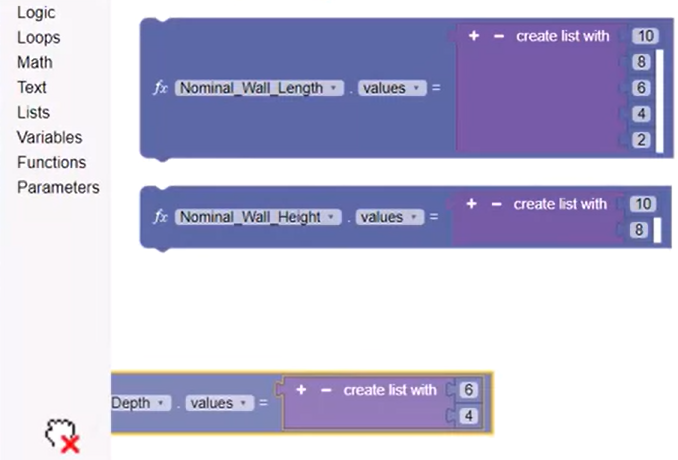
- Click on the waste receptacle to open it and view the deleted blocks. If needed, select a deleted block and drag it into the canvas to reuse it.
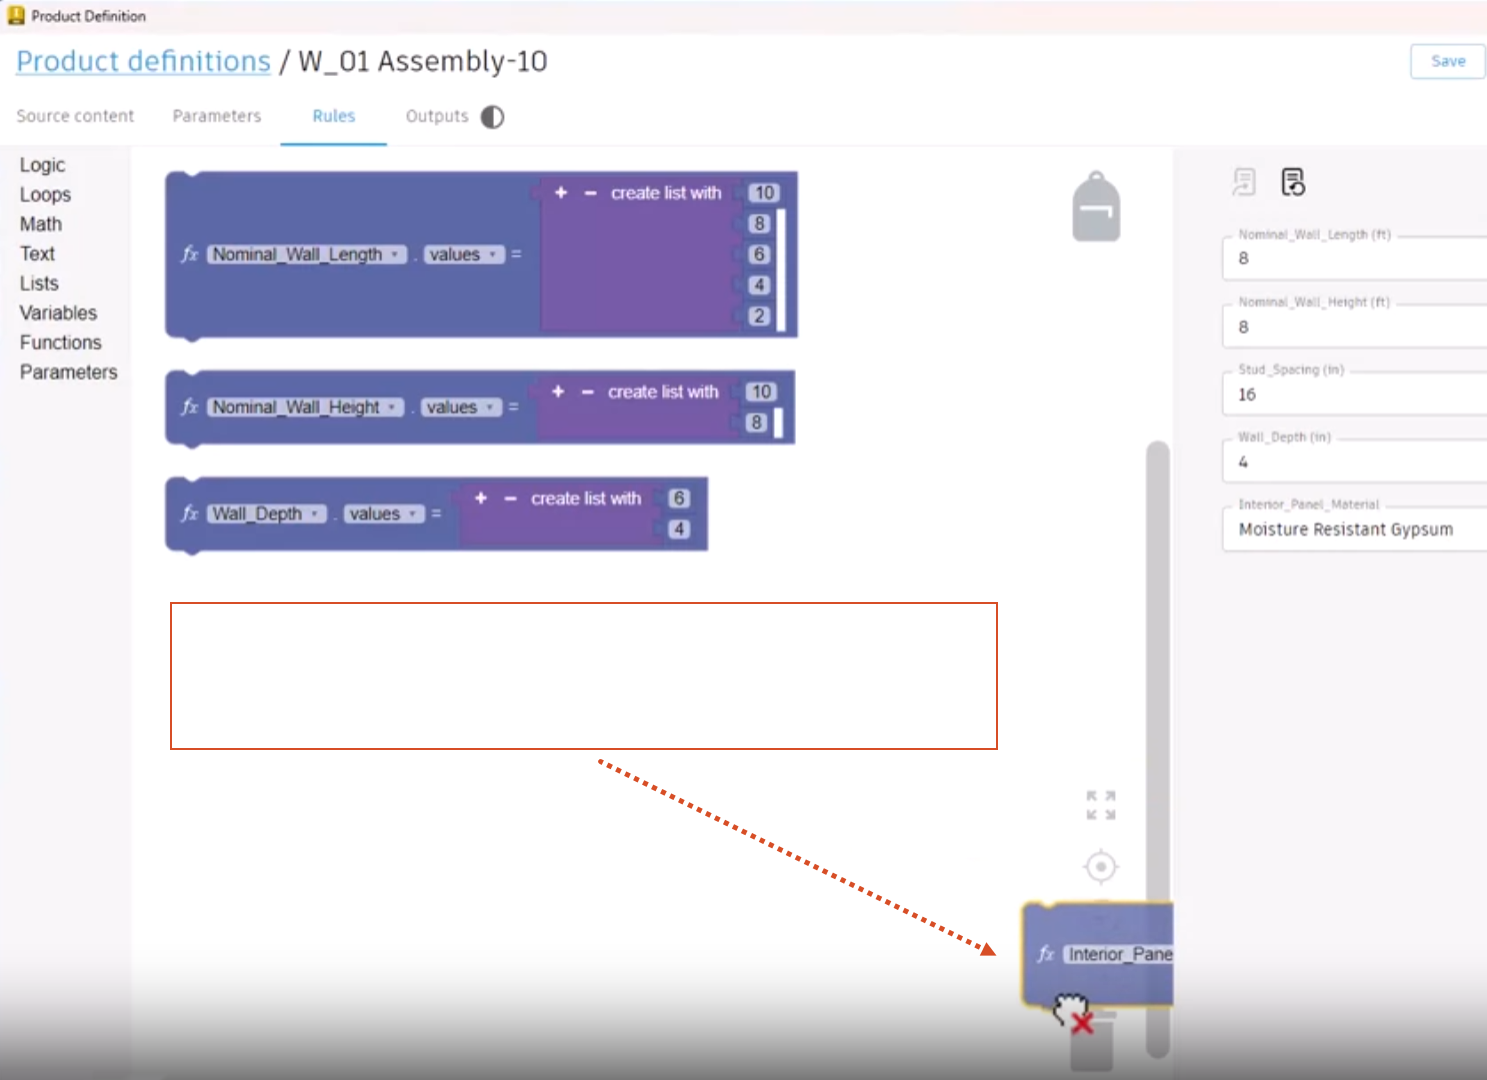
- Alternatively, drag and drop the block to be deleted onto the Block Libraries pane.
Again, the block is added to the waste receptacle.
- As a third alternative, select a block, and then press the Delete key.
The deleted blocks waste receptacle is automatically emptied upon exiting the Product definitions.
Blocks can also be duplicated and reused within the current Product definition:
- Define a block, then right-click the block and select Duplicate to reuse it.

- Snap the two blocks together, then update the duplicate to Max with a value of 12. Right-click the block set and select Duplicate Connected to reuse the connected blocks.
- Alternatively, select a block, then use CTRL+C and CTRL+V to copy and paste the block.
Blocks can also be reused through the Backpack, which allows you to save blocks and connected blocks for reuse later, and to transport blocks between Product definitions.
To use the Backpack:
- Drag and drop the desired blocks, such as the connected blocks, on the Backpack.
Note that this does not remove the blocks from the canvas.
- Click on the Backpack to view the available blocks.
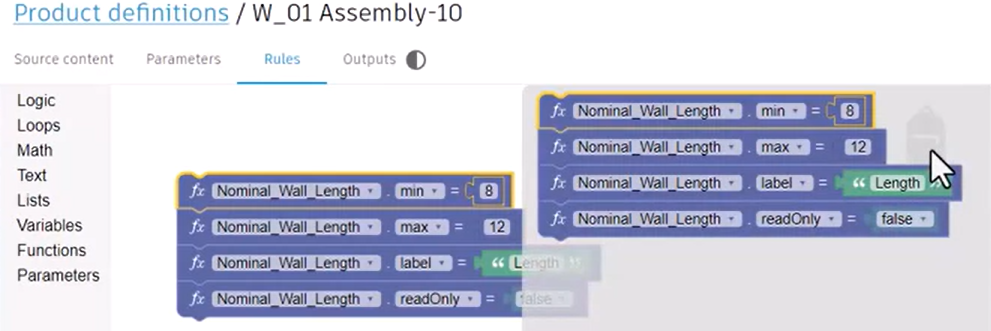
- To reuse the blocks for a different parameter, open the Backpack, then drag and drop the saved connected blocks onto the canvas. In this case, update each of the parameters to Height.
- Add this new set of blocks to the Backpack.
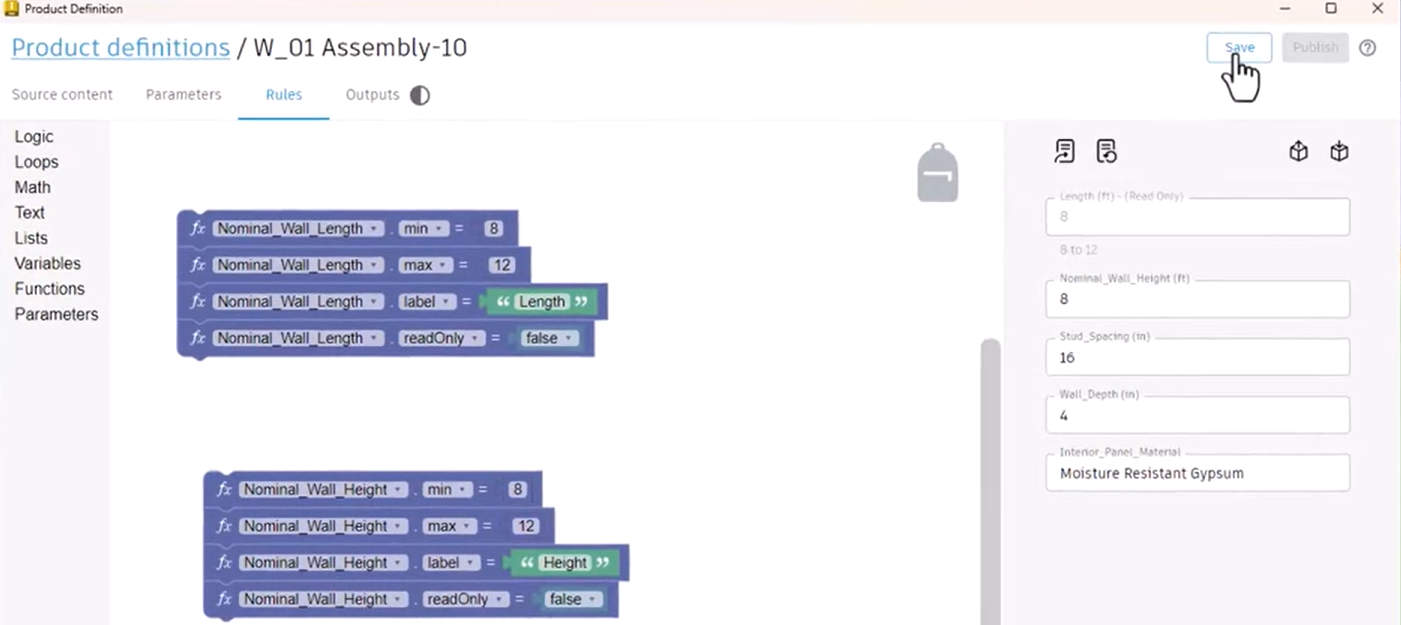
- Click the Save button to save the Backpack contents to the Product definition.
To reuse the Backpack blocks switch in a different Product definition:
- Click Product definitions, select a new definition, and then click Edit.
- Click the Backpack to see that the same blocks are available and can be added to the canvas.
Blocks can be collapsed or expanded to manage space in the canvas:
- Right-click an individual block and select Collapse Block. Or, right-click a collapsed block and choose Expand Block.
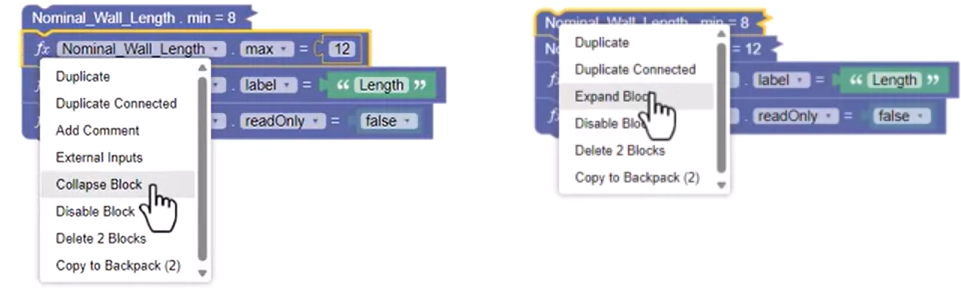
- To collapse all blocks in the canvas, right-click and select Collapse Blocks. Or, to expand all collapsed blocks, right-click the canvas and choose Expand Blocks.
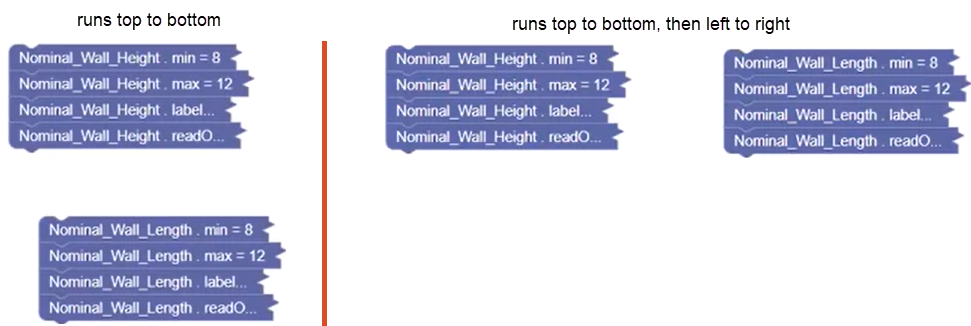
The order in which blocks are read and run is illustrated below. If blocks are arranged one above the other, the blocks are read and run from top to bottom. If the blocks are arranged next to each other, they are read from the top down, then left to right.
It is also important to understand how to move, connect, and disconnect blocks:
- A block or set of blocks can be moved by clicking and dragging.
- Selecting the bottom block disconnects it from the connected blocks. Select the top block to move the entire set.
- To snap blocks together, drag and drop a block to the top or bottom of another.
- Selecting a block in the middle of a set disconnects that block and all blocks connected below it.
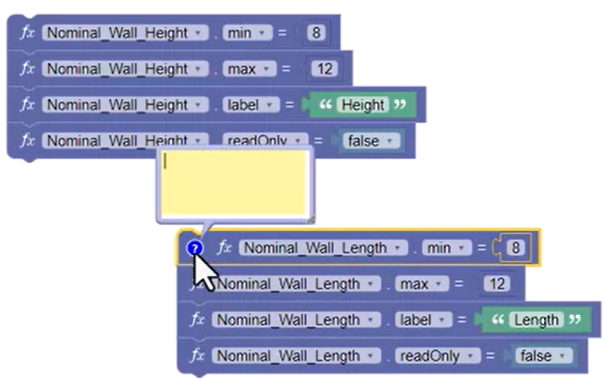
To add a comment to a block:
- Right-click a block and select Add Comment. Click the comment symbol to type the comment, then click the symbol again to hide the comment.
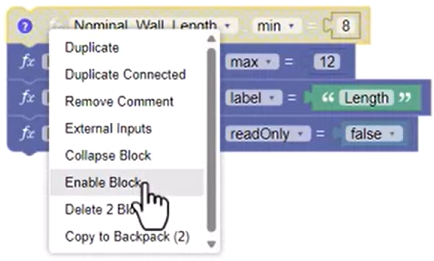
To disable a block:
- Right-click the block and select Disable Block. To enable it again, right-click the block and select Enable Block.
In summary, blocks can be deleted using the waste receptacle, using the block categories pane, or by pressing DELETE. To reuse blocks within a Product definition, select Duplicate in the context menu, or use CTRL+C and CTRL+V. To reuse blocks between Product definitions, use the Backpack tool.