Codeblocks - design forms
Design an input form, including labelling, ordering and grouping inputs with the Informed Design Codeblocks Editor.
Step-by-step guide
Informed Design includes a Form code blocks environment for controlling input forms.
Before using the Form environment, on the Parameters tab, adopt and arrange the parameters required for input logic, input forms, and Inventor model usage.
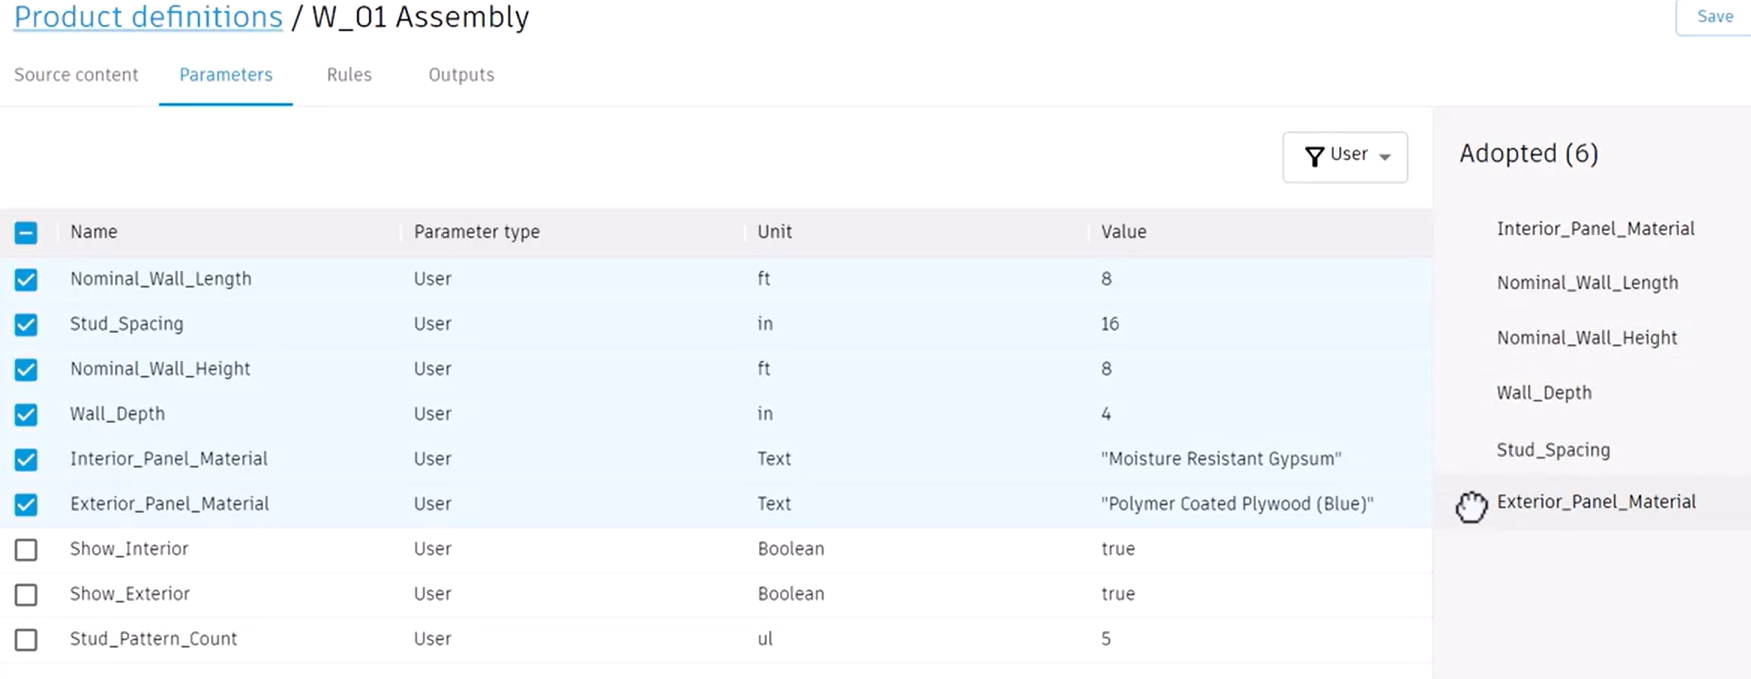
Here, the adoption order is important, so that parameters are passed correctly to the Inventor model. This ensures that updates are driven correctly and also serves as the default order for the Form block.
However, in the Form block, parameters can be reordered without impacting the adoption order.
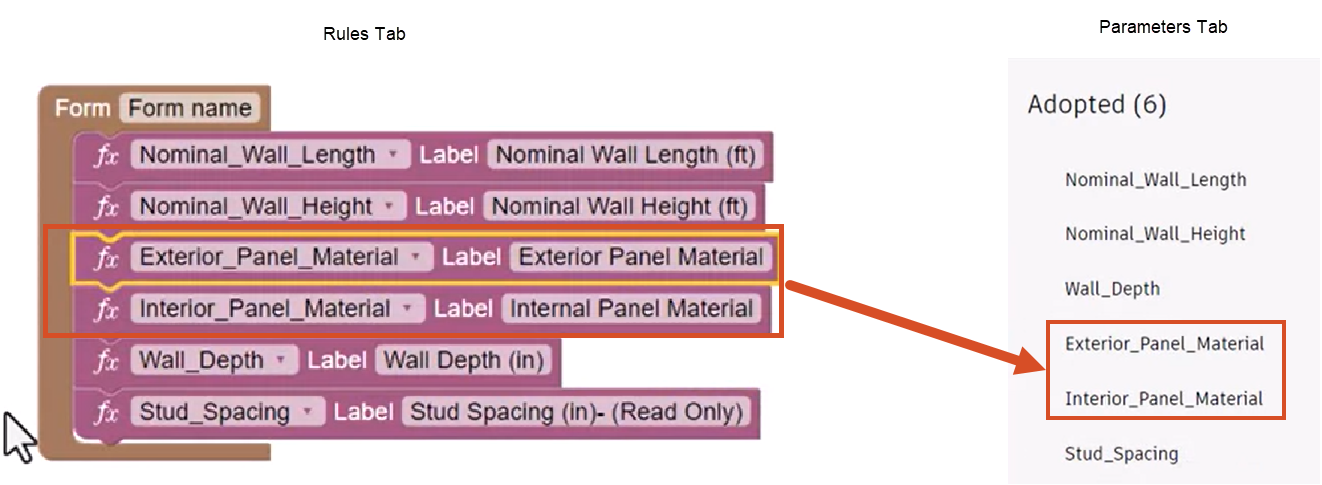
- On the Rules tab, in the Form block, select and move the Exterior and Interior Panel Material parameters above the Wall Depth.
- Select the Parameters tab. The adopted order still shows the Exterior and Interior parameters below the Wall Depth parameter.
Additional parameters can be adopted and rearranged.
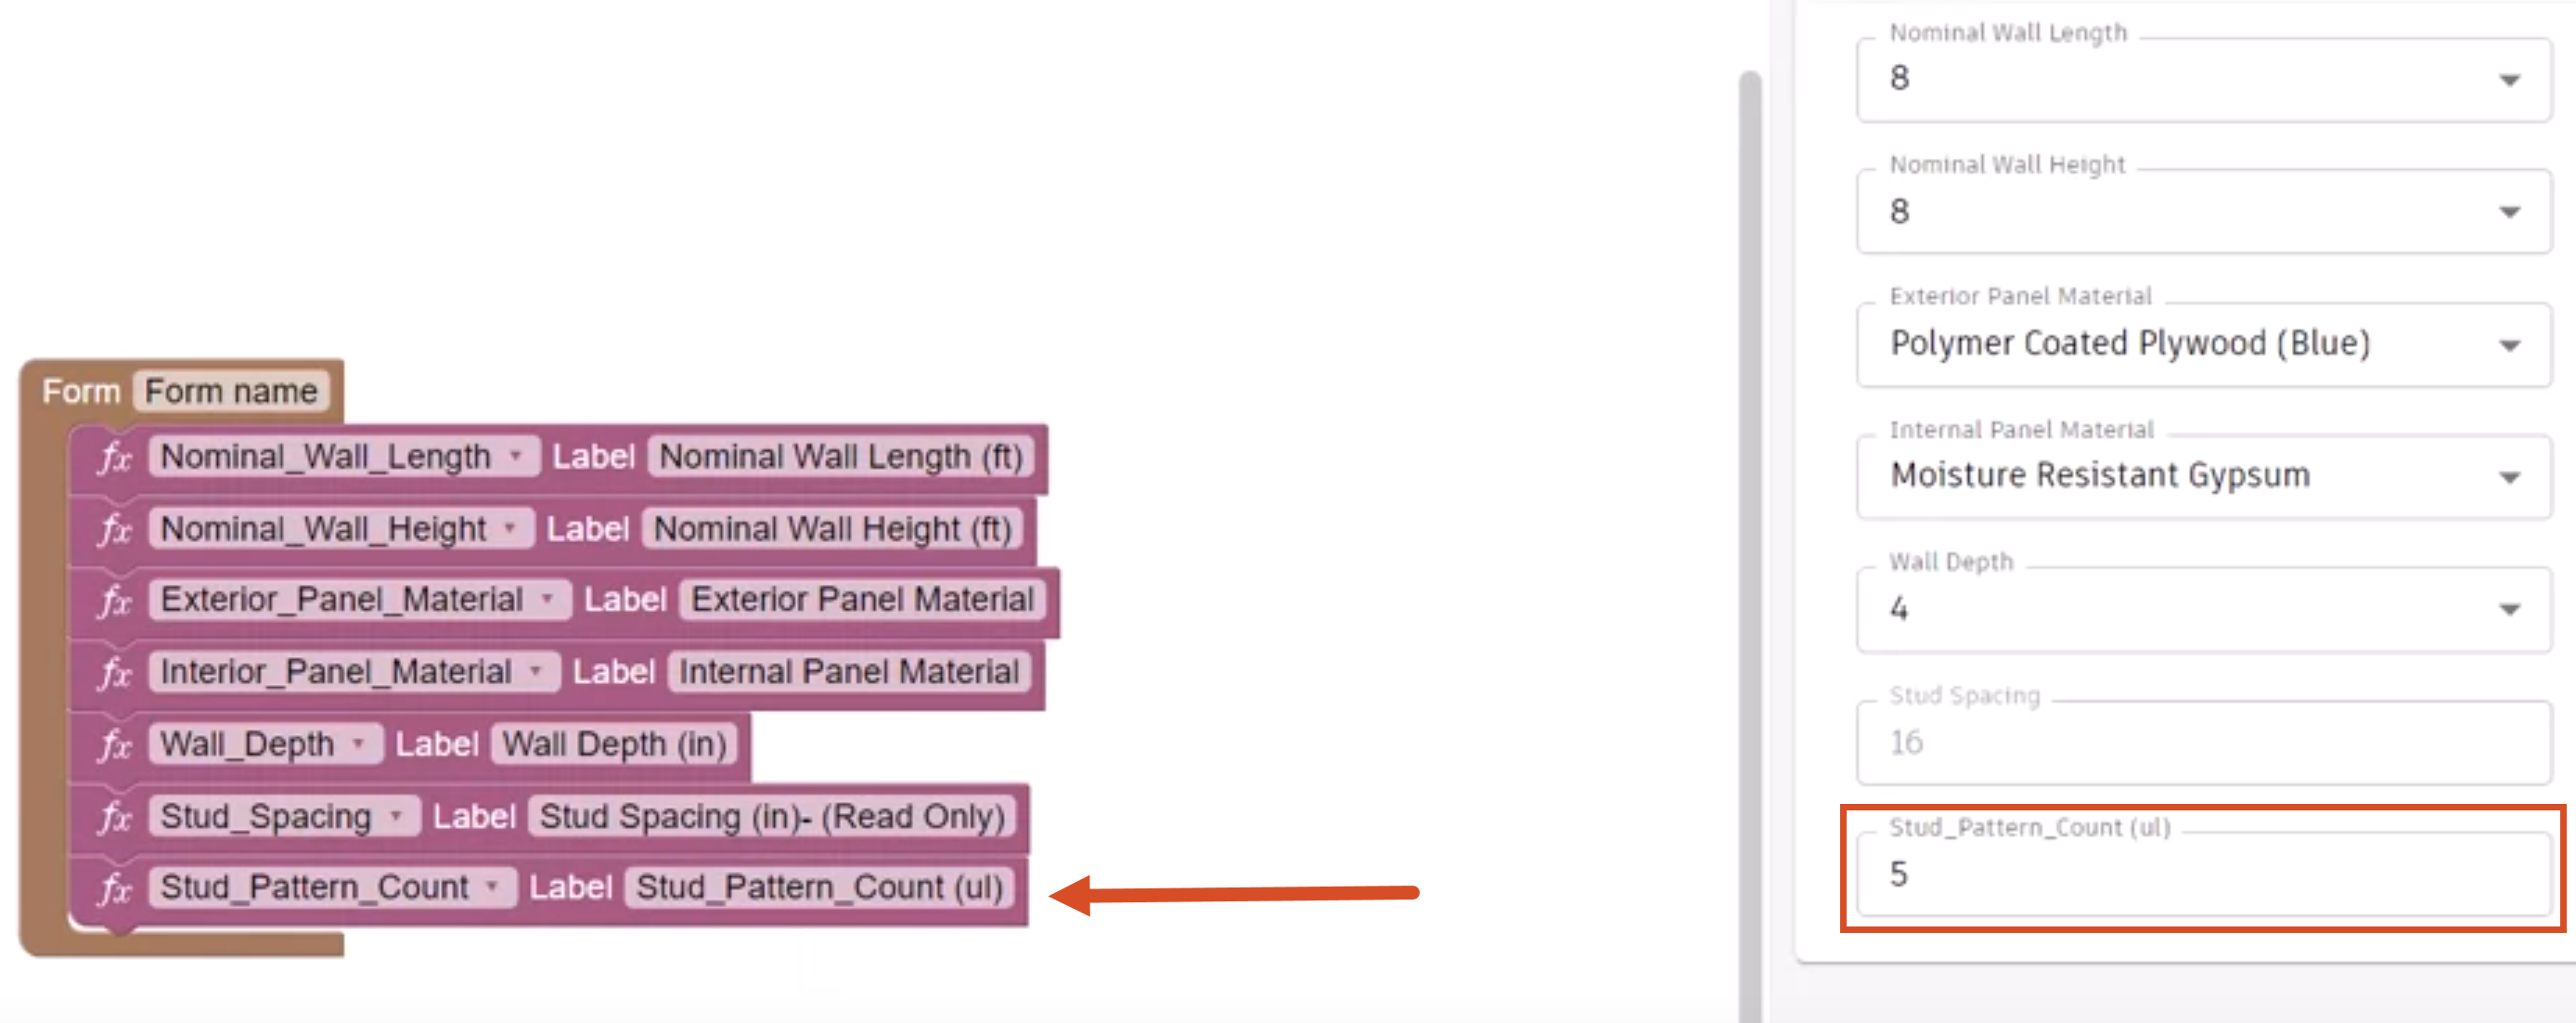
- On the Parameters tab, add Stud_Pattern_Count to add it to the Adopted list and then move the parameter below Exterior Panel Material.
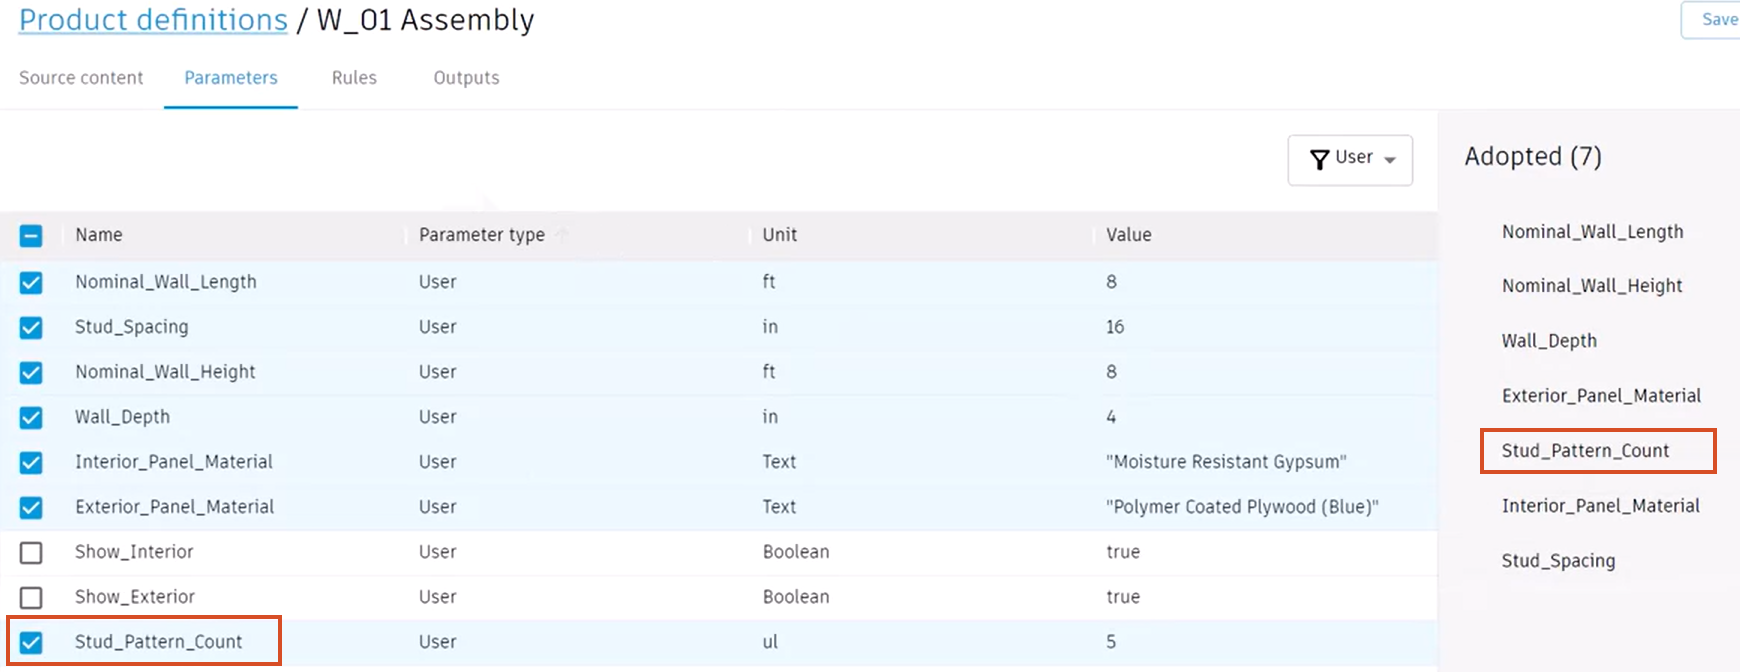
- Switch to the Rules tab, where the parameter has been added to the bottom of the Form block and to the Form.
Parameters can also be unadopted.
- On the Parameters tab, deselect Stud_Pattern_Count.
- Switch to the Rules tab, where the parameter is disabled in the Form block and removed from the form.
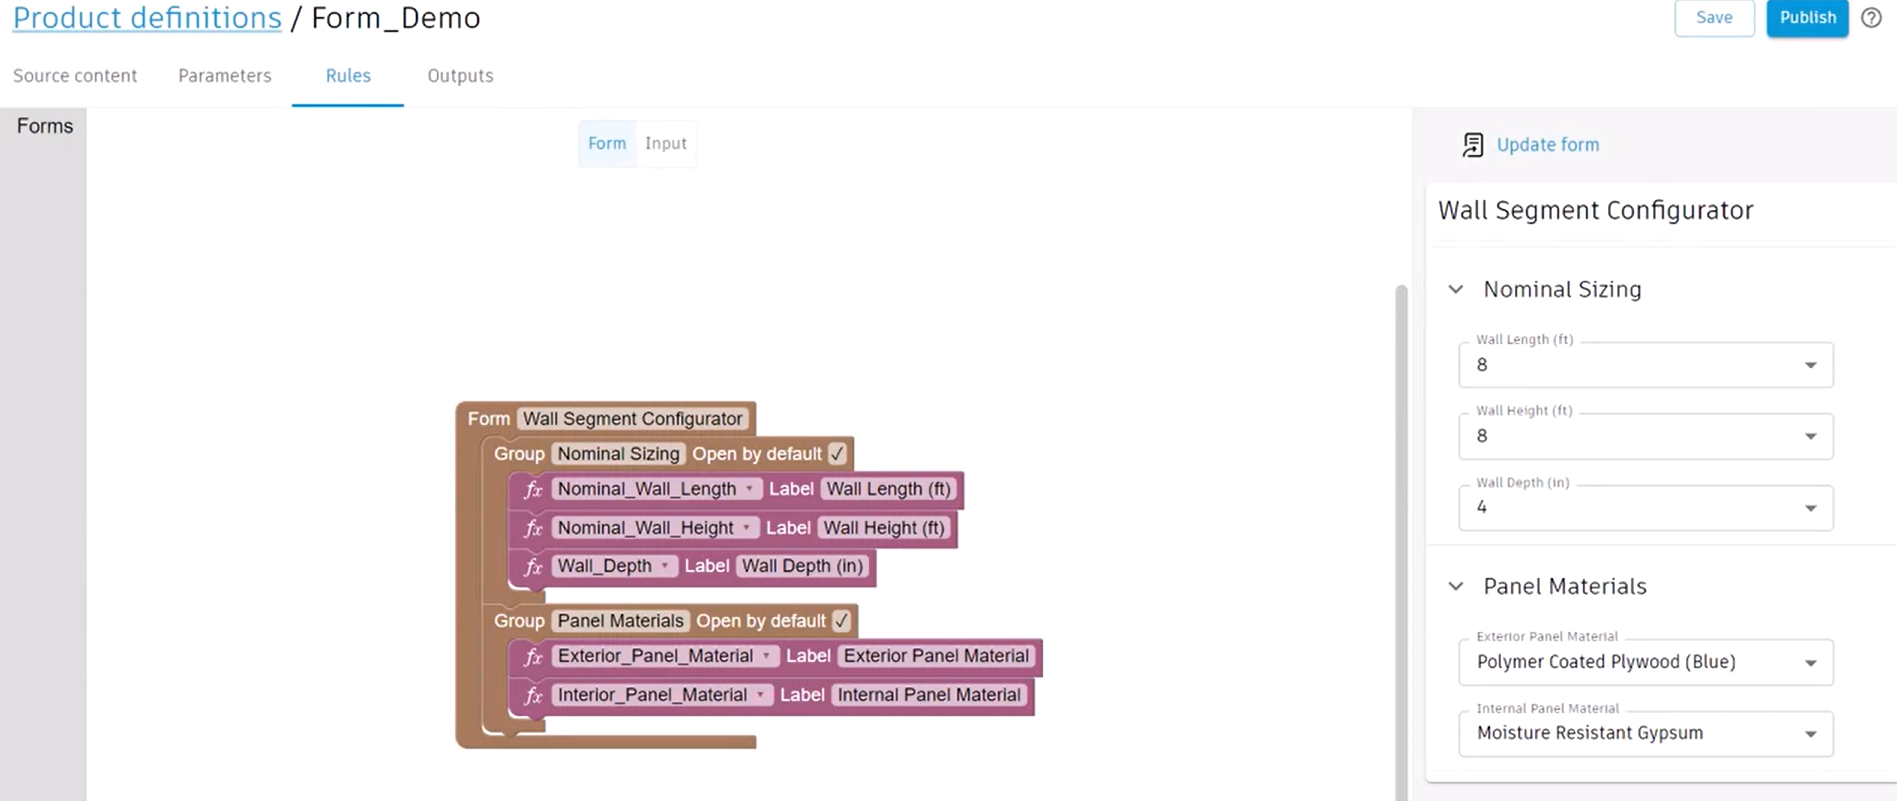
Parameters can be gathered into logical top-level groups within the form block, and a group can be collapsed or expanded in the form by default.
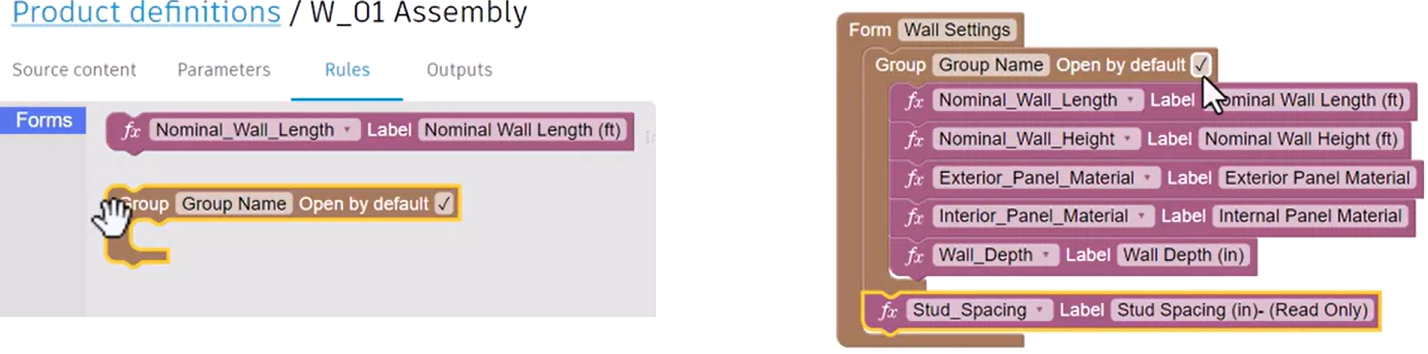
- In the Forms library, select and add the Group block to the Form block.
- Add all parameters to the Group except Stud_Spacing.
- Select or deselect Open by default to automatically collapse or expand the Group within the form.
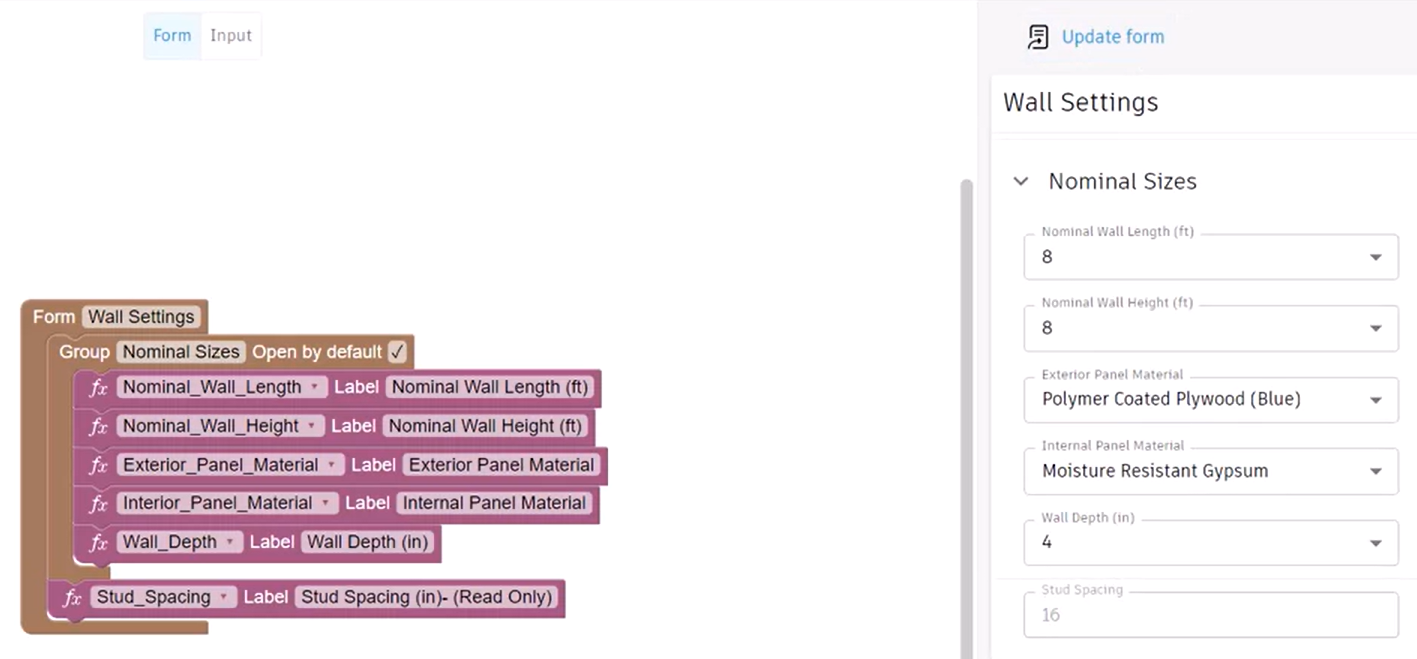
- Enter a meaningful name for the Group, such as "Nominal Sizes".
- Click Update form to add the Group, which is expanded by default and does not include the Stud Spacing parameter.
Form groups cannot be nested, and all associated parameter blocks are deleted when a group is deleted.
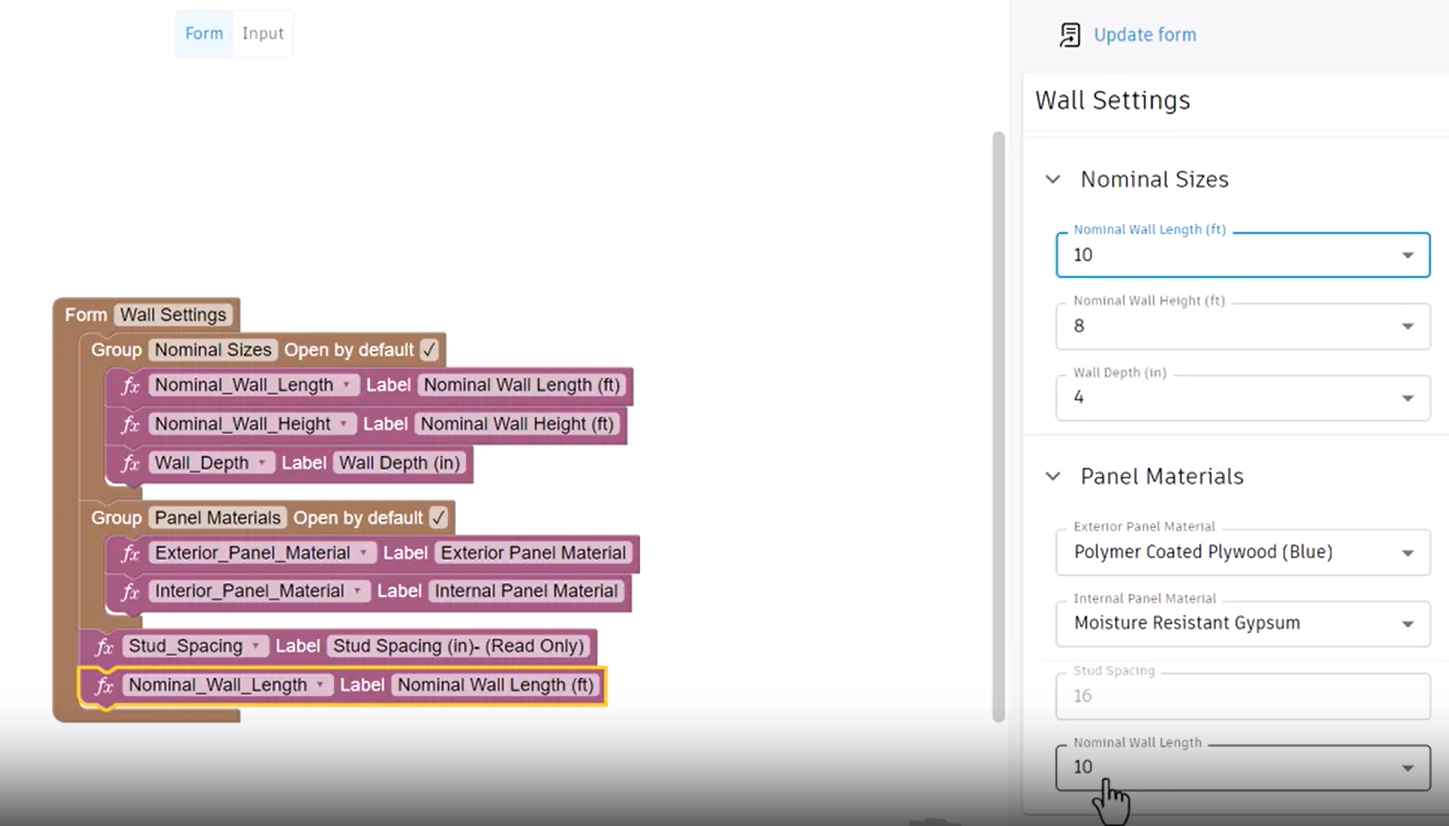
Parameter inputs can be duplicated for a form to show critical values within different form groups. If the value is modified for one input parameter, then the value automatically updates for any duplicates.
Input rules can still be utilized to control parameters in the form. For example, Input rules can be set to read-only, visible or invisible, or to deviate from the default form label.
The parameter label in the Form block is a static label and is unaffected by label changes made in the Input rules.
- In Input rules, update the Stud Spacing label to read "Spacing for Studs". Click Update form to add the label change to the form.
- Switch to the Form rules to see that the Stud_Spacing label in the Form block remains unchanged.
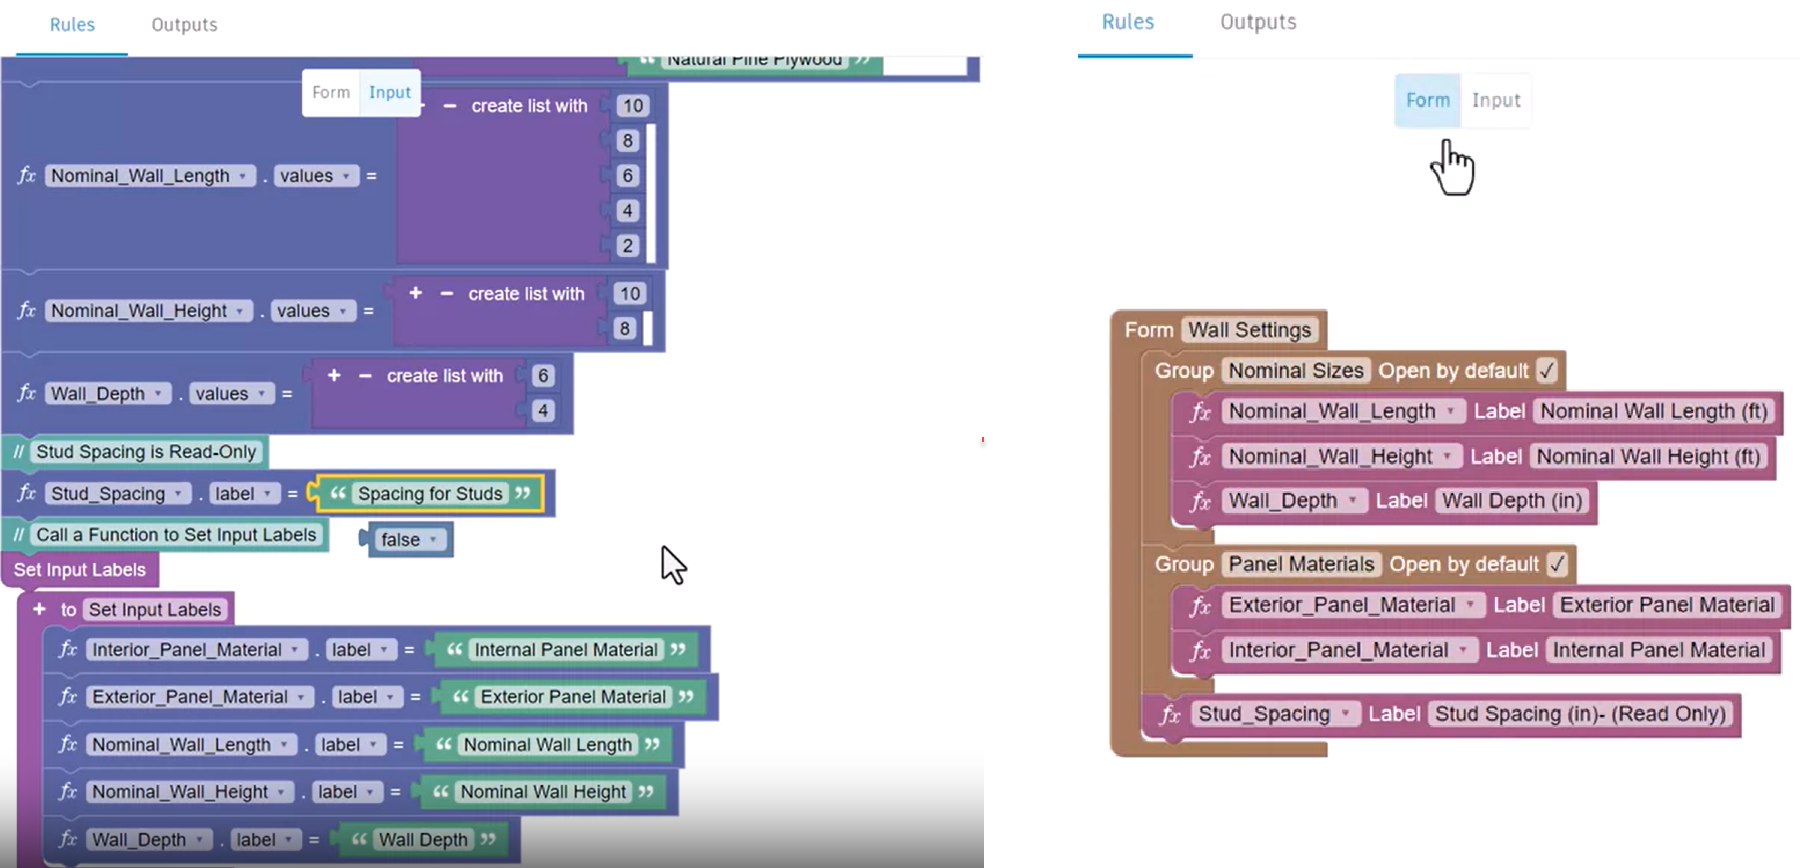
Parameter labels in the Form block are also used as the column headers in the existing variant tables.
Additionally, the Input rule code blocks can remain in the code string even if a parameter is removed from the Form block.
In summary, Form code blocks allow for increased control over the frame layout, via grouping and labeling, while preserving modification capabilities within Input rules.