Adding and editing railings
Add a railing to a staircase and modify the railing properties.
Tutorial resources
These downloadable resources will be used to complete this tutorial:
Step-by-step guide
Add a railing to a staircase and modify the railing properties.
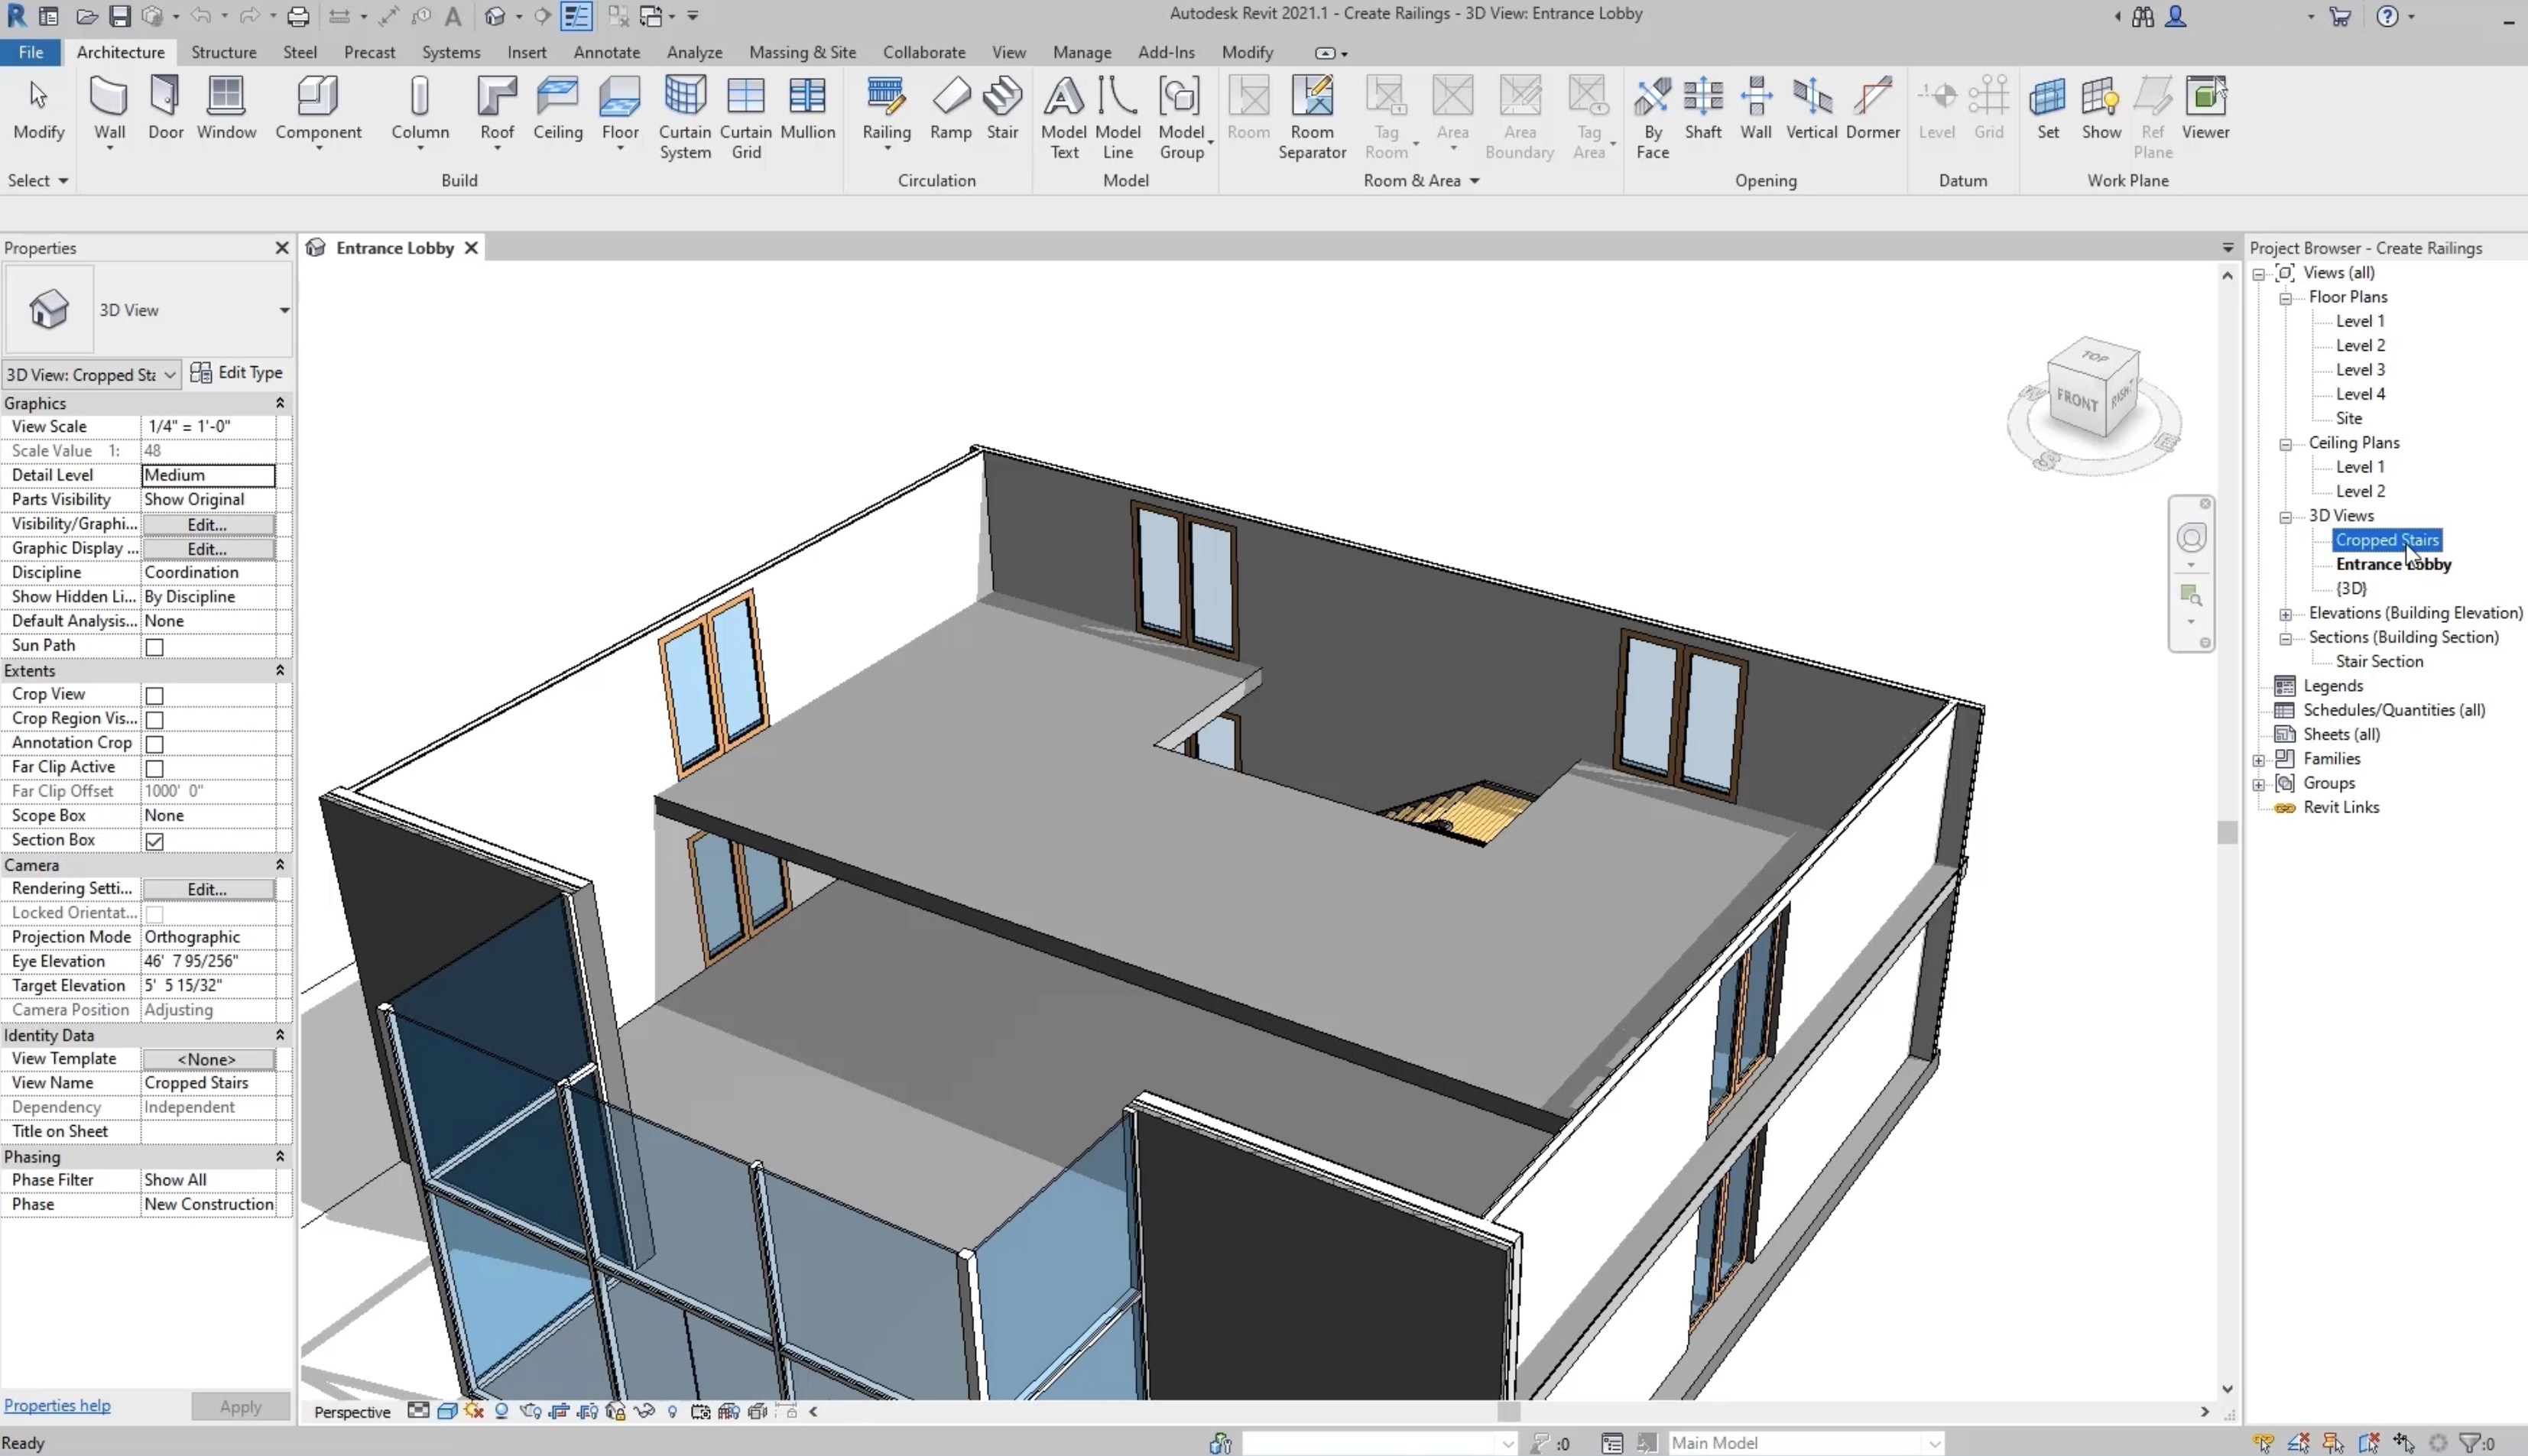
- Open the file Create Railings.rvt. It opens in the Entrance Lobby 3D view.
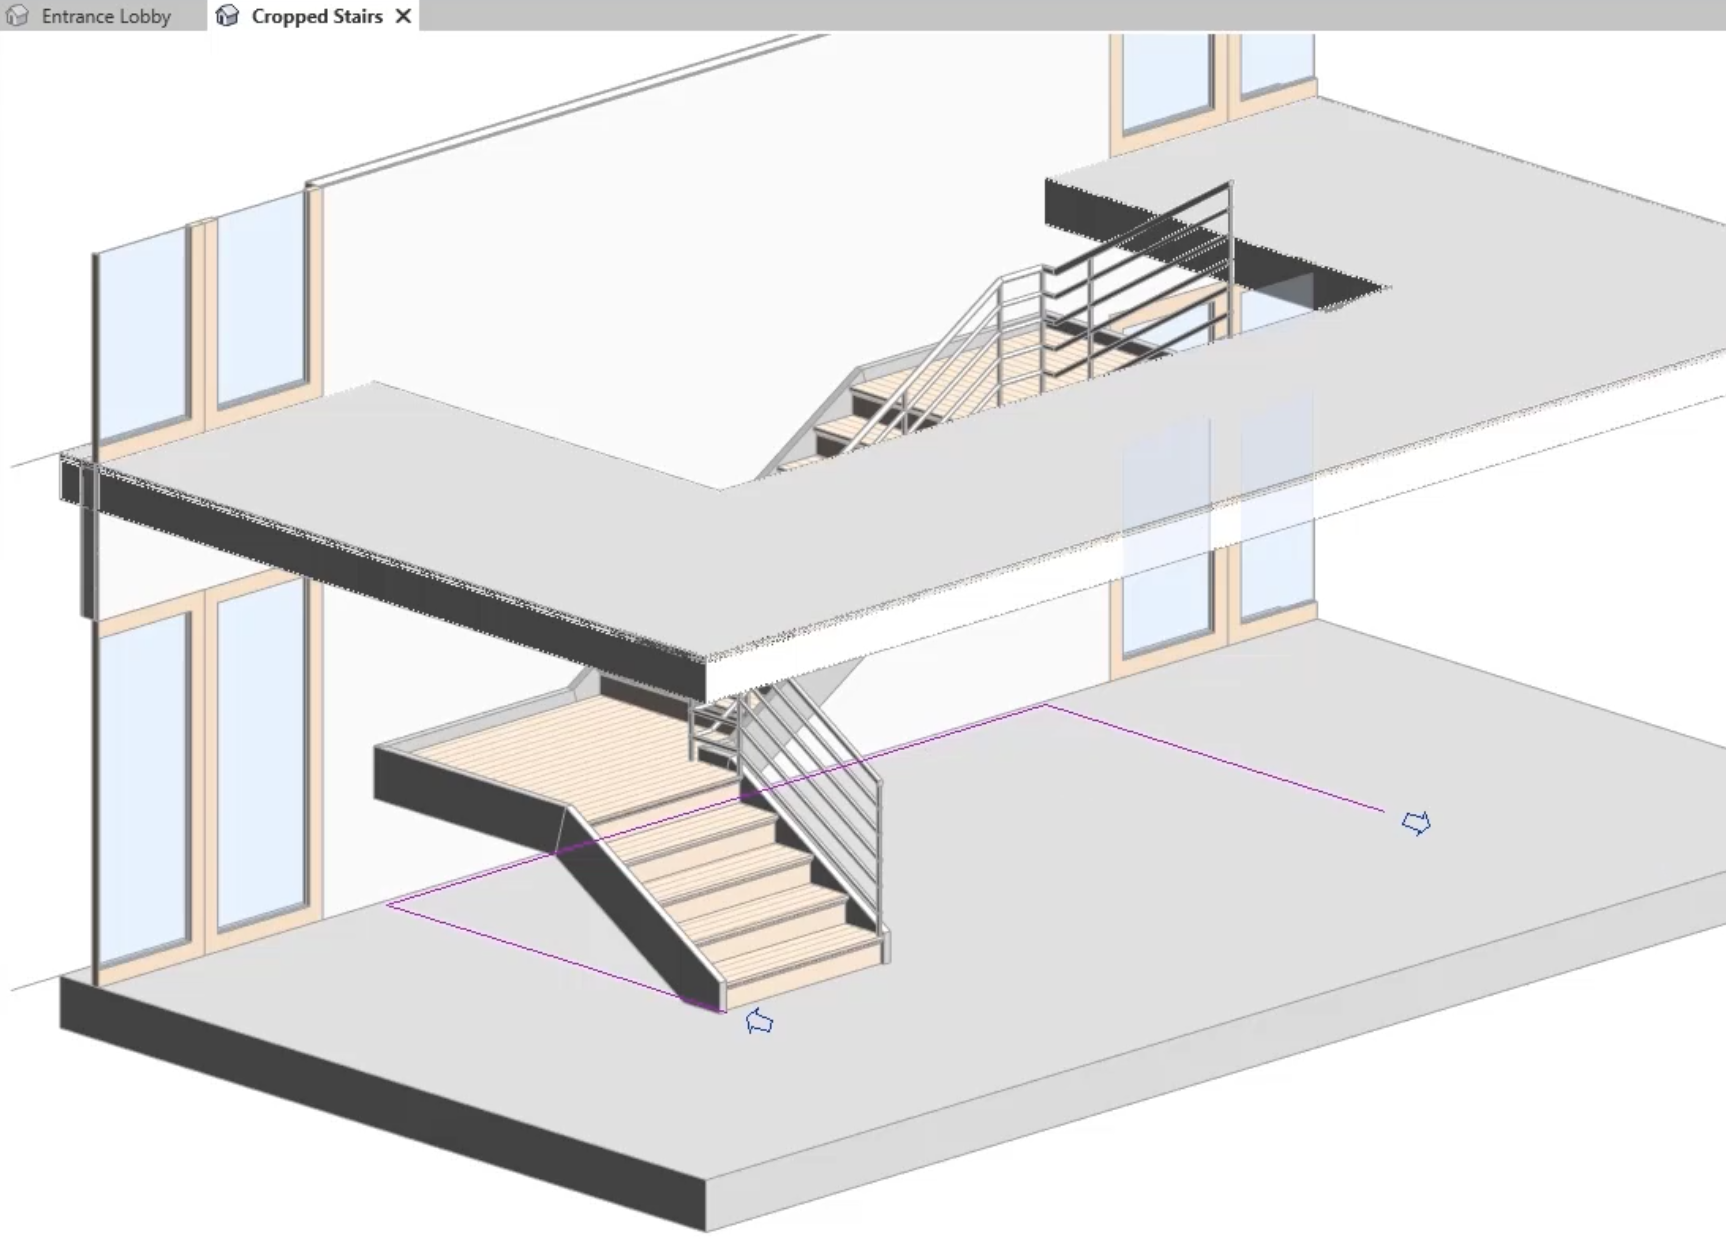
- In the Project Browser, under 3D Views, open Cropped Stairs.
- In the Architecture tab > Circulation panel, expand Railing and click Place on Stair/Ramp.
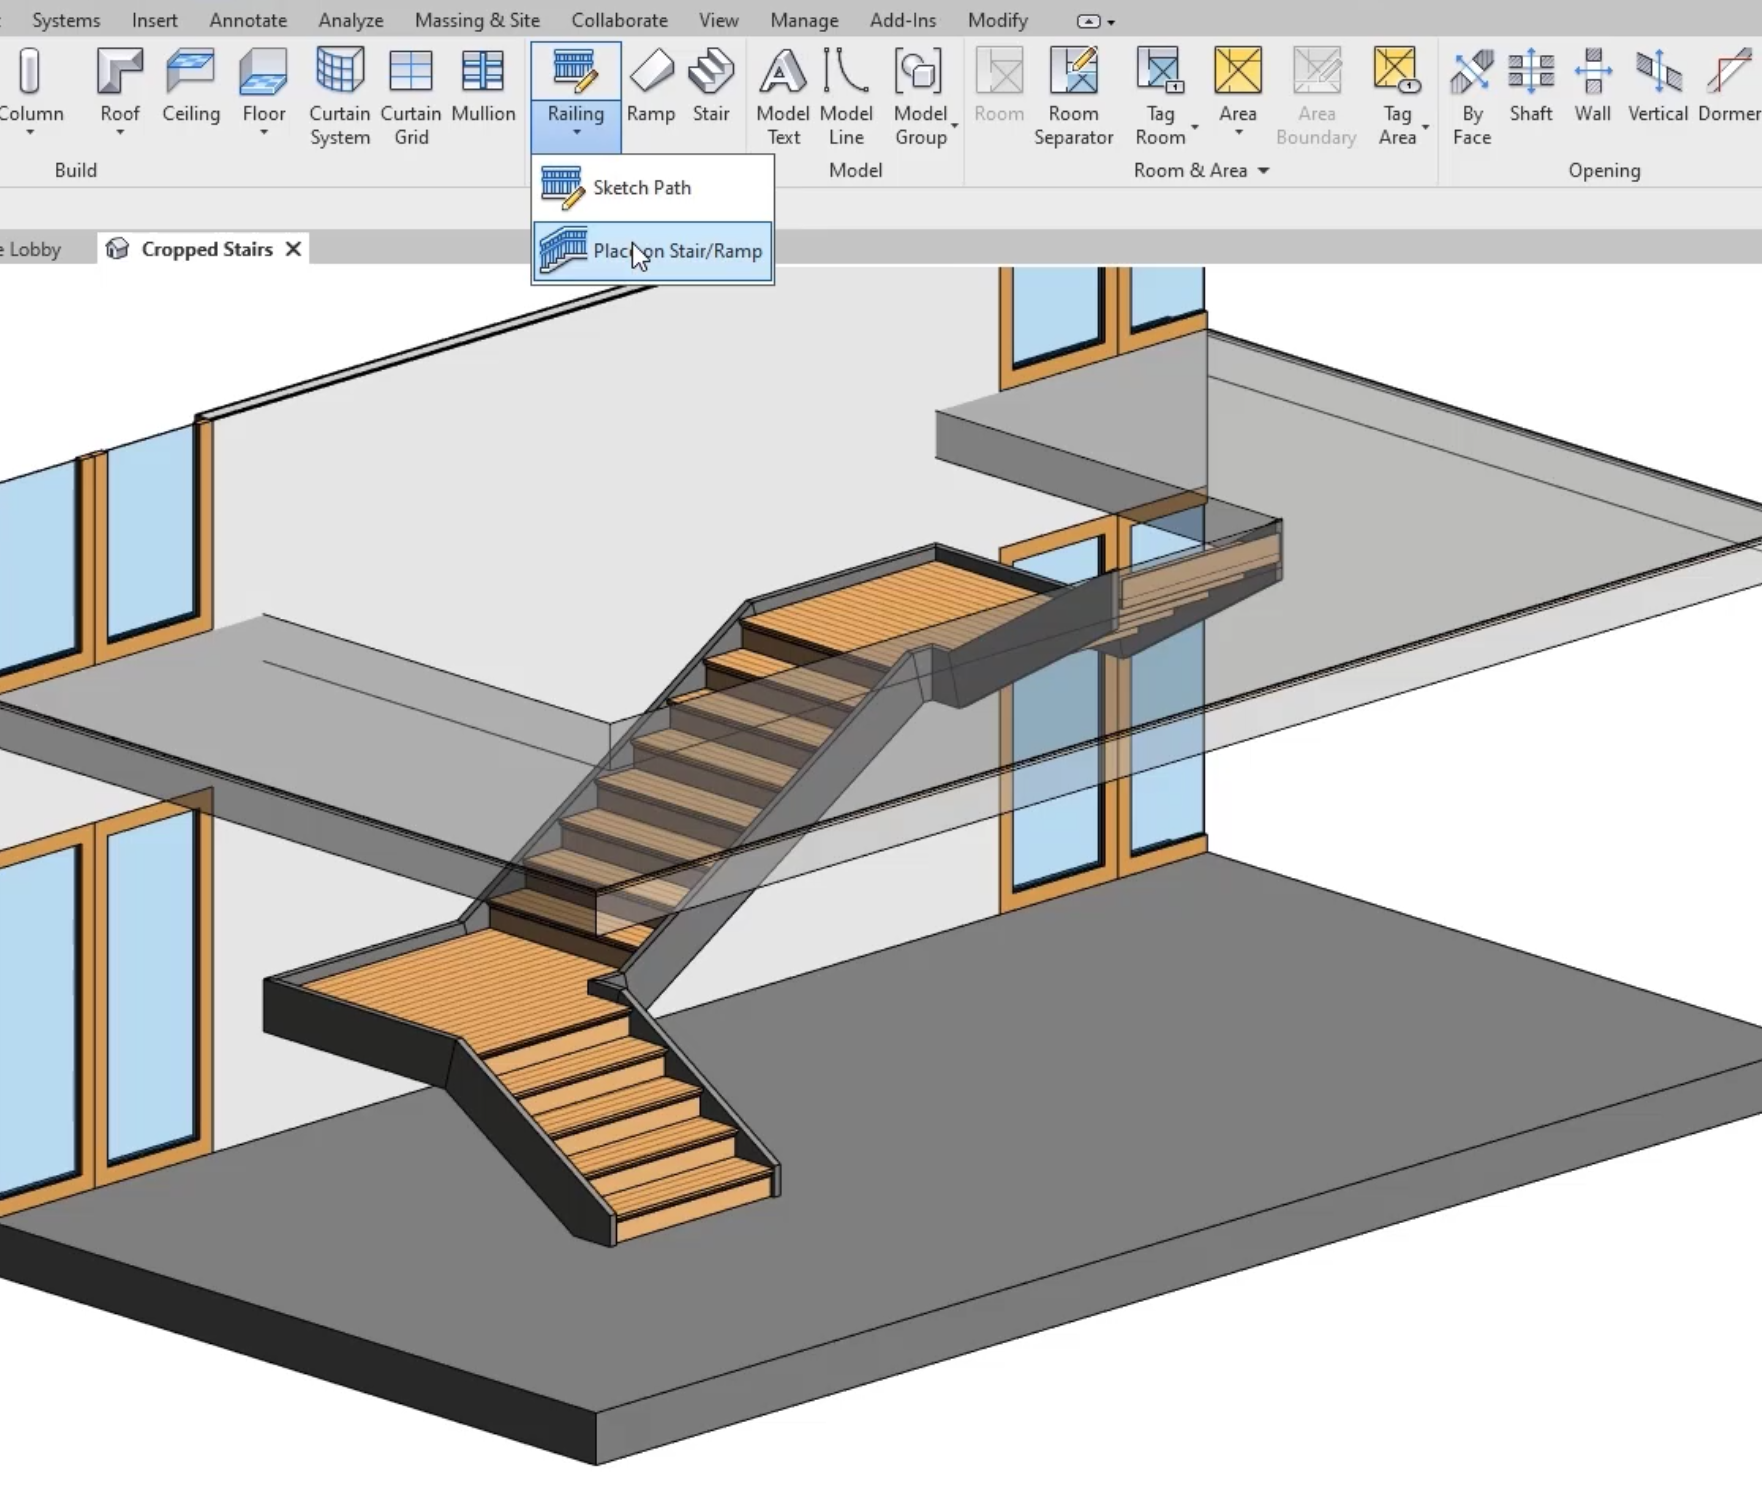
- In the Modify | Place Railing on Stair/Ramp tab > Position panel, click Treads.
- In Properties, in the Type Selector, select Railing: Handrail – Pipe.
- In the view, select the stairs.
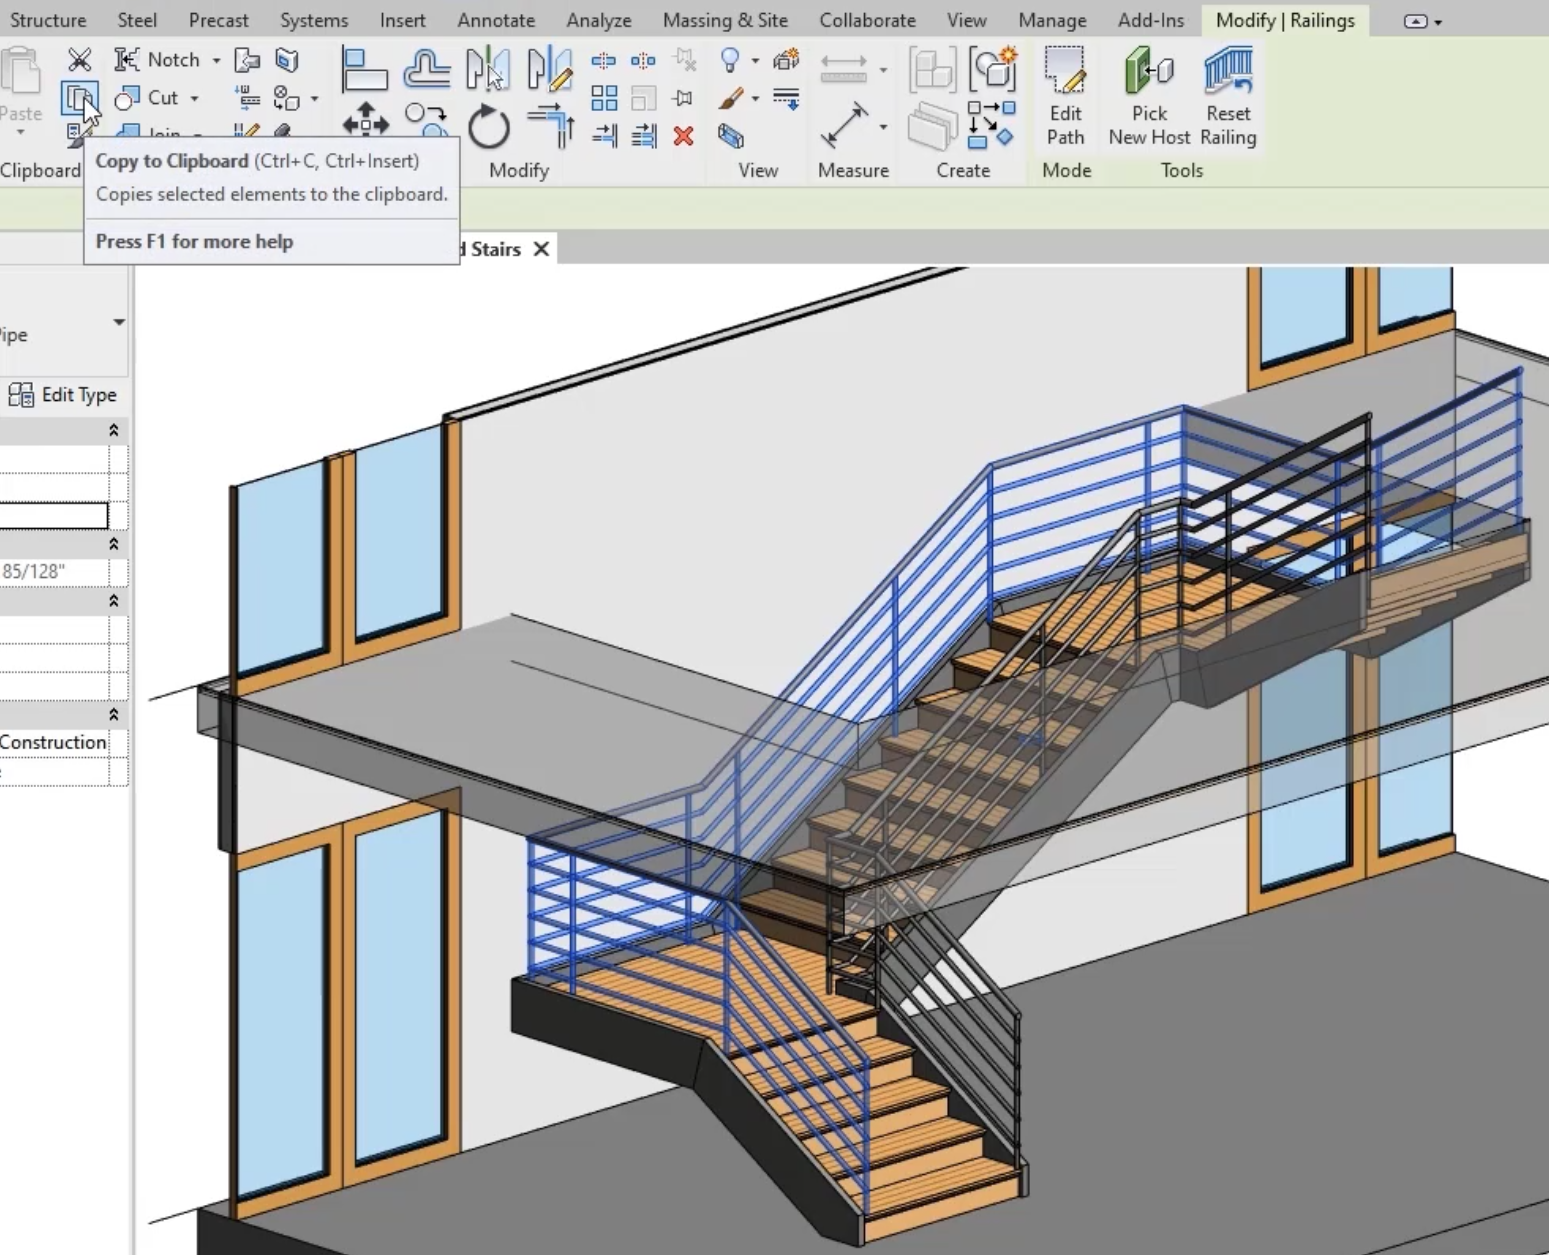
 The railings are placed on both sides of the stairs
- Select the railing against the wall.
- In the Modify | Railings tab > Clipboard panel, click Copy to Clipboard.
- With the railing still selected, in the Modify | Railings tab > Mode panel, click Edit Path. The railing sketch displays.
- In the Project Browser, open the Level 1 floor plan and zoom in on the sketch.
- Select the sketch lines along the wall and to the right.
- In the Modify | Railings > Sketch Path tab, Modify panel, click Delete.
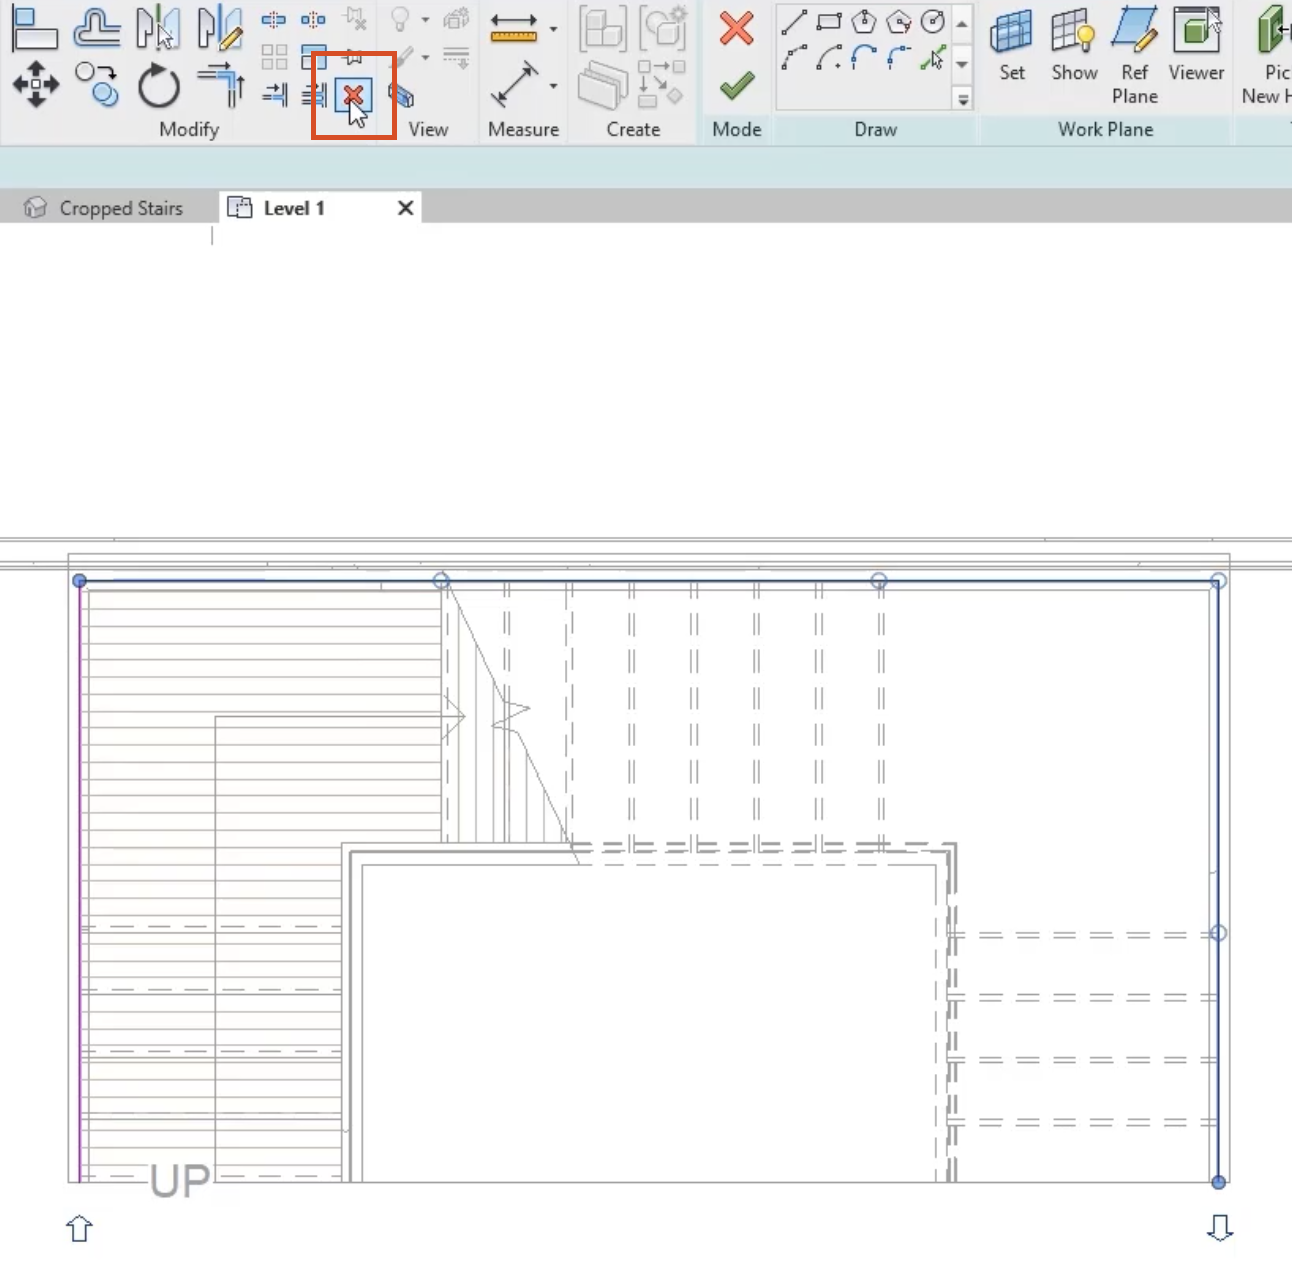
- Click Finish Edit Mode.
- Open the Cropped Stairs 3D view to see the changes. Click Modify.
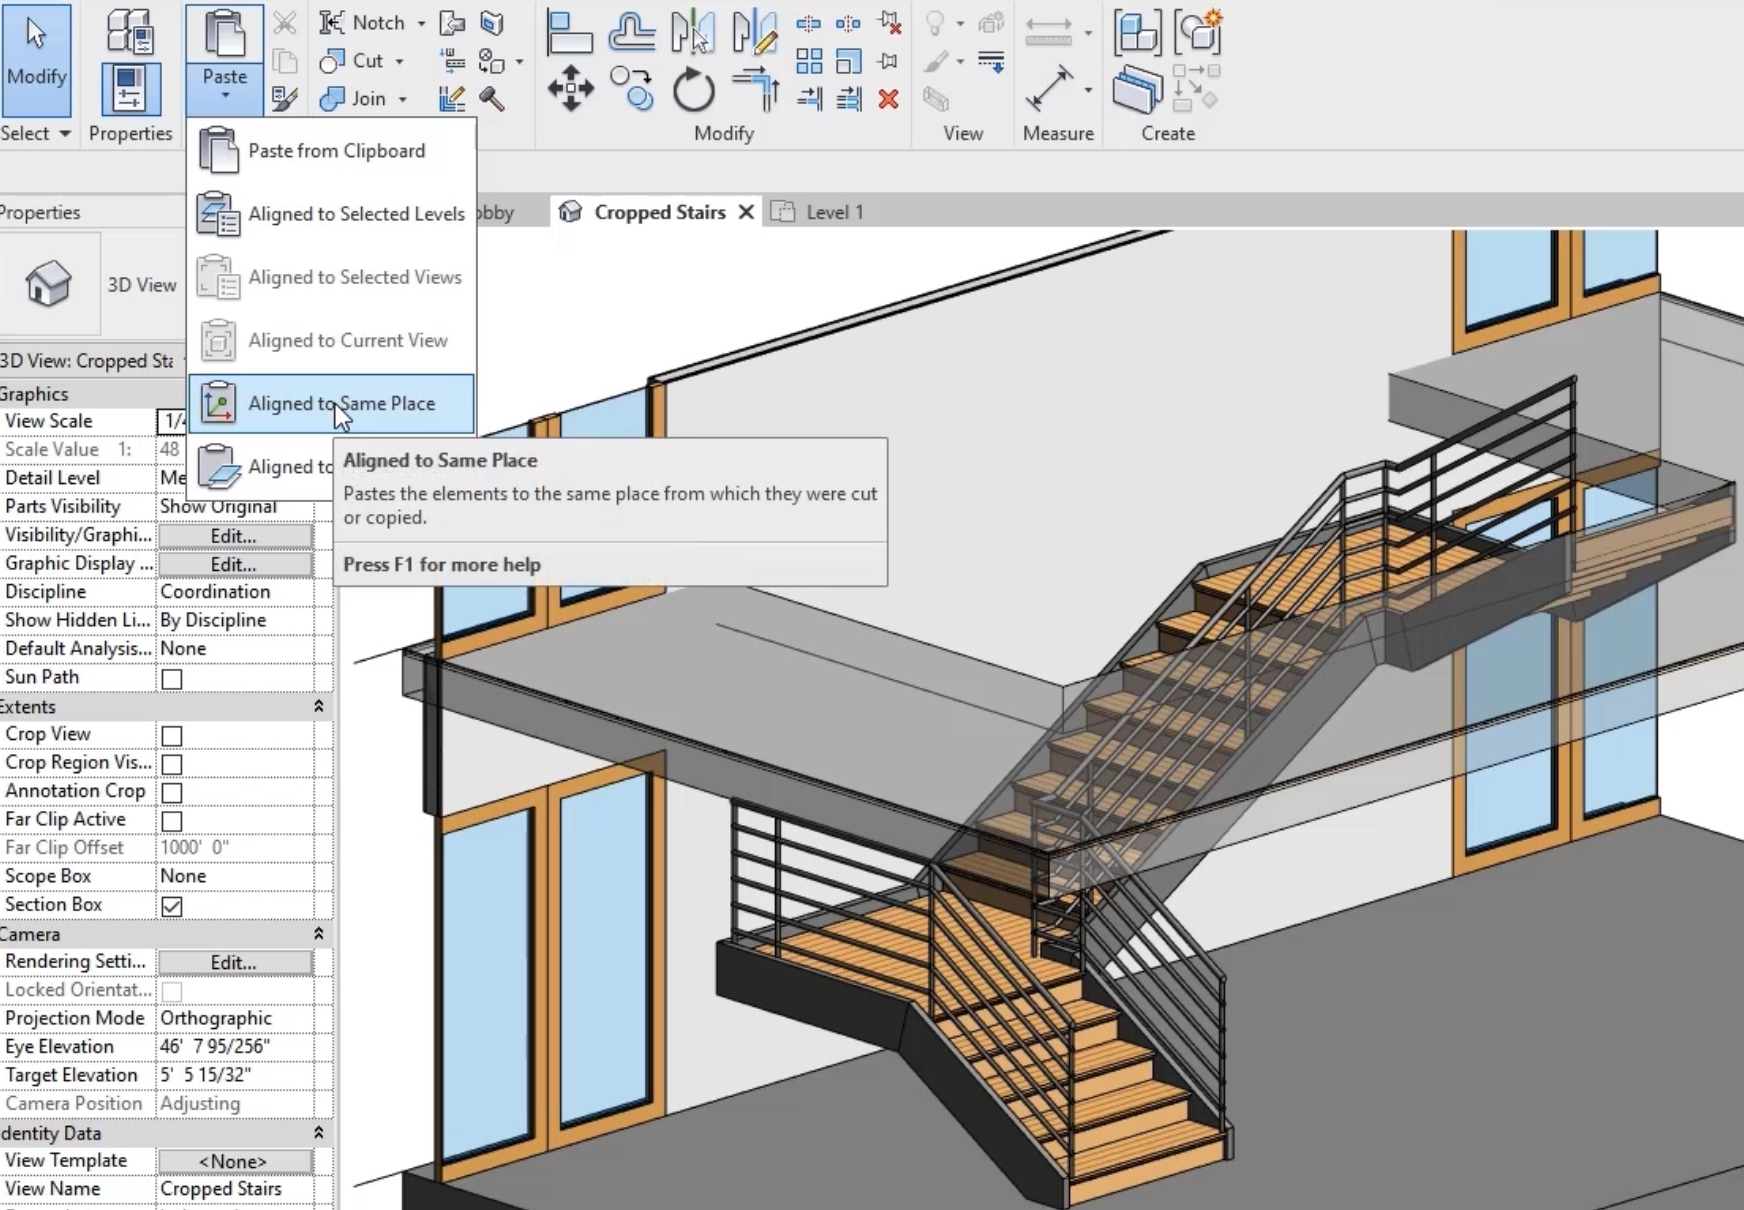
- To paste the original railing back in, on the Modify tab > Clipboard panel, expand Paste and click Aligned to Same Place.
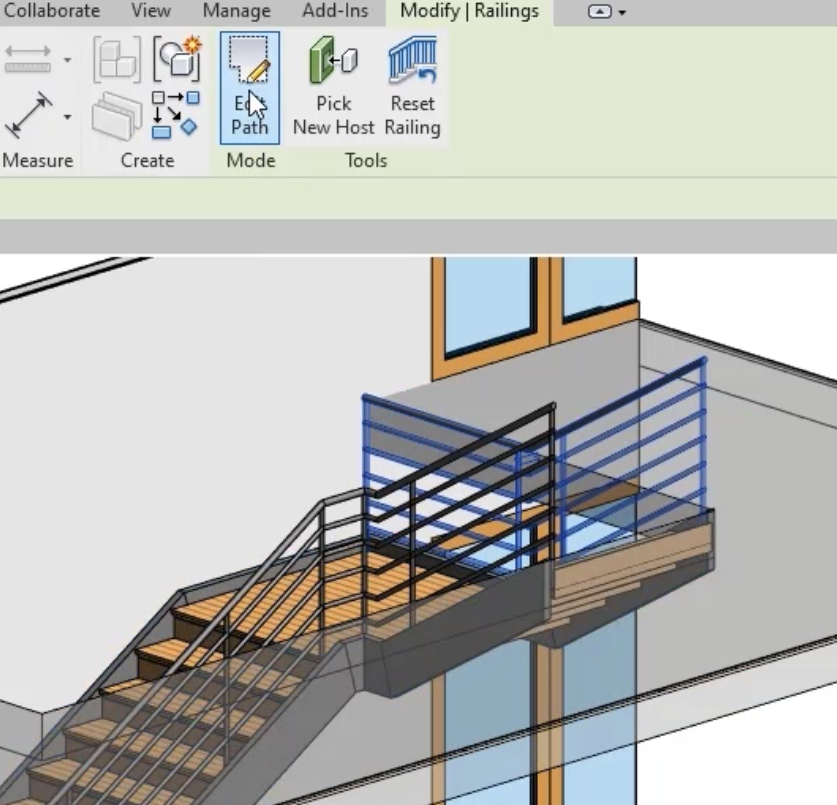
- With the pasted railing still selected, in the Modify | Railings tab > Mode panel click Edit Path. The railing sketch displays.
- Open the Level 1 view. This time, delete the sketch lines along the wall and to the left.
- Click Finish Edit Mode and open the Cropped Stairs 3D view to see the changes.
To extend the railings around the Level 2 stair opening:
- Select the railing from the back wall to the top of the stairs, and in the Modify | Railings tab > Mode panel, click Edit Path.
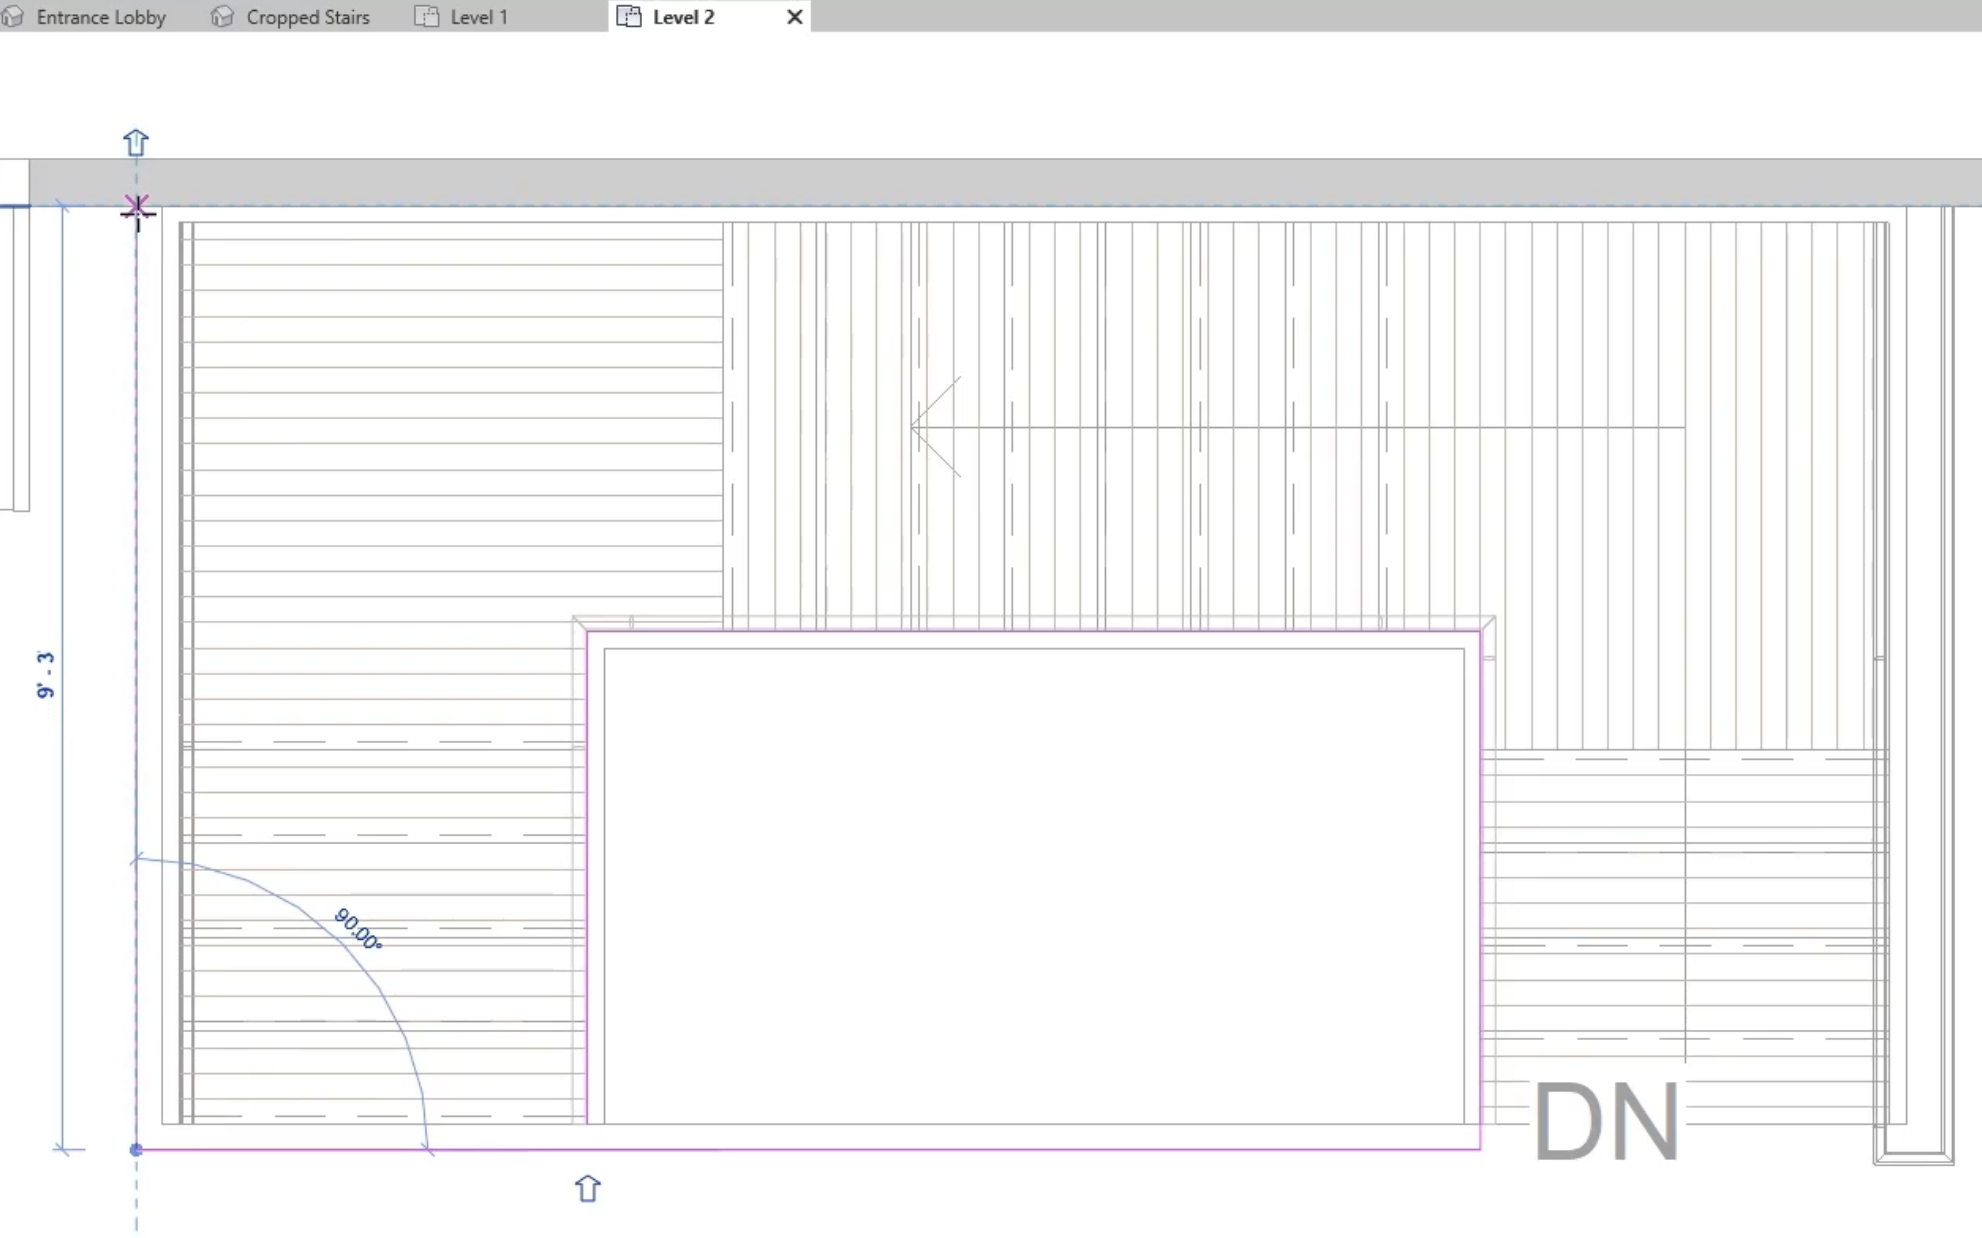
- In the Project Browser, open the Level 2 floor plan.
- In the Modify | Railings > Sketch Path tab > Draw panel, click Line.
- In the Options Bar, select Chain.
- Draw the following sketch to extend the railing to the wall. (Dimensions for reference only.)
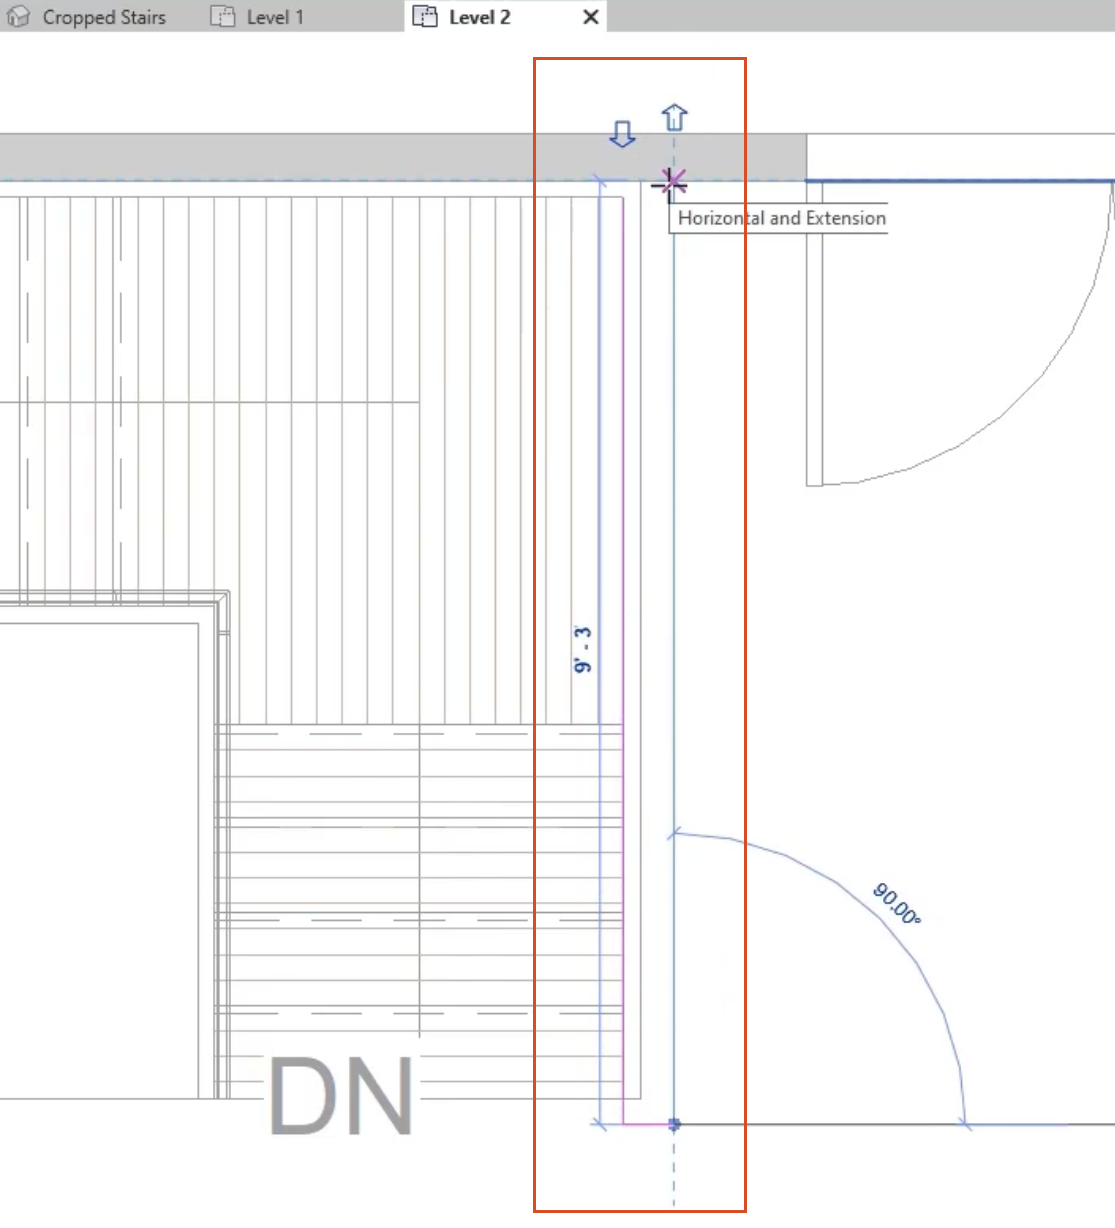
- Click Finish Edit Mode.
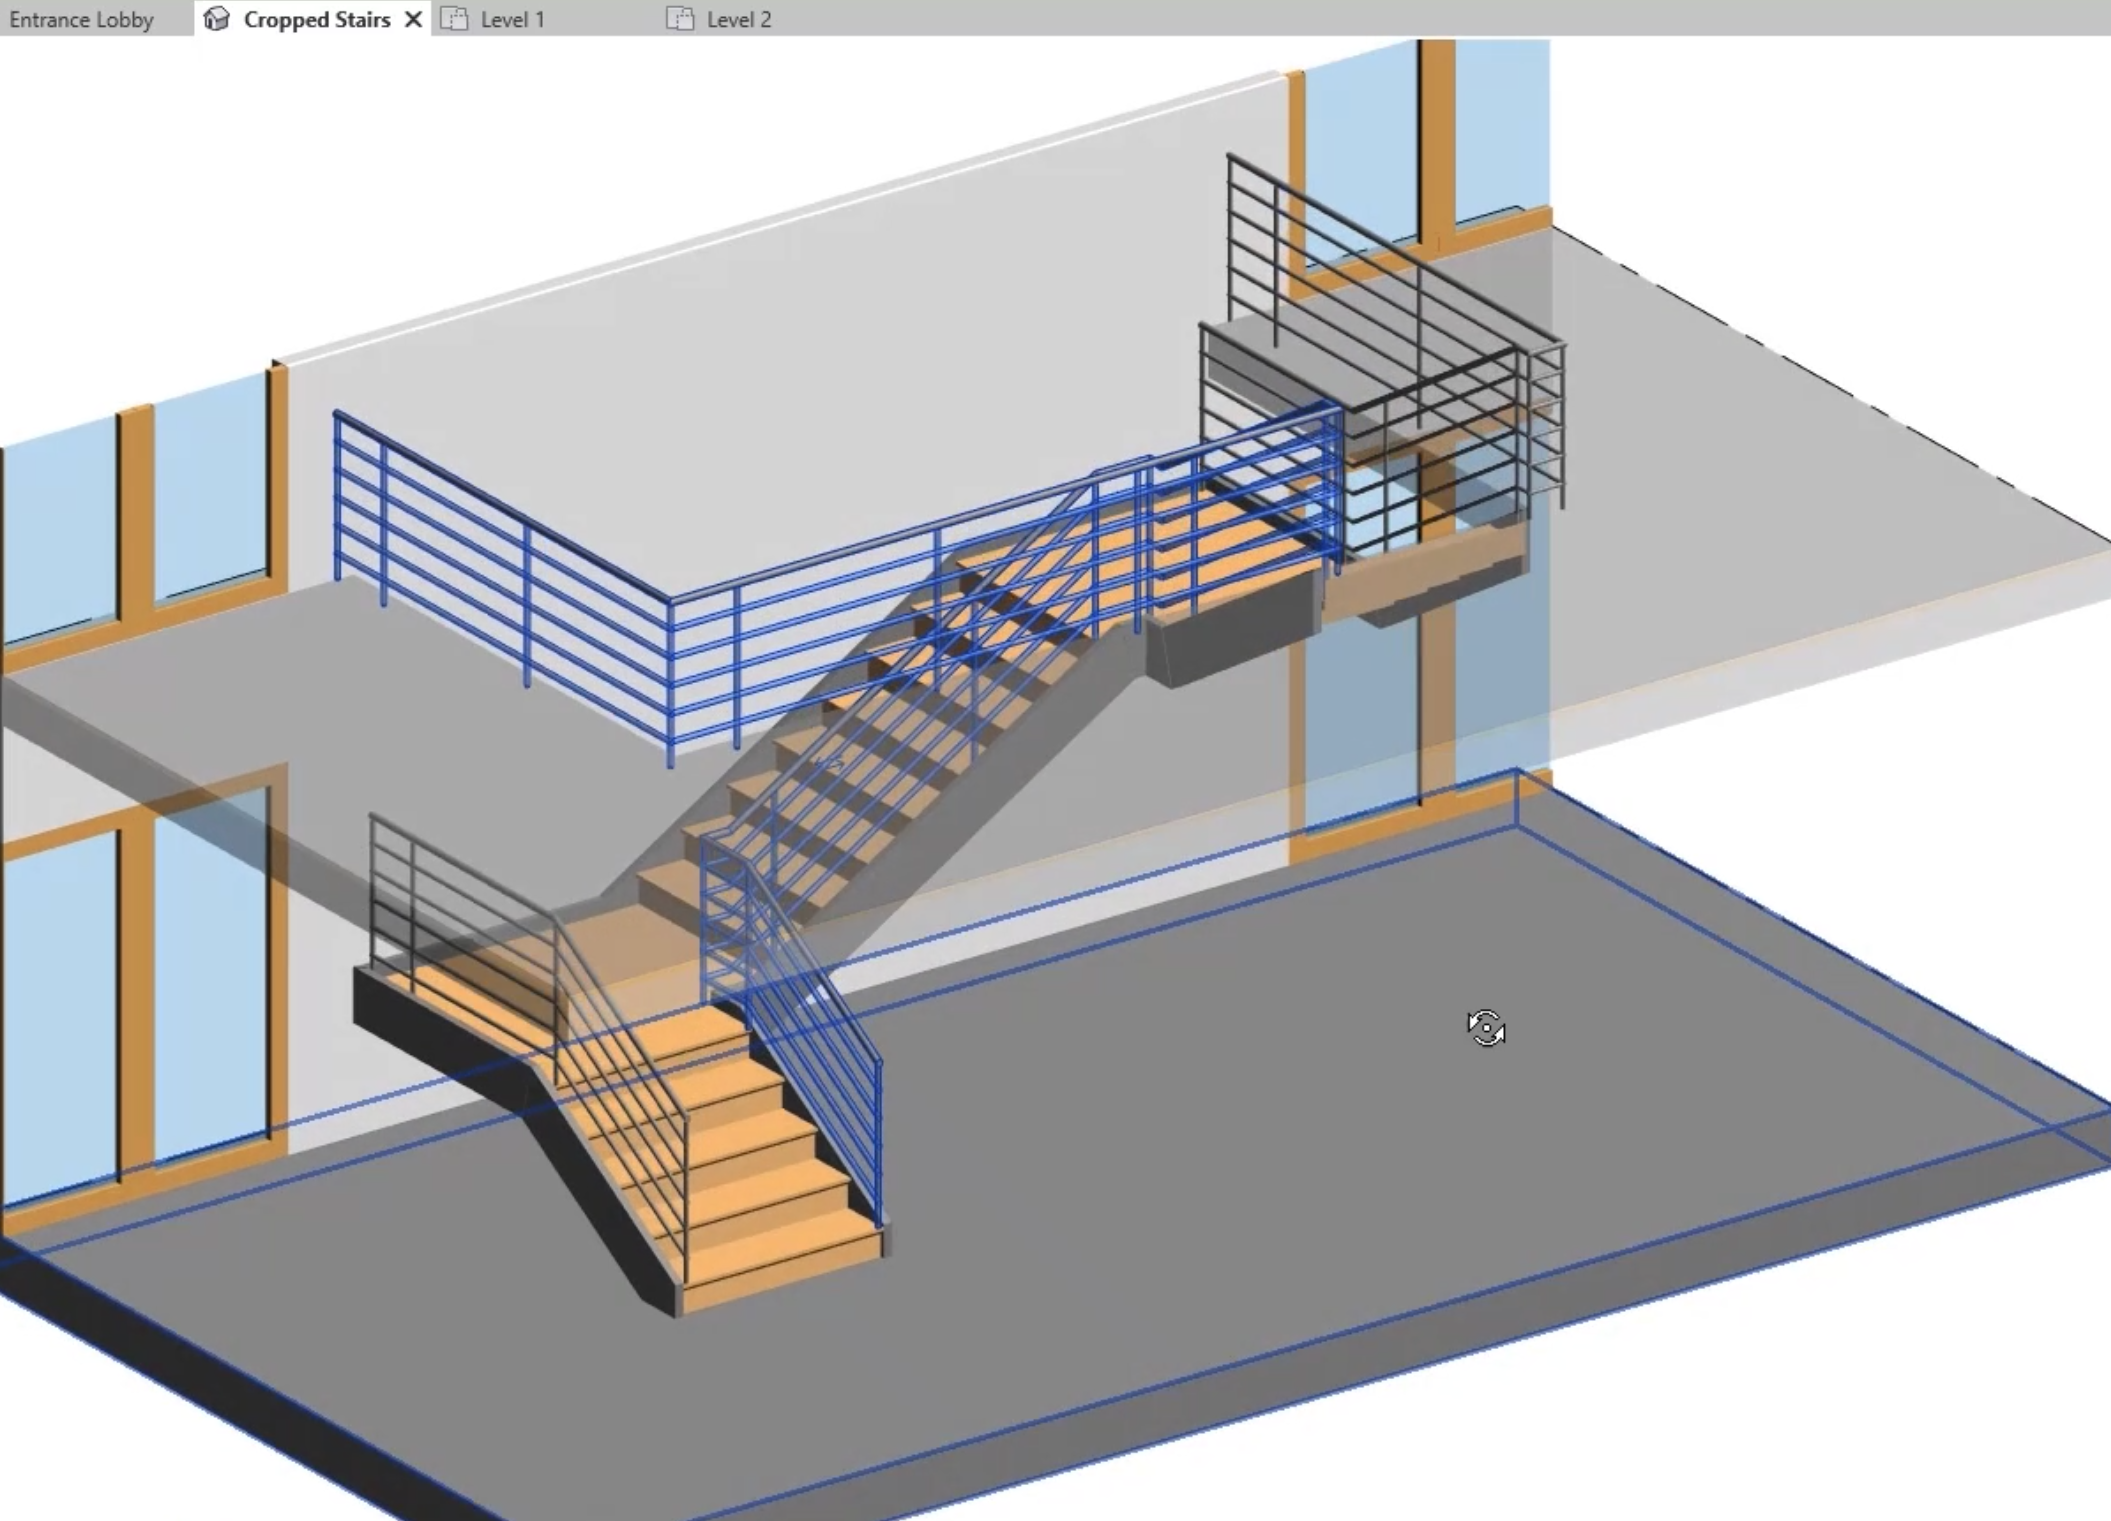
- Switch to the Cropped Stairs 3D view to see the extended railing.
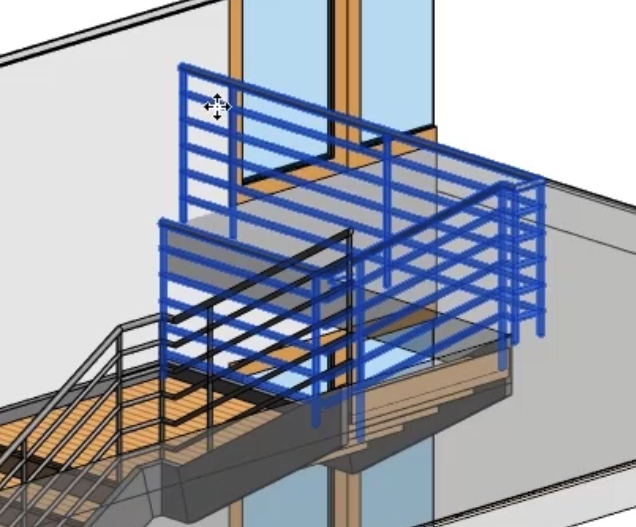
- Repeat the process to add railings around 2 remaining sides of the stair opening, using the center railing sketch in the Level 2 view.
- Open the Cropped Stairs 3D view and rotate it around to see the new railings.