Importing data into the model
Create a model from a blank network by importing data using different methods.
Tutorial resources
These downloadable resources will be used to complete this tutorial:
Step-by-step guide
Urban drainage network data can be imported into InfoWorks ICM from a range of sources, including existing InfoWorks ICM models, Access files, CSV files, MapInfo, and ArcGIS files.
Though it is possible to import networks directly from these sources, it is more common to import using the Open Data Import Centre (ODIC), which allows for data to be mapped automatically to the relevant InfoWorks ICM object data table.
Create a network folder to house the imports:
- In the Explorer window, right-click the Model Group and select New InfoWorks > InfoWorks network.
- In the New Name - InfoWorks network popup, in the New Name field, enter "Urban Drainage Model".
- Click OK.
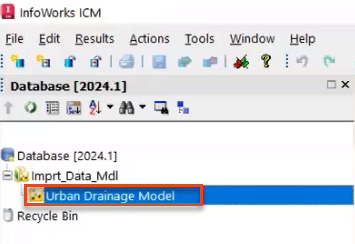
- Double-click or drag the Urban Drainage Model onto the GeoPlan to make it the active network.
To correctly align this tutorial with the GIS layers, set the coordinate system for the model:
- From the GeoPlan menu, select Set Coordinate System.
- In the Select Coordinate System dialog box, in the Projection group, click More (…).
- In the Choose Coordinate System dialog box, next to Find, type "british" to find the coordinate system for this tutorial exercise.
- In the tree view, expand the British Coordinate Systems folder, and select British National Grid [EPSG 27700].
![The Choose Coordinate System dialog box, with British National Grid [EPSG 27700] selected as the coordinate system.](https://files.upskill-dev.autodesk.com/public/innovyze/infoworksicm/iwcm2023M08U02_Imprt_Data_Mdl_002.webp)
- Click OK.
- Click OK again to close the Select Coordinate System dialog box.
To import networks with the Open Data Import Centre (ODIC):
- From the Network menu, click Import, then select Open Data Import Centre.
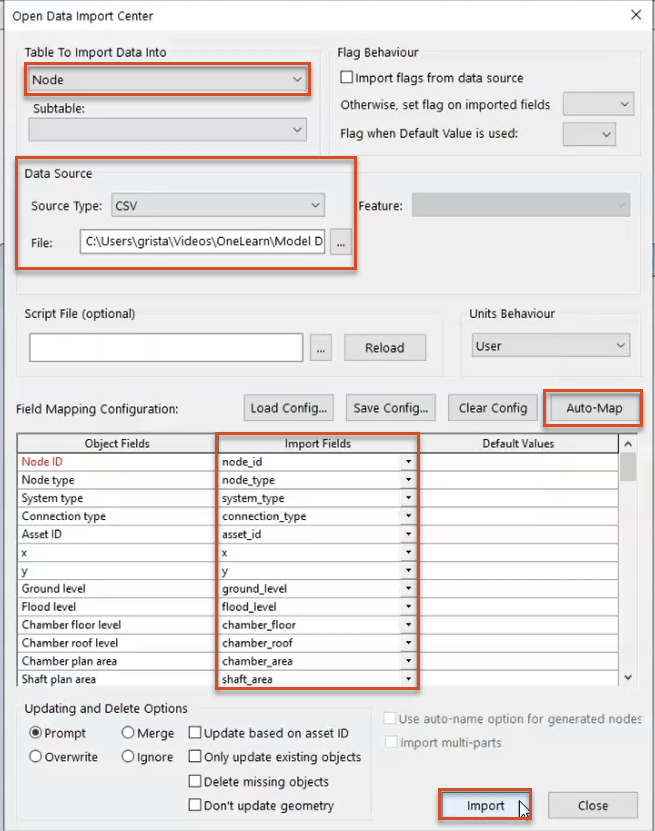
- In the ODIC, under Data Source, expand the Source Type drop-down and select CSV.
- Click the File Browse (…) icon, navigate to the exercise files for this tutorial, and select Nodes.csv.
- Click Open.
- Back in the ODIC, in the Field Mapping Configuration group, click Auto-Map to search the import file for fields that match those that define the nodes in the network:
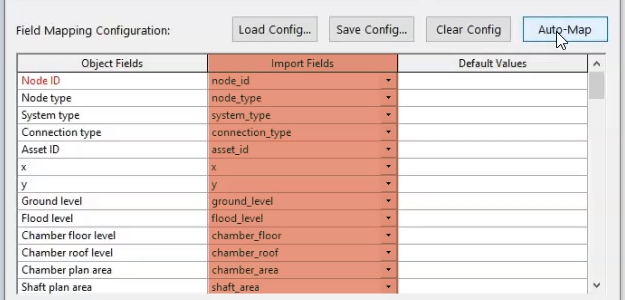
In the table, under Import Fields, the data from the CSV file populates the matching Object Fields.
- Click Import.
An import notification displays how many objects were imported, as well as if there were any errors or warnings.
- Click OK.
To import a conduit network:
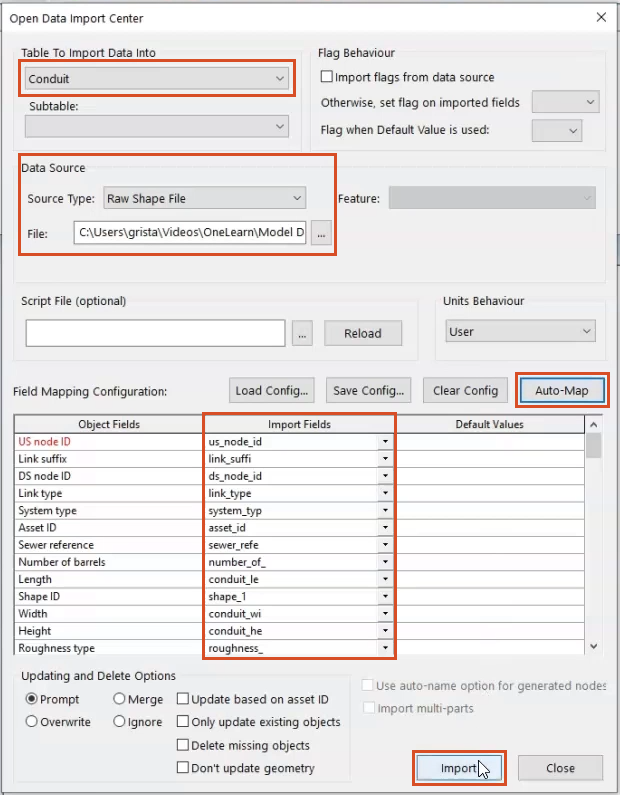
- Still in the ODIC, under Table To Import Data Into, expand the drop-down and select Conduit.
- Under Data Source, select Raw Shape File as the Source Type.
- Click the File Browse icon, navigate to the exercise files for this tutorial, and select Conduits.shp.
- Click Open.
- Again, for the Field Mapping Configuration, click Auto-Map to see the matching data fields in the table.
- Click Import.
- Click OK to close the notification window.
- Click Close the exit the ODIC.
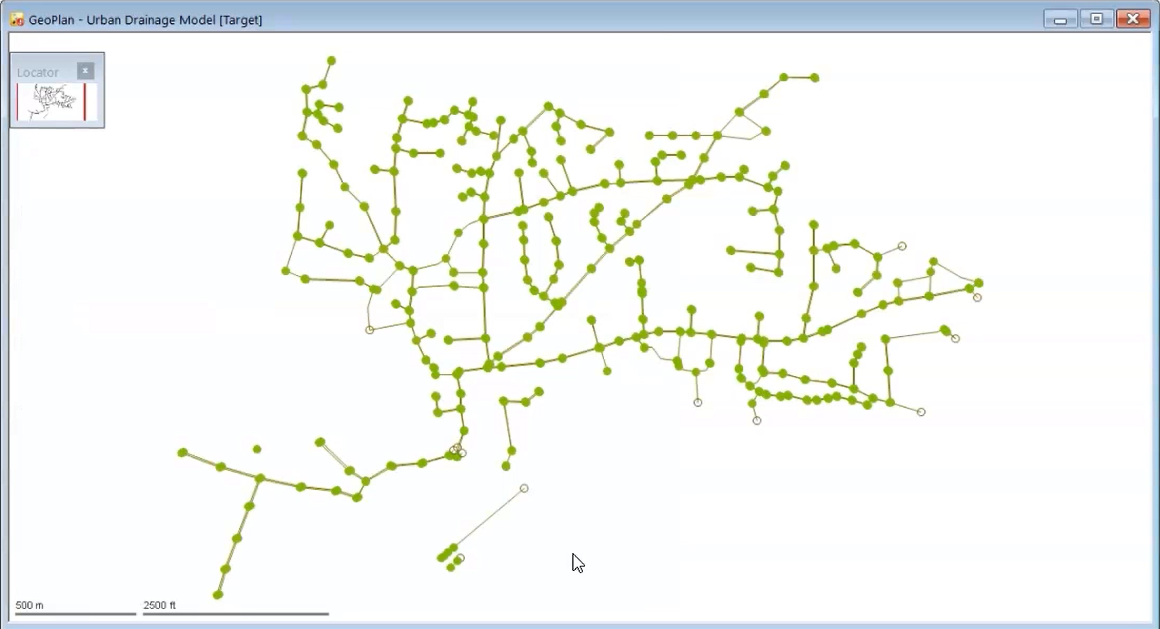
The GeoPlan displays the imported data:
Another method for importing data into the sewer network model is to bring in updated data from a CSV file. This is particularly useful for bringing in changes made by others with differences between network versions and InfoWorks format data.
To add subcatchments and other structures from an updated CSV:
- From the Network menu, click Import, then select Update from CSV files.
- In the Import/Update from CSV Data dialog box, the update options can be configured, but for this exercise, just click OK.
- In the file browser, locate and select Network_Structures.csv.
- Click Open.
- The file browser reappears to load other .csv files. For this tutorial, click Cancel.
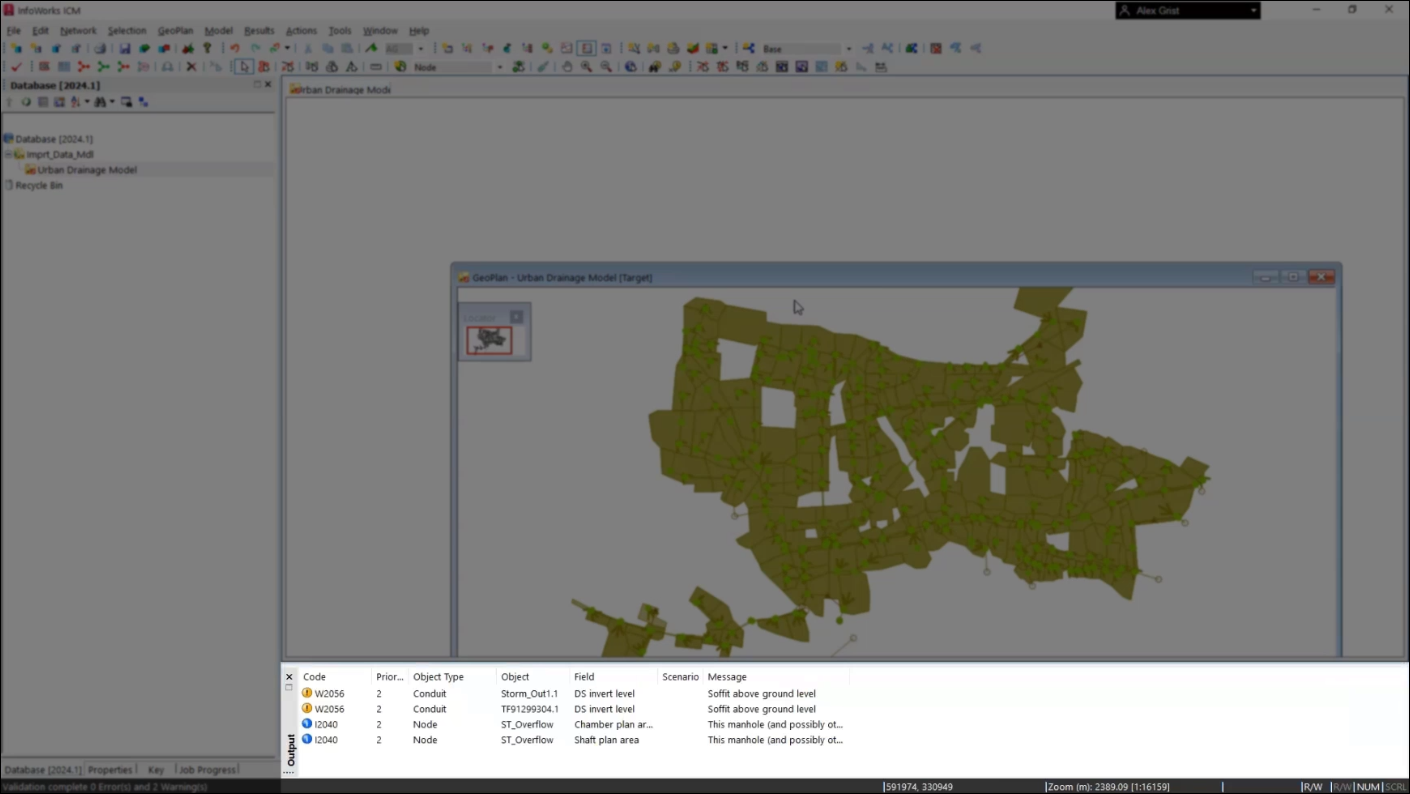
The model view changes to show a list of all the data that will be imported in this CSV. Subcatchments and structures can now be seen in the GeoPlan, along with the previously imported nodes and conduits.

- Click Validate to validate the network.

- In the Network Validation dialog box, click OK.
Only yellow warning and blue information messages appear in the Output window for this network:
- Click Commit to commit the changes to the new network.

- In the Commit changes to server dialog box, add a comment of "Imported model data".
- Click OK.