& Construction

Integrated BIM tools, including Revit, AutoCAD, and Civil 3D
& Manufacturing

Professional CAD/CAM tools built on Inventor and AutoCAD

Integrated BIM tools, including Revit, AutoCAD, and Civil 3D

Professional CAD/CAM tools built on Inventor and AutoCAD
Any referenced datasets can be downloaded from "Module downloads" in the module overview.
Transcript
00:01
We are now going to focus our time on creating the geometry within FormIt.
00:08
Based on the information that we have already produced,
00:12
we now need to add finer detail and create more intricate shapes.
00:21
So, now that we have images brought into the Environment,
00:25
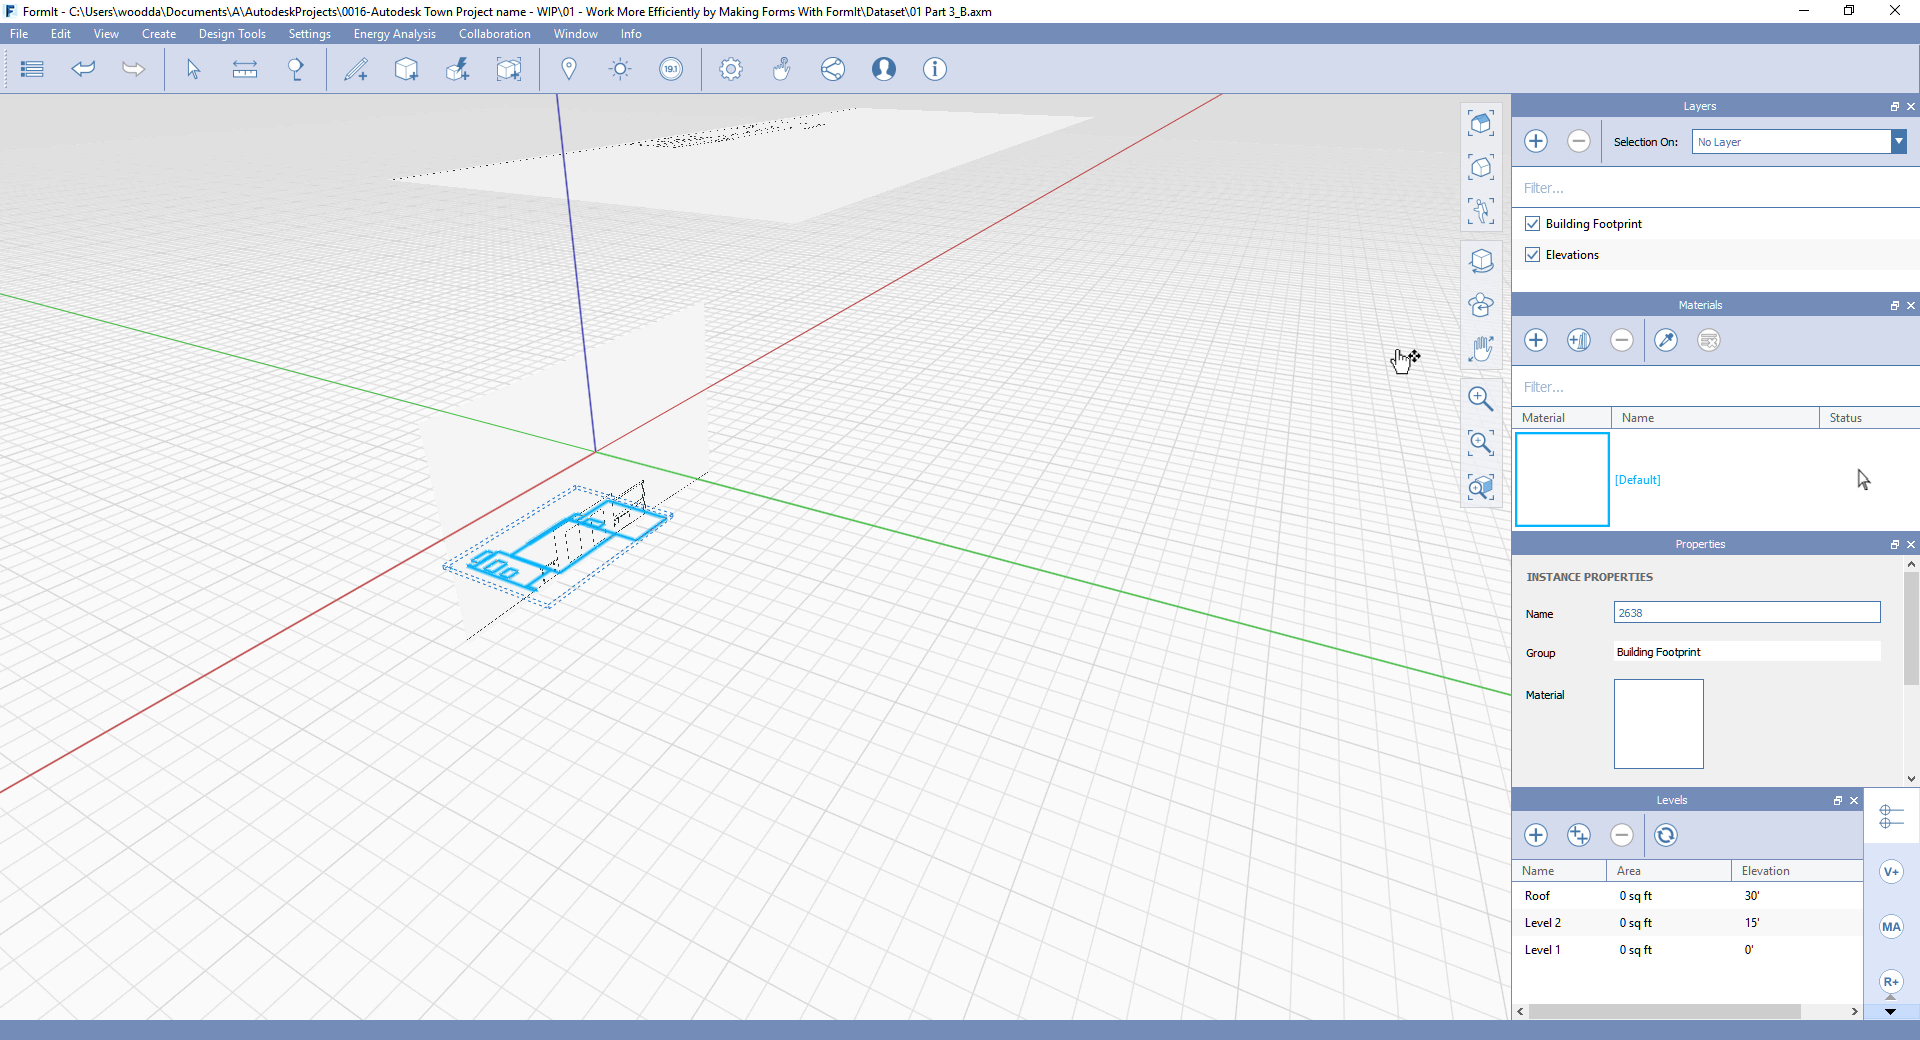
we can then associate layers to these images to have control over the graphics of the Environment.
00:34
So, we've selected this image and we've also selected the building footprint.
00:43
So, if we select the image, we can associate that to the Elevation.
00:55
By creating the forms,
00:57
it's quite easy by going to top view and stenciling the footprint of the building.
01:09
This is creating a surface.
01:14
And game perspective of the relationship of the building footprint,
01:19
to the other aspects of the building.
01:25
So, we can easily go to a 3D View,
01:27
and circulate around to see how that represents to images that we've brought in but also the building footprint.
01:35
So, you can quite easily adjust the height of the solids by the Push/Pull relationship.
01:48
It's very easy to navigate to identify the heights and you can tweak this as required.
02:10
We now want to create a modification to the actual profile of one of the solid.
02:16
So, this can be done by attaching a line to the surface and selecting that surface and extruding that across.
02:27
This can also be done in respect to the other side of drawing on two sides of the solid,
02:35
and that acts as a reference point for removing the excess to solid.
02:48
You can establish Reference Planes to help you create your solids.
02:53
Once you've established that, you can easily manipulate the solid to the direction that you require.
03:02
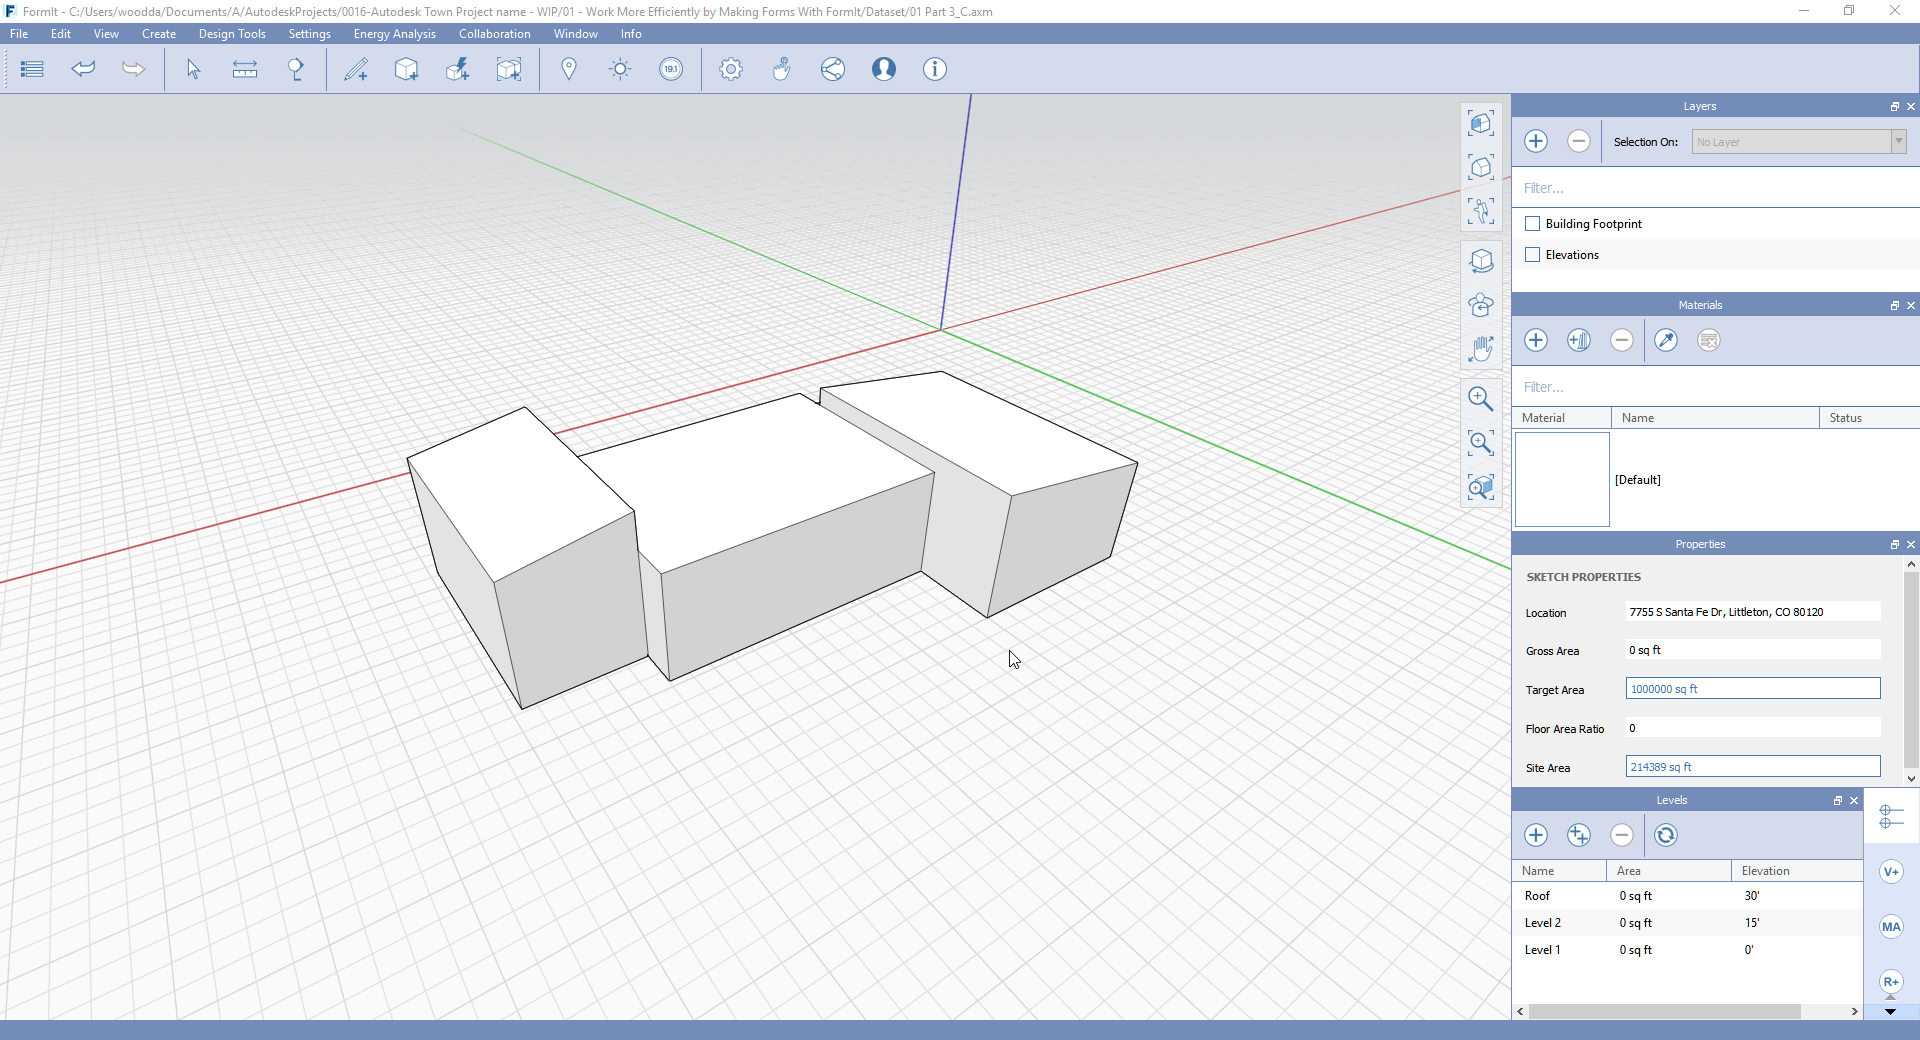
So, in this example, we are modifying the roof to play around with how that would play in terms of a design decision.
03:11
So, we've made a recess to collect rainwater.
03:21
We're checking that in the 3D View to make sure that we're happy with the scope and the size of the buildings.
03:29
We're then going to turn off the views for the building footprint and the Elevation views.
03:36
We can double click the solids and the levels that we set up for the beginning of the project can then be referenced to the solid objects.
03:54
The areas can then be identified for gross area.
03:60
This is very useful for indications of achieving project standards.
04:08
So, we can readjust the names.
Video transcript
00:01
We are now going to focus our time on creating the geometry within FormIt.
00:08
Based on the information that we have already produced,
00:12
we now need to add finer detail and create more intricate shapes.
00:21
So, now that we have images brought into the Environment,
00:25
we can then associate layers to these images to have control over the graphics of the Environment.
00:34
So, we've selected this image and we've also selected the building footprint.
00:43
So, if we select the image, we can associate that to the Elevation.
00:55
By creating the forms,
00:57
it's quite easy by going to top view and stenciling the footprint of the building.
01:09
This is creating a surface.
01:14
And game perspective of the relationship of the building footprint,
01:19
to the other aspects of the building.
01:25
So, we can easily go to a 3D View,
01:27
and circulate around to see how that represents to images that we've brought in but also the building footprint.
01:35
So, you can quite easily adjust the height of the solids by the Push/Pull relationship.
01:48
It's very easy to navigate to identify the heights and you can tweak this as required.
02:10
We now want to create a modification to the actual profile of one of the solid.
02:16
So, this can be done by attaching a line to the surface and selecting that surface and extruding that across.
02:27
This can also be done in respect to the other side of drawing on two sides of the solid,
02:35
and that acts as a reference point for removing the excess to solid.
02:48
You can establish Reference Planes to help you create your solids.
02:53
Once you've established that, you can easily manipulate the solid to the direction that you require.
03:02
So, in this example, we are modifying the roof to play around with how that would play in terms of a design decision.
03:11
So, we've made a recess to collect rainwater.
03:21
We're checking that in the 3D View to make sure that we're happy with the scope and the size of the buildings.
03:29
We're then going to turn off the views for the building footprint and the Elevation views.
03:36
We can double click the solids and the levels that we set up for the beginning of the project can then be referenced to the solid objects.
03:54
The areas can then be identified for gross area.
03:60
This is very useful for indications of achieving project standards.
04:08
So, we can readjust the names.
Creating the geometry can now begin. We have the referenced sketches within the project and will start to create profiles of the spaces to the building the extrude masses for adding finer detail for modification. Adding information to these masses such as levels will also be covered.
Geometry creation
Creating the geometry can now begin. We have the referenced sketches within the project and will start to create profiles of the spaces to the building the extrude masses for adding finer detail for modification. Adding information to these masses such as levels will also be covered.

Before

After
Steps:
1. Open file ‘01 Part 4_B’.
a. Create layers to associate the images and building footprint DWG to maintain a clean environment for before modelling the building masses.
b. Select the dialog box for layers an select the plus symbol. This will then create a layer. Then can then be renamed: Building Footprint, Elevations
c. These imported elements can be assigned to the layers by selecting each and selecting the correct layer drop-down list within the dialog box for layers.
2. Creating the forms
a. Select shortcut ZT for the top view of the environment
b. Start creating the surfaces to each space by selecting the 3D sketching tools.
c. Select the default 3D view (ZD) to make sure you are happy with the created geometry.
d. Make further modification within the 3D view for referencing to the images imported.
3. Object profile and extrusions for removal of 3D mass
a. Select the 3D sketch line tool for modelling on the surface of the mass.
b. When the start of the line has been specified the angle and direction can be decided for desired direction, by selecting the opposite vertical edge to the mass the line will for a profile for the slope of the roof.
c. Select the small triangle surface and push this to the opposite side of the mass, this will then remove the excess not required.
d. Make further refinements to the masses to reflect the geometry references within the imported images.
e. By double left clicking on the mass it will select the whole object. This can then be assigned for levels which we created at the beginning of this tutorial. Navigating to the properties dialog box you will see a tick box for ‘Use levels’. Select this and the levels create will be automatically applied to the building mass we have created.
f. This will then feedback the Gross Area total.
g. Click Save
Summary
This activity covered the process to start building your 3D masses of referenced images to provide a design option of this project. It has enabled the designer to add further details to the object after the main form has been developed. Further details were covered for adjusting and modifying these forms to suit the desired profiles. We concluded the activity with how to assign levels and access the useful data to get feedback on the current design.
How to buy
Privacy | Do not sell or share my personal information | Cookie preferences | Report noncompliance | Terms of use | Legal | © 2025 Autodesk Inc. All rights reserved
Sign in to start learning
Sign in for unlimited free access to all learning content.Save your progress
Take assessments
Receive personalized recommendations
May we collect and use your data?
Learn more about the Third Party Services we use and our Privacy Statement.May we collect and use your data to tailor your experience?
Explore the benefits of a customized experience by managing your privacy settings for this site or visit our Privacy Statement to learn more about your options.