Calculating reinforcement in Robot
Any referenced datasets can be downloaded from "Module downloads" in the module overview.
Calculating reinforcement in Robot - Exercise
In this practice, you will step through the process of assigning in Robot the reinforcement parameters for the slab and calculating the required reinforcement for it.
- Open Autodesk Robot Structural Analysis Professional 2020.
- Open in it the project STRUCTURAL_after steel design.rtd.
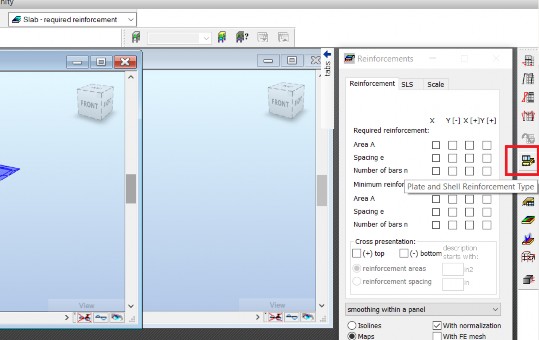
- Select the RC Design > Slab – required reinforcement layout, as marked below.
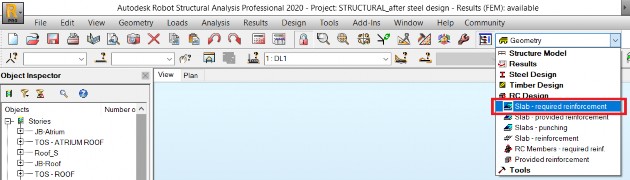
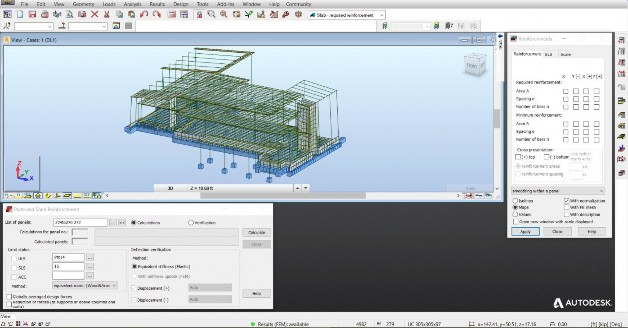
- This screen layout is composed of a graphic View in the left-top part, the Plate and Shell Reinforcement calculations dialog-box in the left-bottom part and the Reinforcement results dialog-box on the right side.
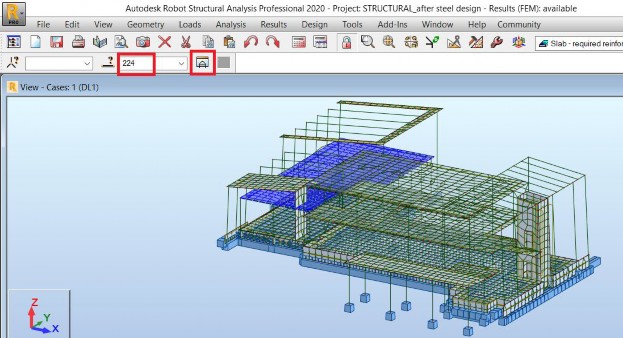
- Input the panel number 224 into the field of bar and panel selection and use Enter from the keyboard to accept and select this panel. Use the Edit in New Window icon to open a new graphic window, showing only the selected panel.
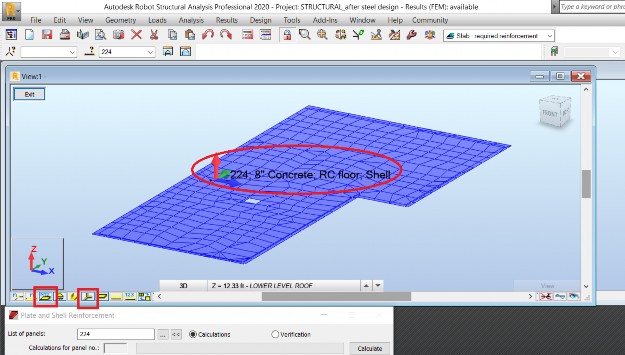
- Resize the new window and zoom in to the selected panel. Click the Panel Descriptions icon at the bottom of the graphic viewer to display the description of the panel containing its number, thickness label, RC design parameters and panel calculation model. Click also the Local Systems icon at the bottom of the graphic viewer to see the local coordinate system of the panel.
- Select the Plate and Shell Reinforcement Type icon from the right-side vertical toolbar.
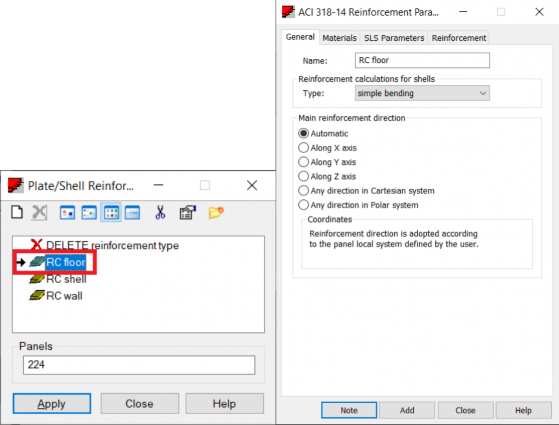
- It results in displaying the Plate/Shell Reinforcement dialog box. It can be noticed that the RC floor type, assigned to panel 224, is displayed here. Double-click it to open reinforcement parameters dialog box corresponding to this type for the active RC design code.
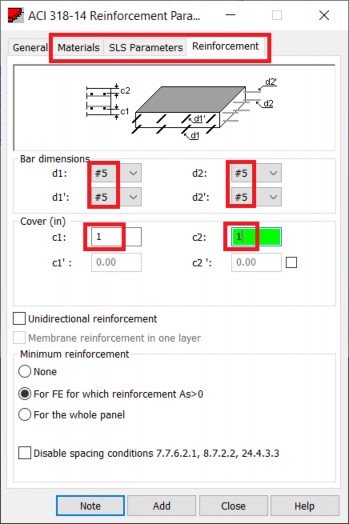
- See the contents of the Materials and SLS Parameters tabs of this dialog box. Finally, in the Reinforcement tab, select #5 bar dimensions and define 1 inch cover values.
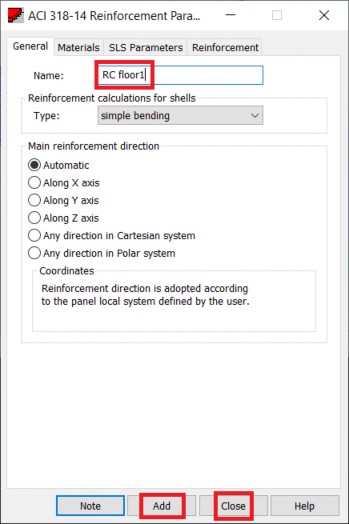
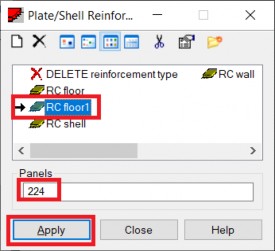
- Return to the general tab of this dialog box, change the name of the reinforcement type to RC floor1, select Add, and Close.
- It can be noticed in the Plate/Shell Reinforcement dialog box that the new type RC floor1 was added and it is active and that the list of selected panels (224) was automatically transferred to the Panels field of the dialog box. Select Apply to assign this type to the selected panel.
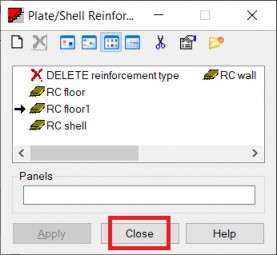
- Select Close to close the dialog box.
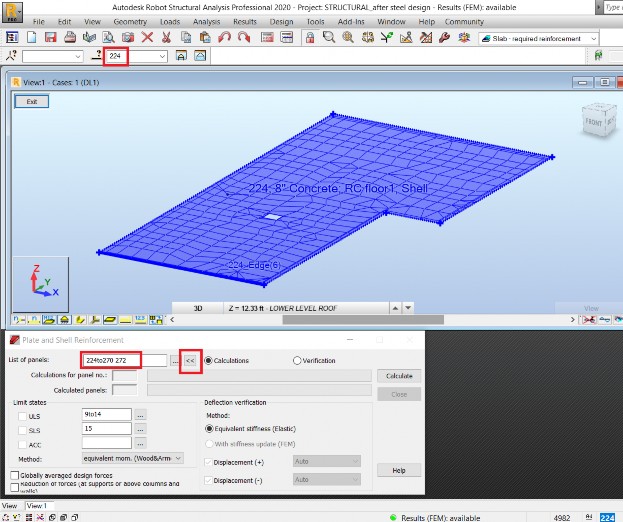
- Select again the panel 224 as in point 5. above. Use the icon << to transfer the current selection of panels to the calculation dialog box.
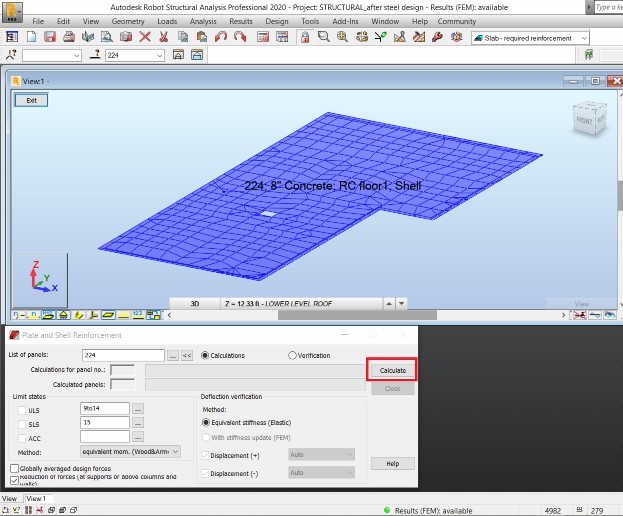
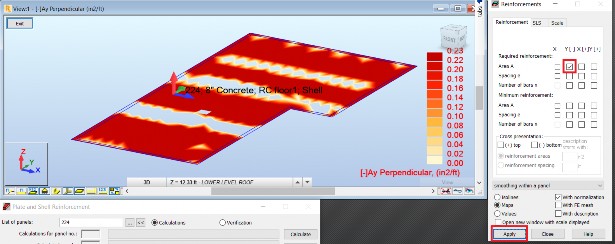
- Select the Calculate button to calculate required reinforcement for specified panel, combinations and calculation method. Close the Calculation Messages dialog box displayed after calculations.
- Activate the bottom reinforcement in local Y ([-]Ay) and select Apply to display it.
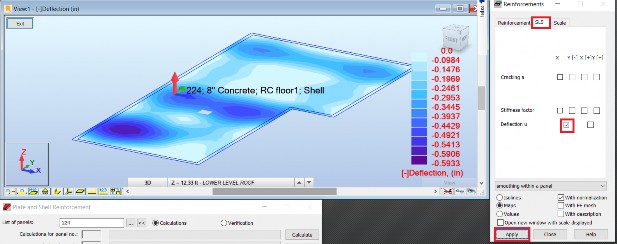
- Switch to the SLS tab of the Reinforcement results dialog box, activate deflection, and select Apply to display it. The long-term deflection is displayed.
- Save the model with a new name using File > Save As… from the pull-down text menu.