Create a flush book for a zone
Any referenced datasets can be downloaded from "Module downloads" in the module overview.
Step-by-step guide
When working in InfoWater Pro UDF, it can be helpful to create a field journal, or flush book, for a flush zone. A flush book consists of a series of graphical maps and technical data sheets to guide field personnel in implementing developed UDF sequences.
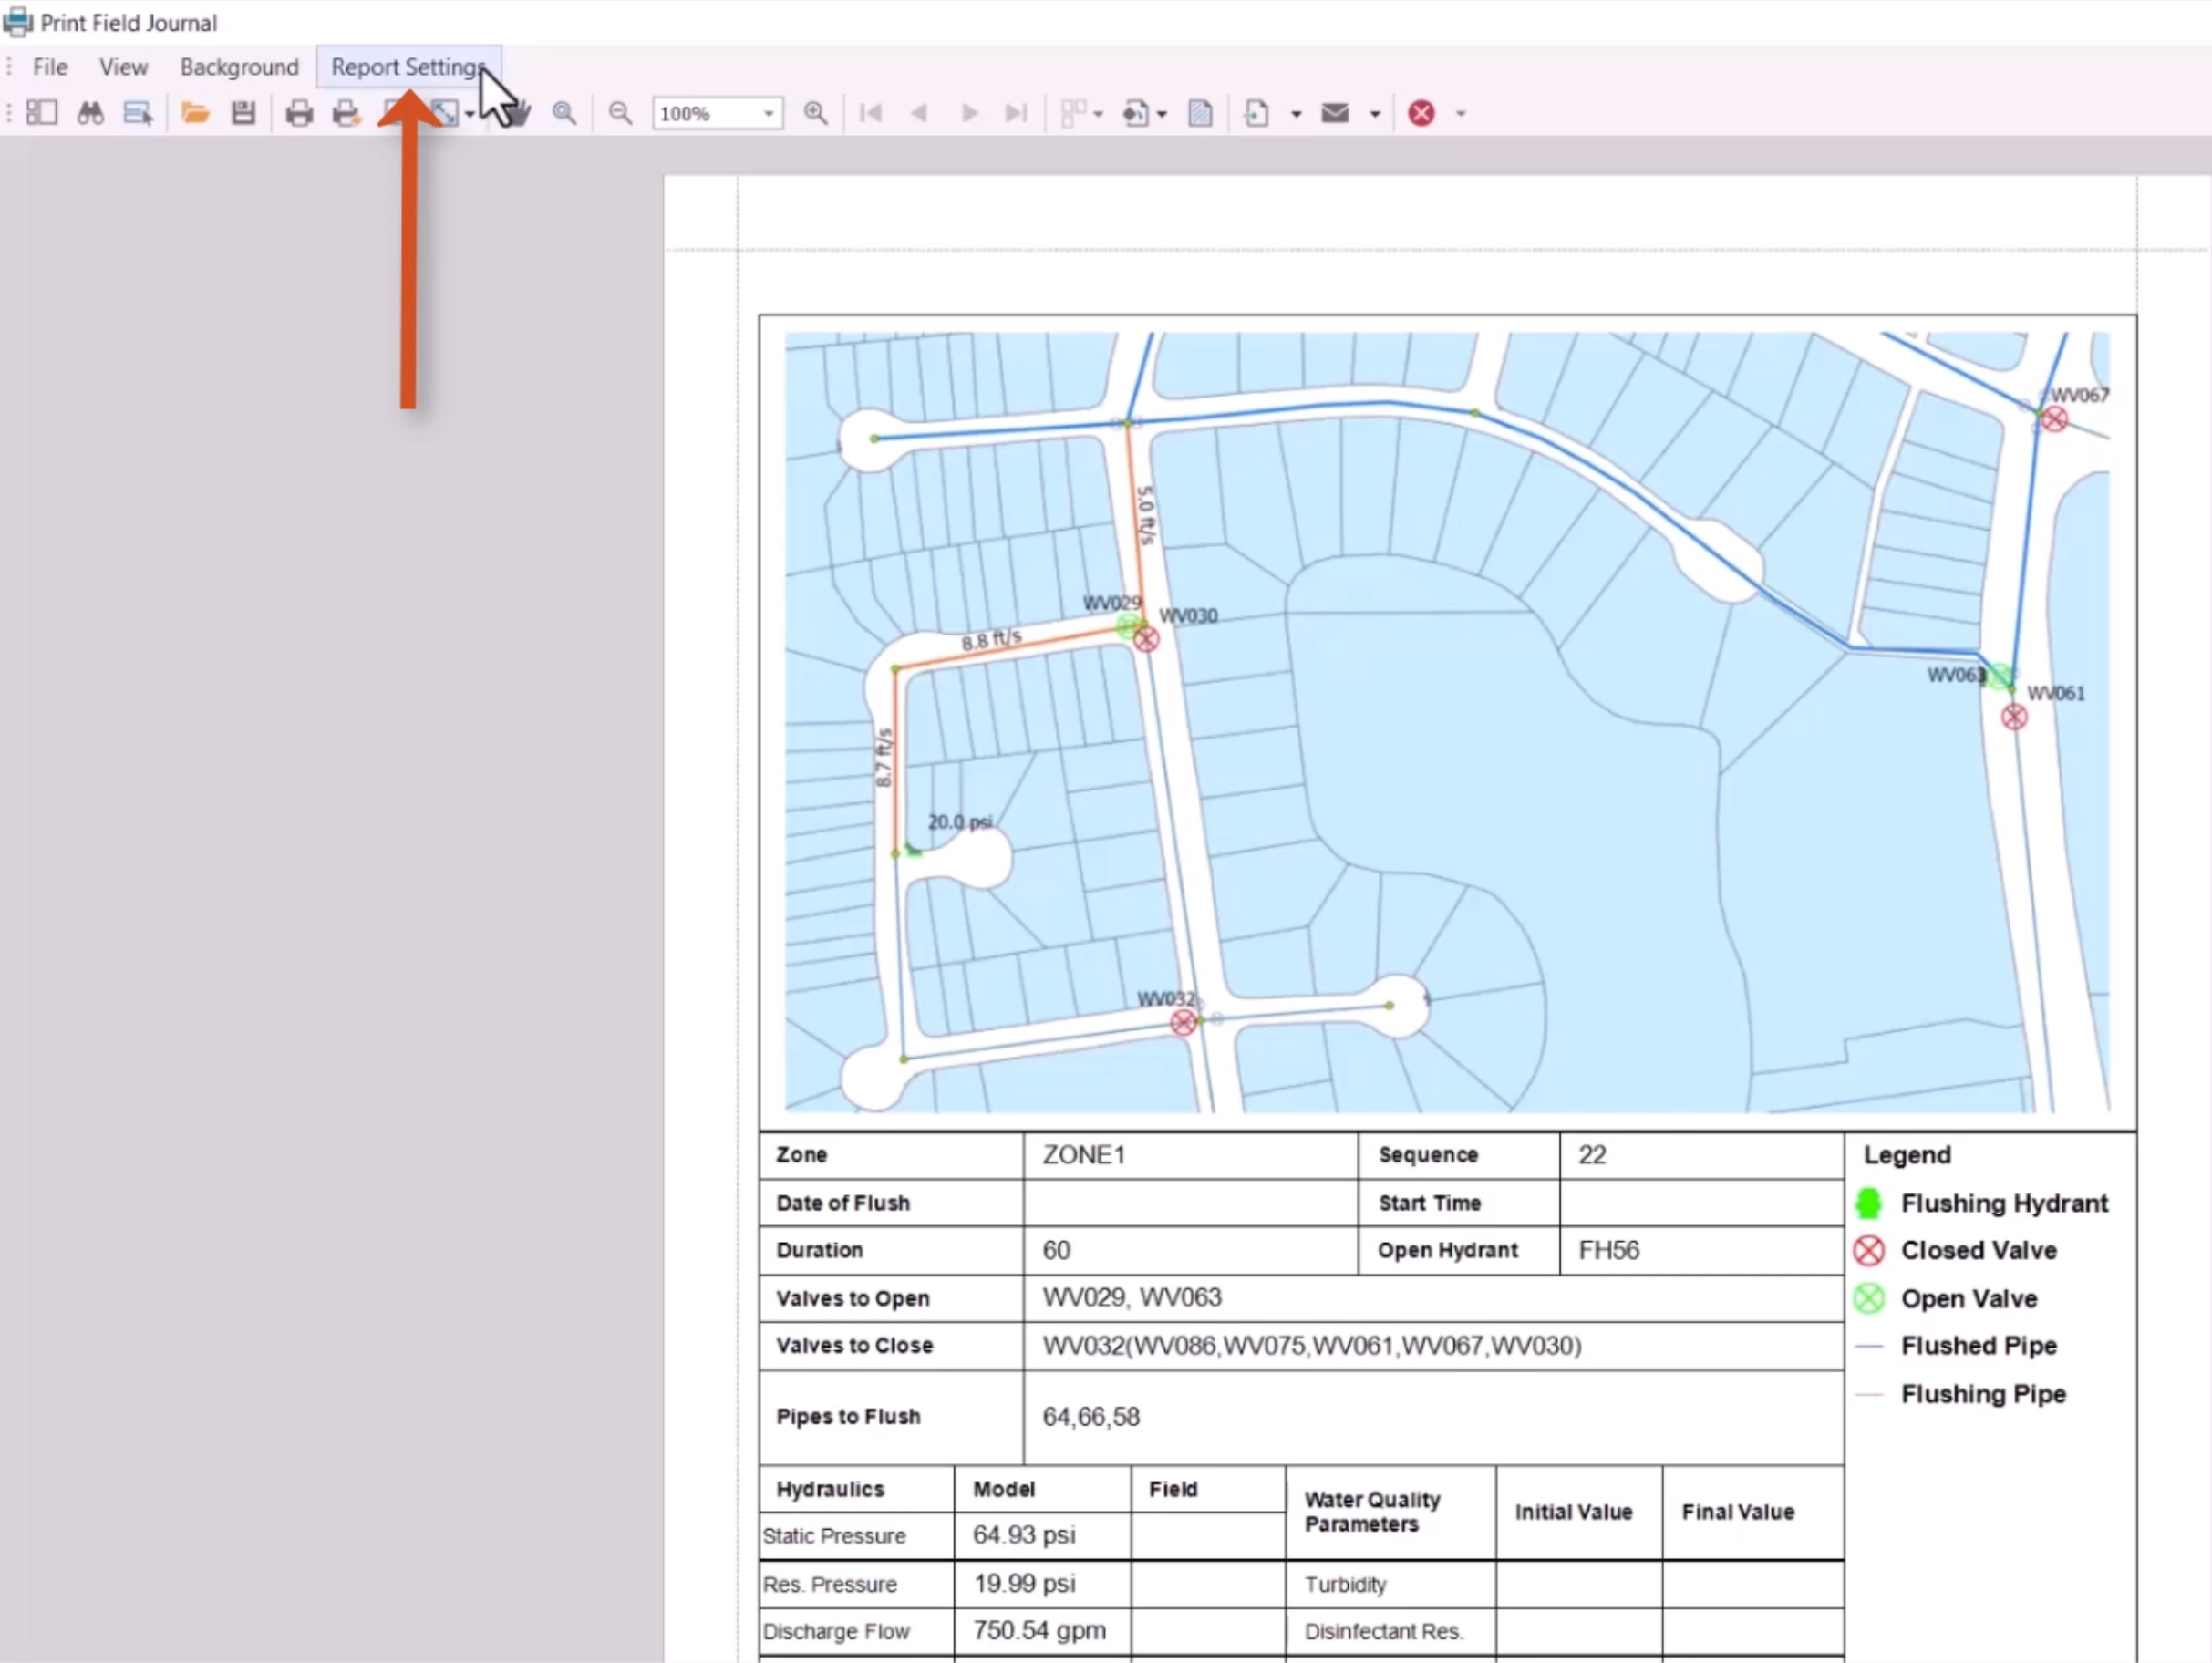
For every flush zone analyzed by InfoWater Pro UDF, the field journal creates a map for each flush sequence, detailing the fire hydrants and valves that need to be manipulated for systematic, unidirectional cleaning. Information including pressure, flow, flushing volume, flushing duration, and water quality is also included for each sequence.
To create a flush book:
- Open an InfoWater Pro UDF model with a flush zone created and at least one successful flushing sequence run.
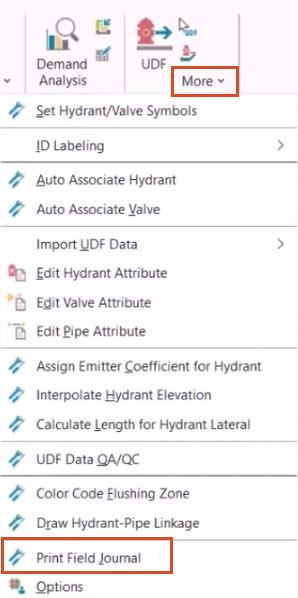
- From the InfoWater Pro ribbon, UDF panel, expand the More drop-down and select Print Field Journal.
- In the Select Sequence Range dialog box, select the range of sequences to include in the flush book.
- If needed, customize the paper size, layout, and page margins.
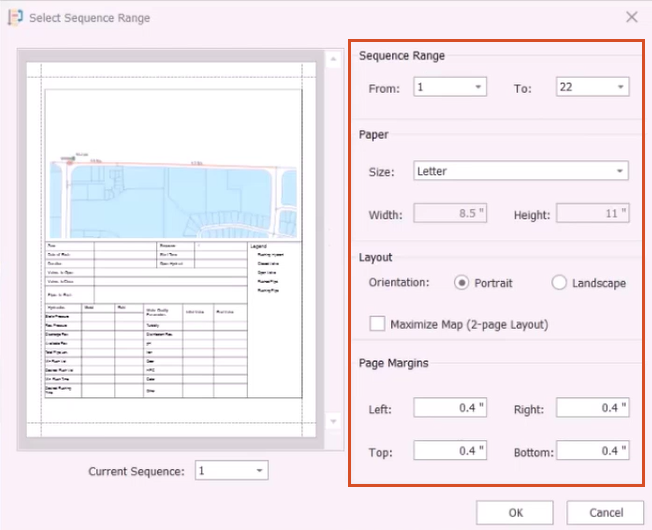
- Click OK.
The program exports a map for each sequence in the specified range. The Message Board window provides information about each sequence, including residual pressure, shear stress, and velocity measurements for critical map elements.
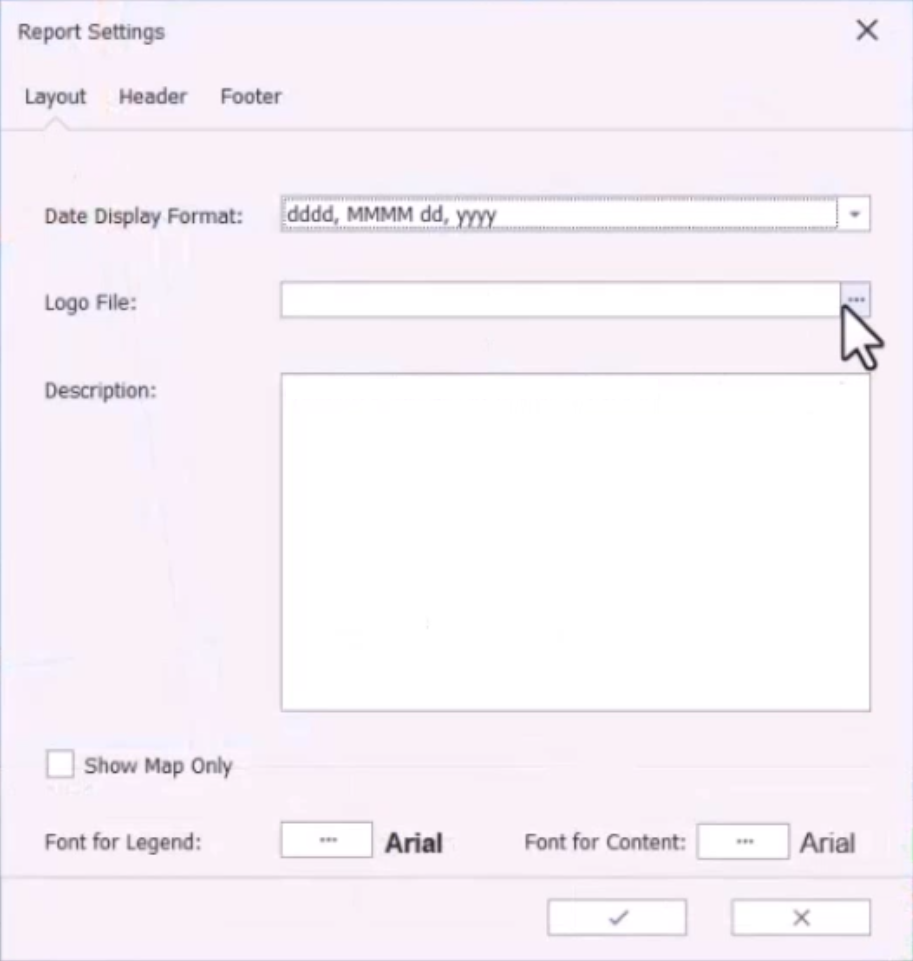
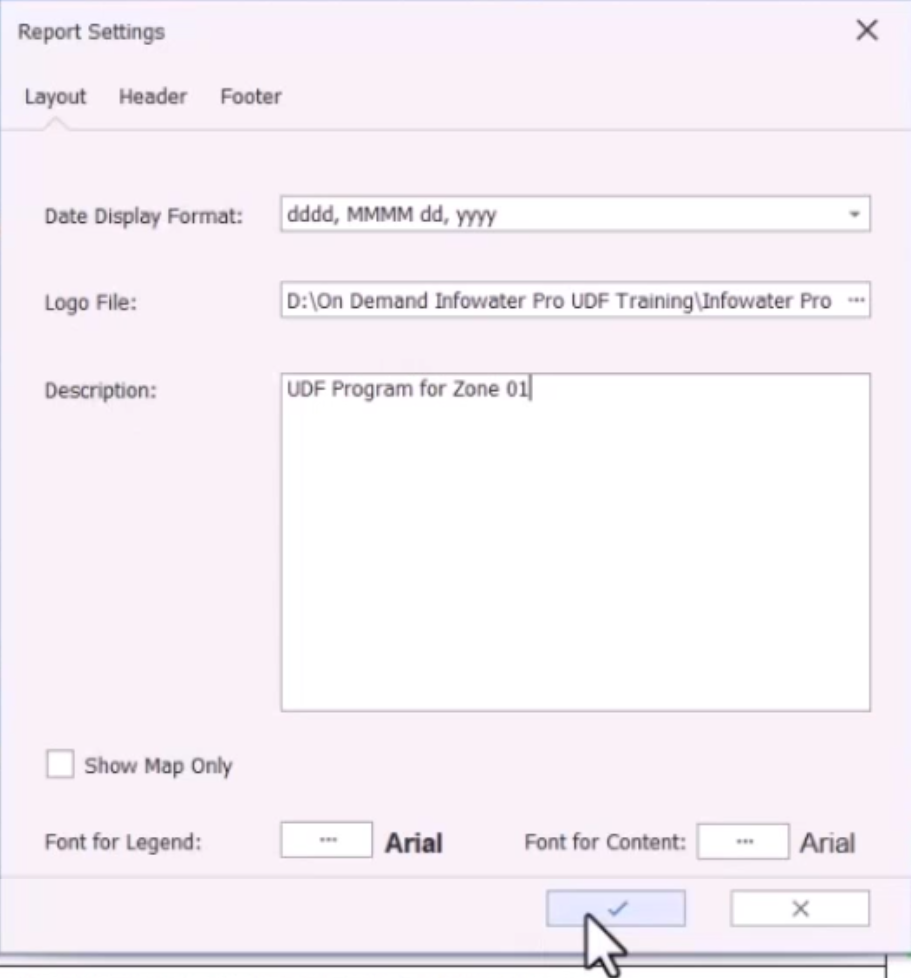
- In the Print Field Journal window, click Report Settings.
- In the Report Settings dialog box, Layout tab, use the dropdown to adjust the Date Display Format.
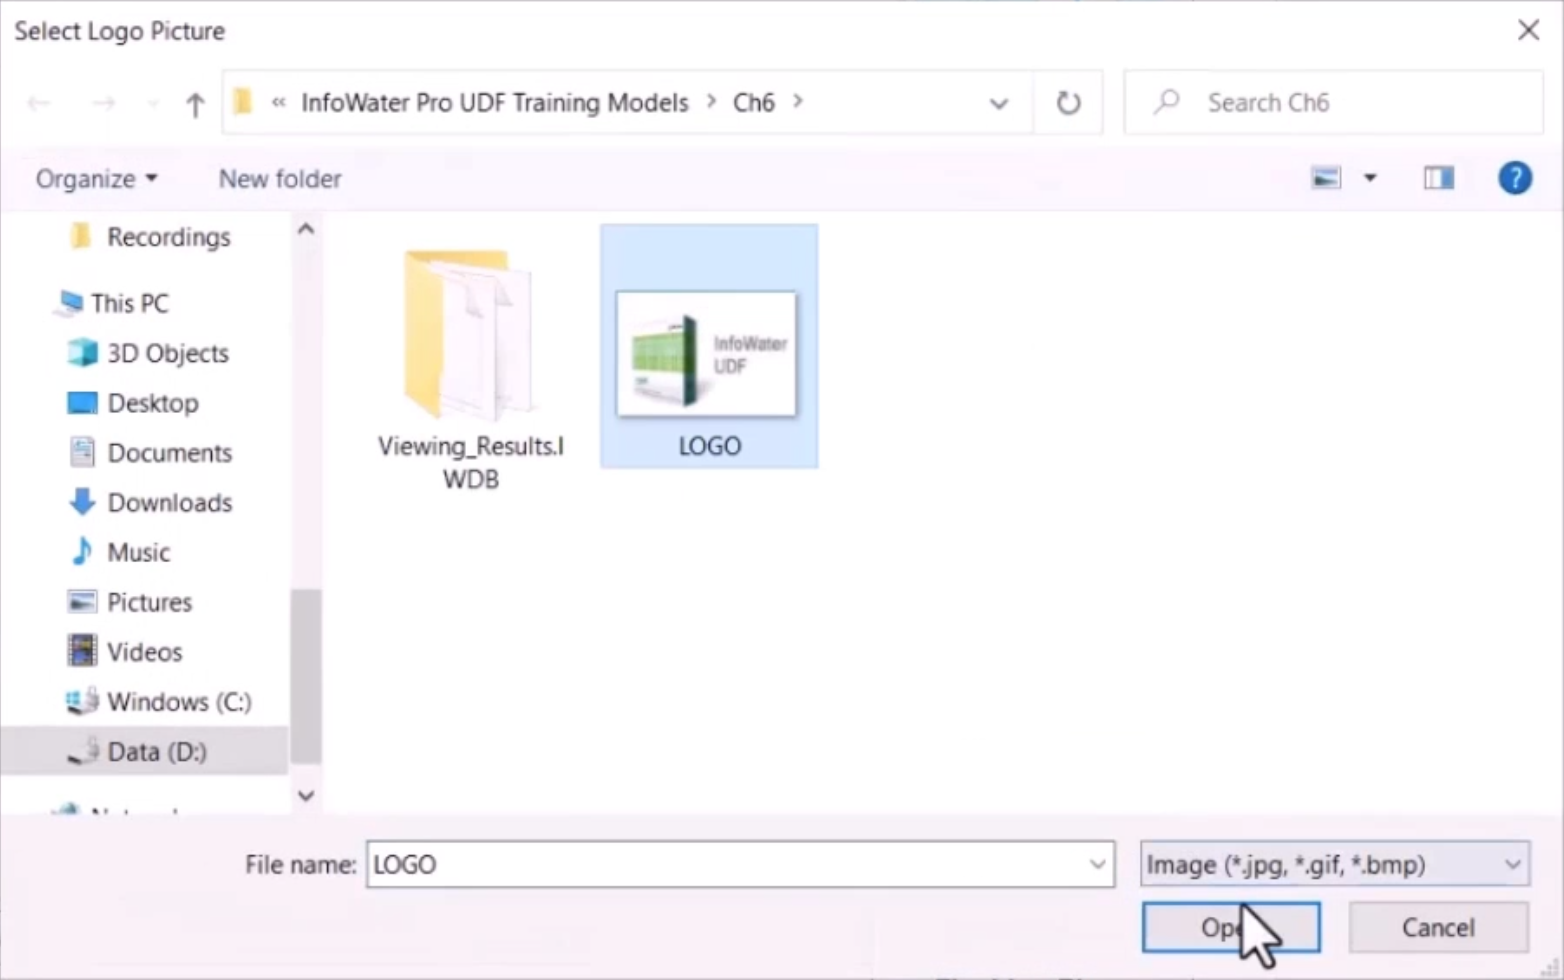
- Next to the Logo File field, click Browse (…).
- In the Select Logo Picture dialog box, navigate to and select a file.
- Click Open.
- Back in the Report Settings dialog box, type a Description.
Note the additional options to adjust the legend and content fonts.
- If needed, open the Header and Footer tabs to customize information visible within each.
- When finished, click the check mark to save the changes and close the dialog box.
To change page setup details, if needed:
- In the toolbar, click Page Setup.
- In the Page Setup dialog box, customize the paper size, orientation, and page margins.
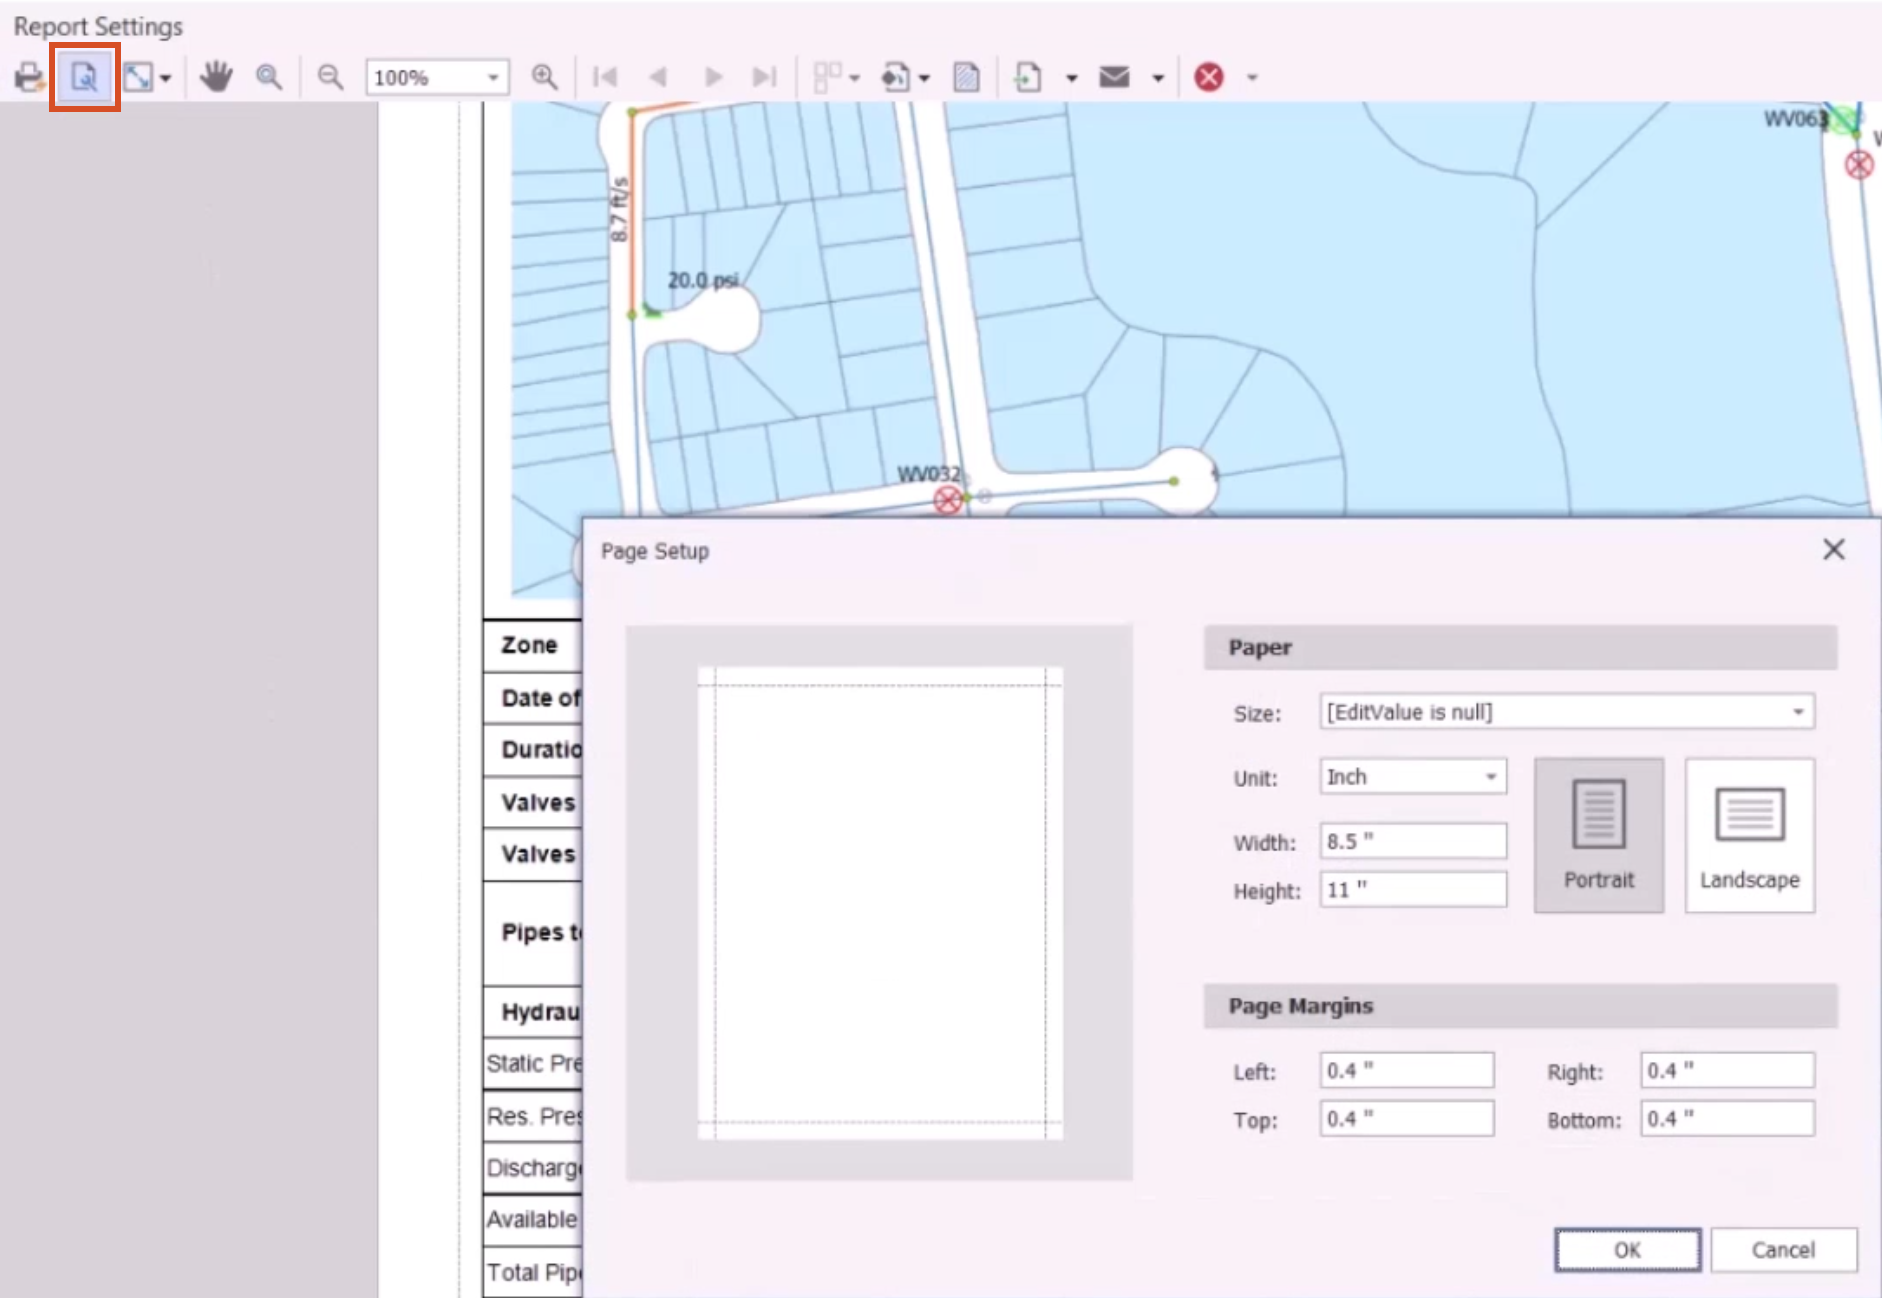
- Click OK to update the layout of the flush book.
- From the toolbar, click Print to print a hard copy of the journal.