Additional information on Civil 3D style management
As discussed in the previous videos, the three main procedures for exchanging Civil 3D styles are:
- Referencing styles using the Reference command: This is ideal for referencing styles within a project team to ensure consistency project-wide. Styles are referenced and can be updated if any changes are made to the source file.
- Importing styles using the Import command: This is ideal for importing multiple styles.
- Dragging and dropping styles into your drawing using the Toolspace.
The first and third methods are demonstrated in the previous videos.
The second method uses the Import command, which enables you to import the styles from a source drawing into the host drawing. The Import Civil 3D Styles palette lists the styles that are available for import and displays the style differences between the source and the host drawing. Each style collection lists three subcategories: styles to be added, styles to be deleted, and styles to be updated, as shown below.
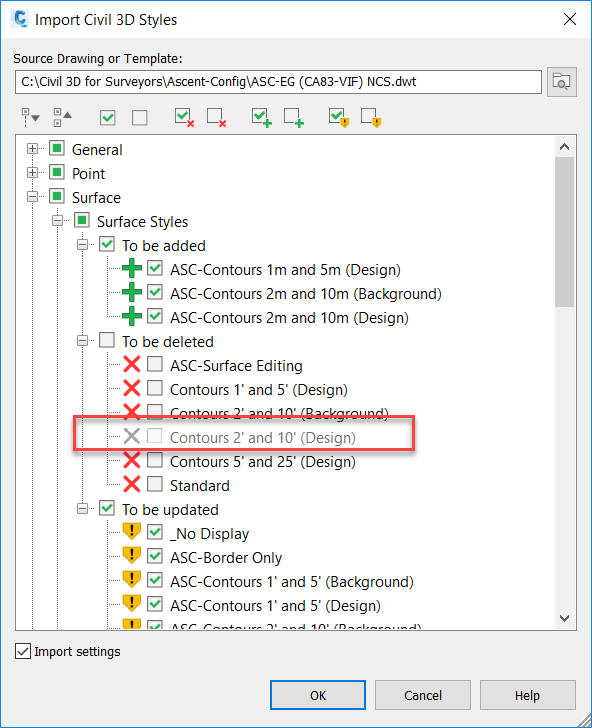
You can select which styles you want to import. New styles are added to the host file, and existing styles in the host file are overwritten. Styles that do not reside in the importing file but do reside in the host drawing (but are not in use in the host drawing) will be deleted in the host drawing.
For example, in the image above, the Contours 2' and 10' (Design) style does not exist in the importing file but is being used in the host drawing, so it is grayed out and cannot be deleted in the host drawing.
The imported styles are not referenced, so there is no connection between the file they originated in and the host file. If styles change in the original file, the styles in the host drawing do not automatically update and there are no notifications of any type to indicate that changes have been made.