Creating a project
Open an existing project or create a new project and initialize the link between ArcGIS Pro and InfoWater Pro.
Step-by-step:
When you launch either ArcGIS Pro or InfoWater Pro, the ArcGIS Pro start page appears. From this page, you can start new projects or open existing projects.
To open an existing project:
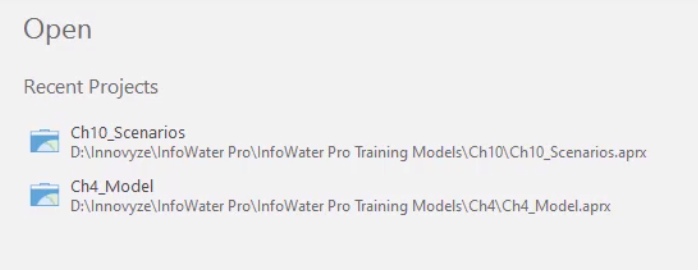
- From the ArcGIS Pro start page, locate the project in the Recent Projects list, click Open another project to access all projects, or open the relevant .aprx file directly from your file browser.
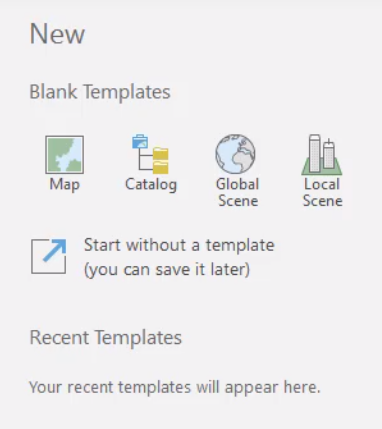
- To create a new project, from the ArcGIS Pro start page, under Blank Templates, choose a default template, such as Map.
- In the Create a New Project dialog box, name your project.
- Browse to the location you wish to save your project.
- Click OK.
- In ArcGIS Pro, Map ribbon, click Add Data > Data.
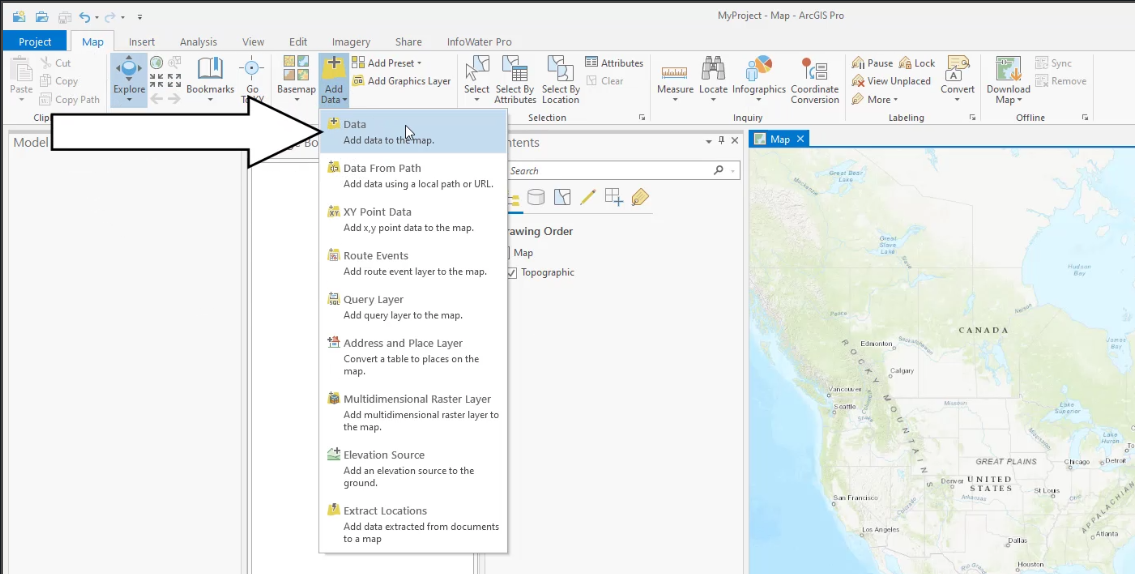
- From the Add Data file browser, select the shapefile you want to add to your project.
- Click OK.
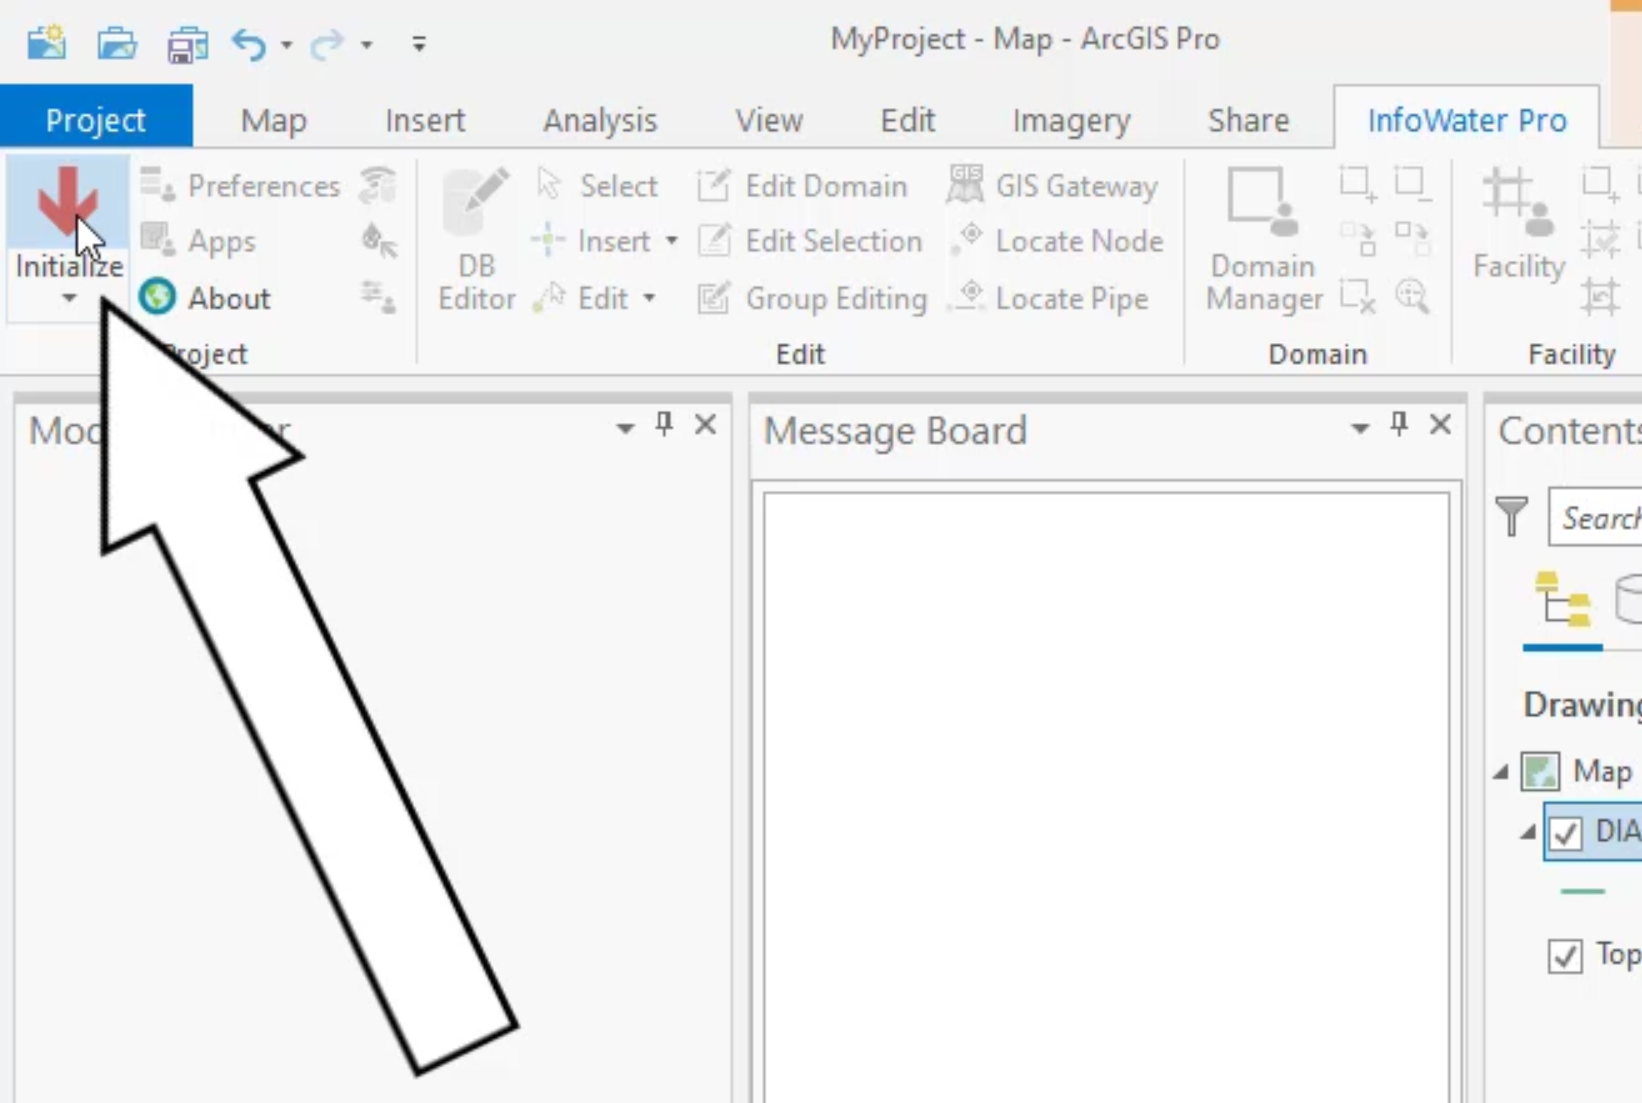
- On the ribbon, InfoWater Pro tab, Project panel, click Initialize to create the necessary databases to store model information and establish links between the ArcGIS Pro file and the InfoWater Pro database.
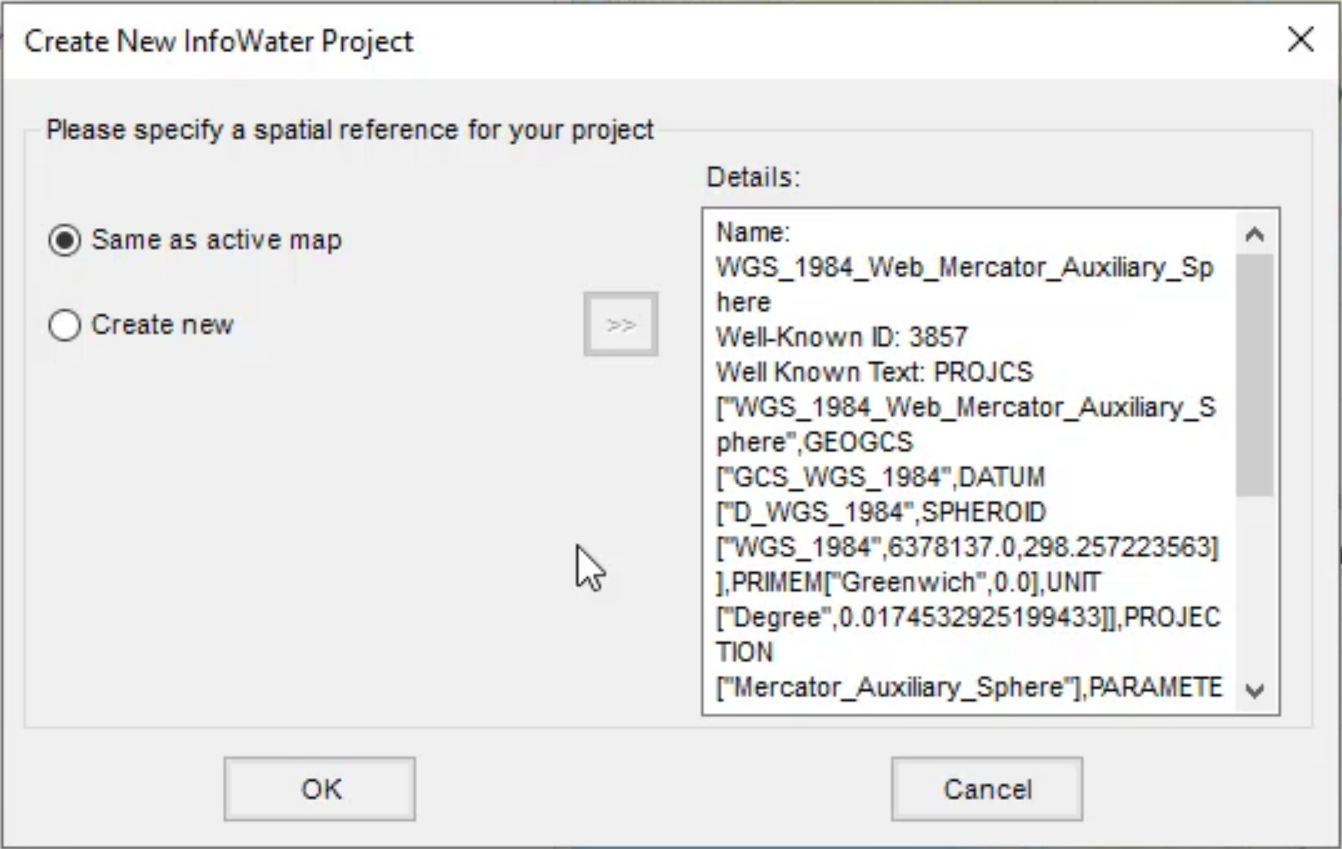
- In the Create New InfoWater project dialog box, for the spatial reference, select Same as active map.
- Click OK.
- Save your project.