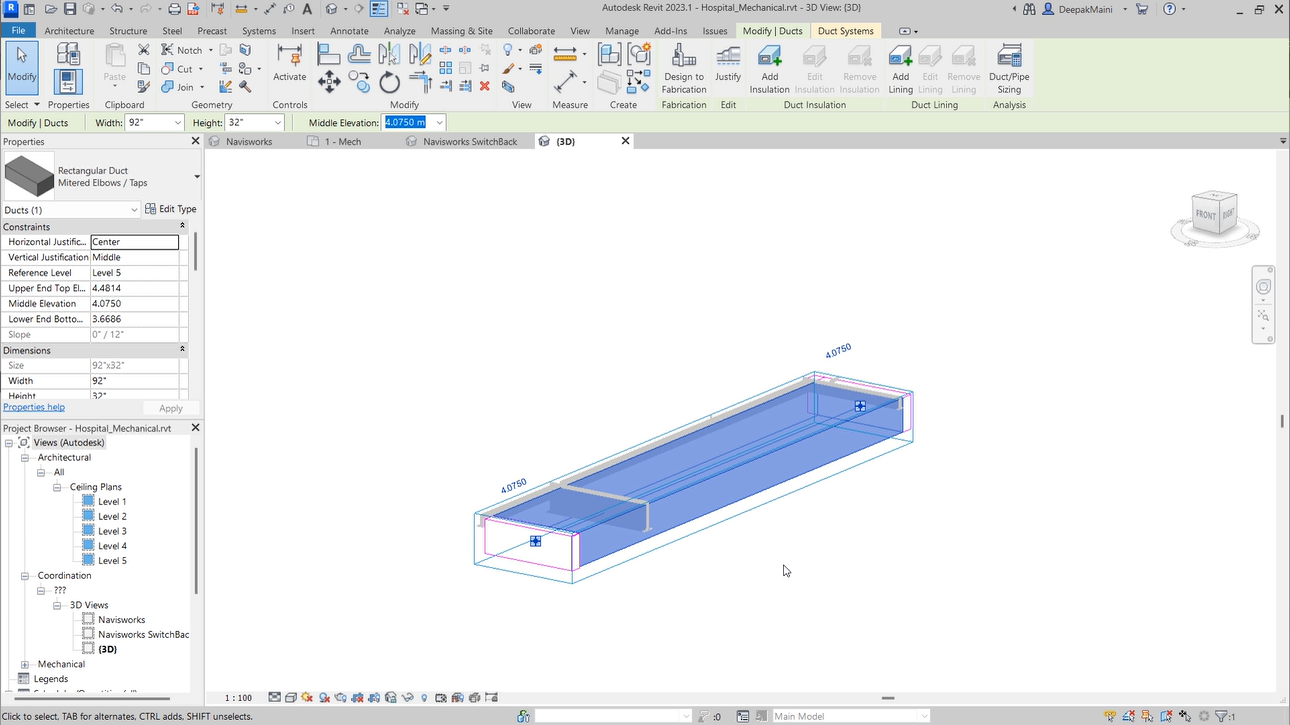
Review Navisworks Clashes in Revit
Any referenced datasets can be downloaded from "Module downloads" in the module overview.
Review Navisworks Clashes in Revit – Practice Exercise
Task 1: Enable the SwitchBack Functionality in Revit
- Start Revit.
- Open the Mechanical Revit model from the local drive.
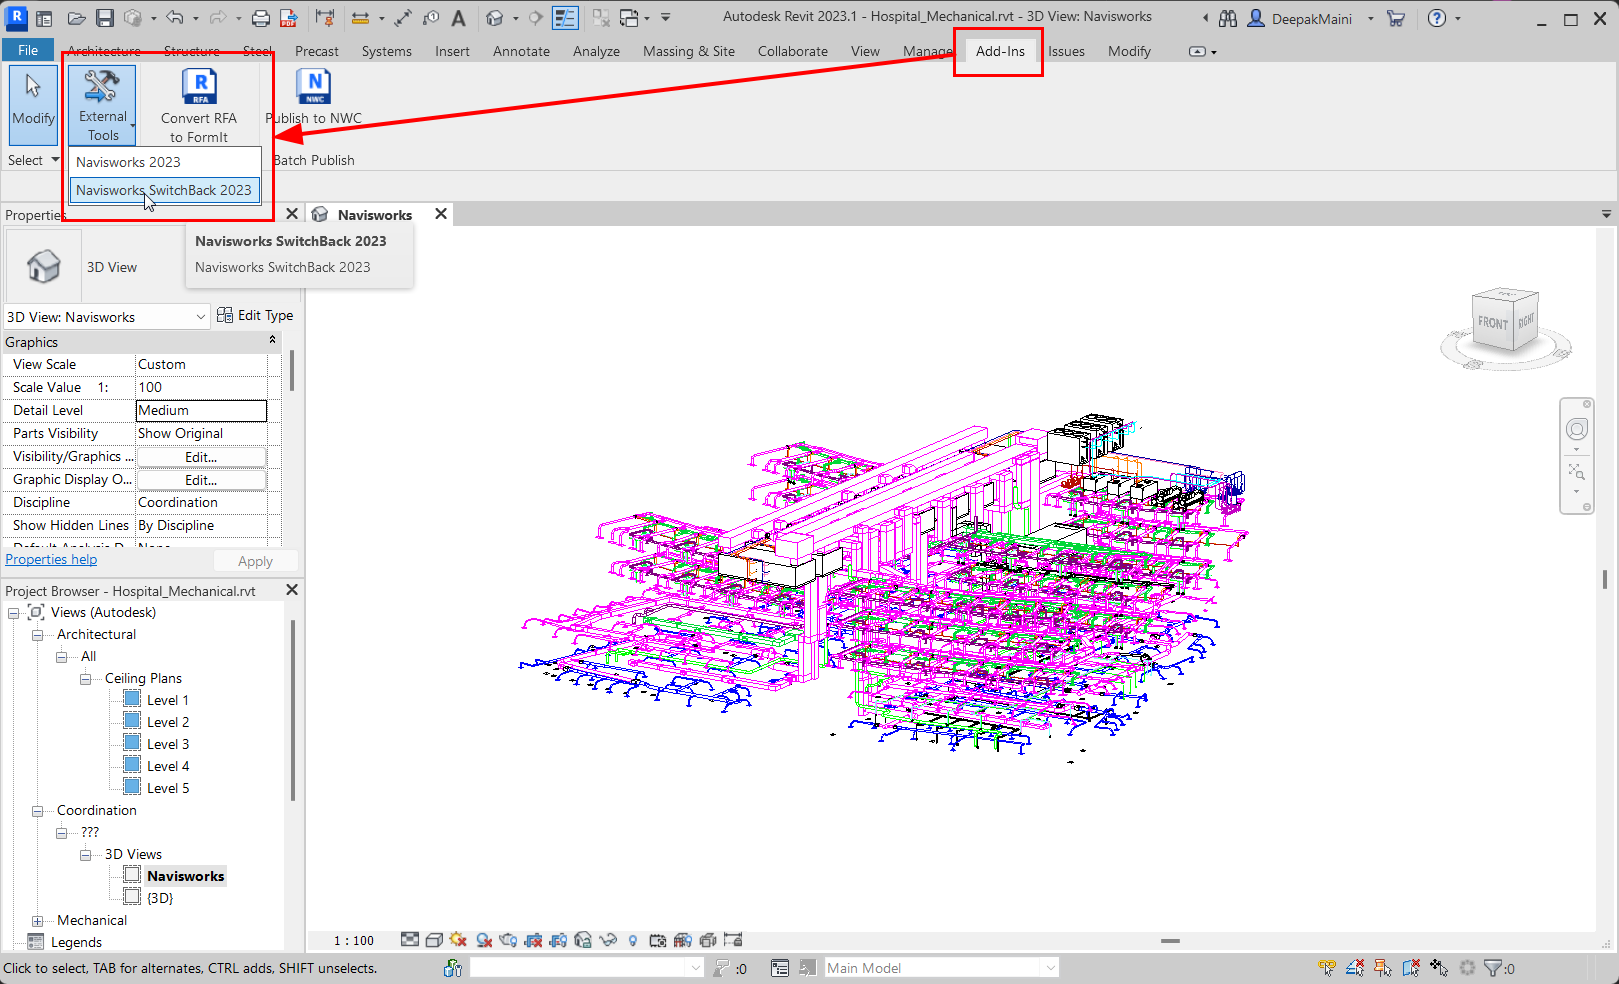
- From the Add-Ins ribbon tab > External Tools flyout, click Navisworks SwitchBack, as shown below:
Task 2: Link Structure NWC File as a Coordination Model
- From the Insert ribbon tab, click Coordination Model, as shown below:

- From the Positioning drop-down list on the bottom left, select By Shared Coordinates.
- Click the Add button and then use the Desktop Connector to browse to the Structure folder on the Docs project.
- Double-click on the NWC file in the Structure folder; the file is listed in the Coordination Model dialog box, as shown below:
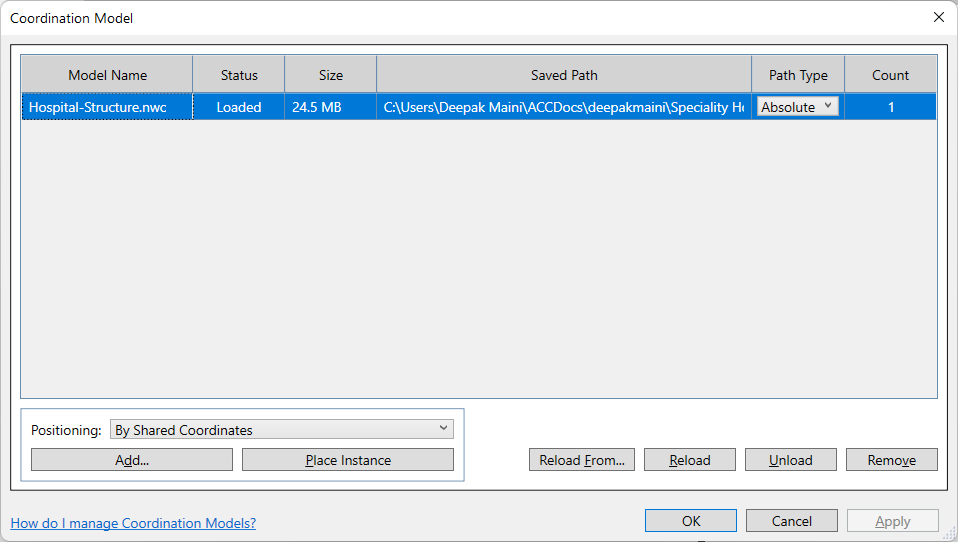
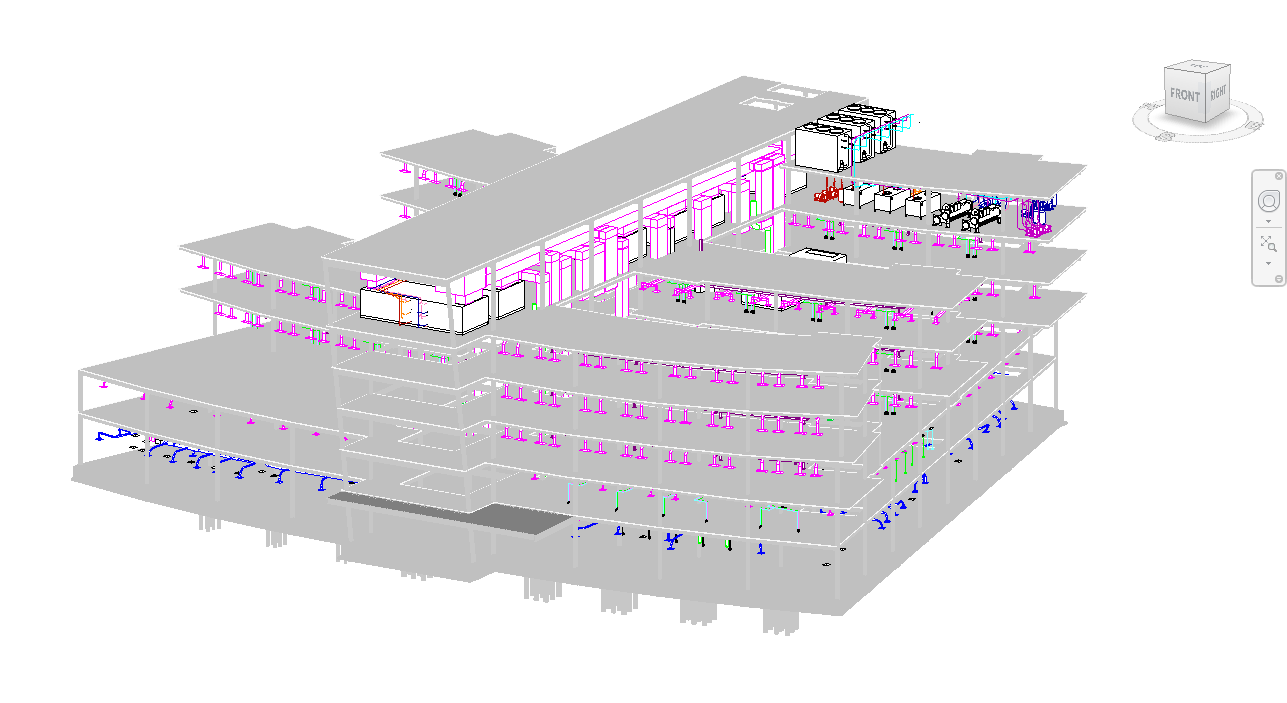
- Click OK in the dialog box; the NWC file is linked to the Revit model as a Coordination Model, as shown below:
Task 3: Using the SwitchBack Functionality to Select Clashing Element in Revit
- Start Navisworks and load the NWD file from the Docs project.
- Click on the clash group relating to the ACC issue you want to resolve, as shown below:
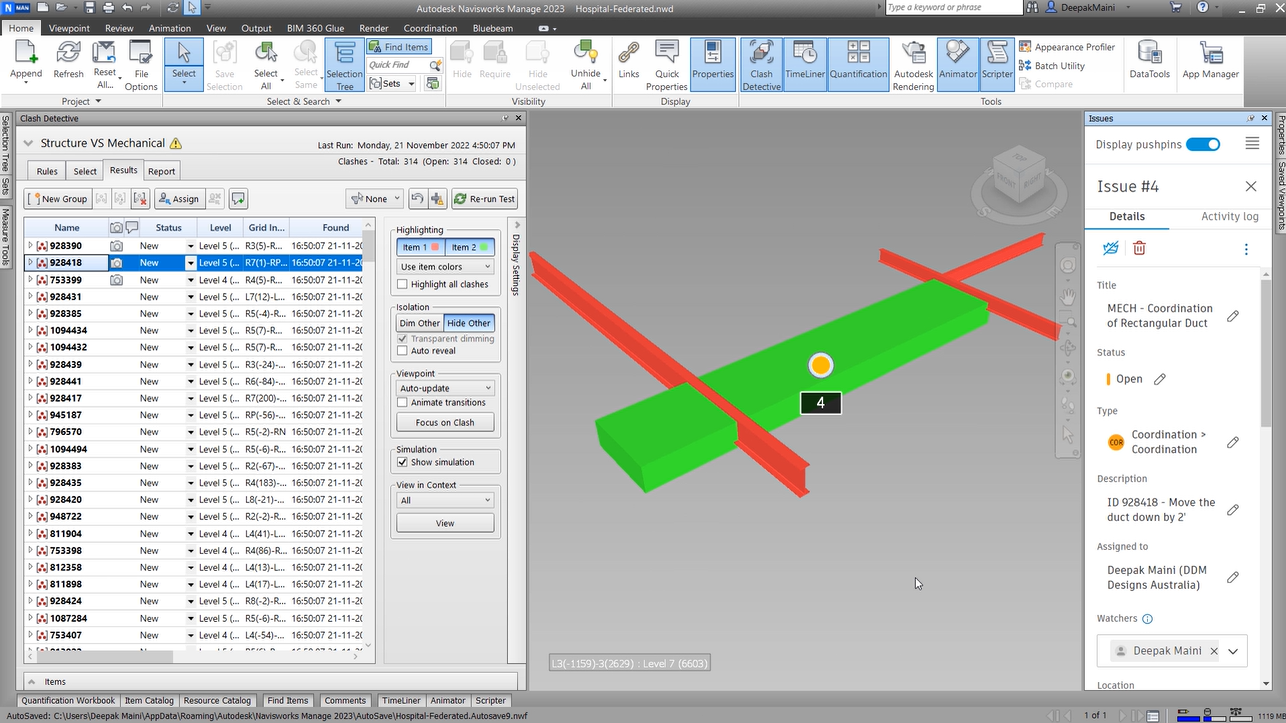
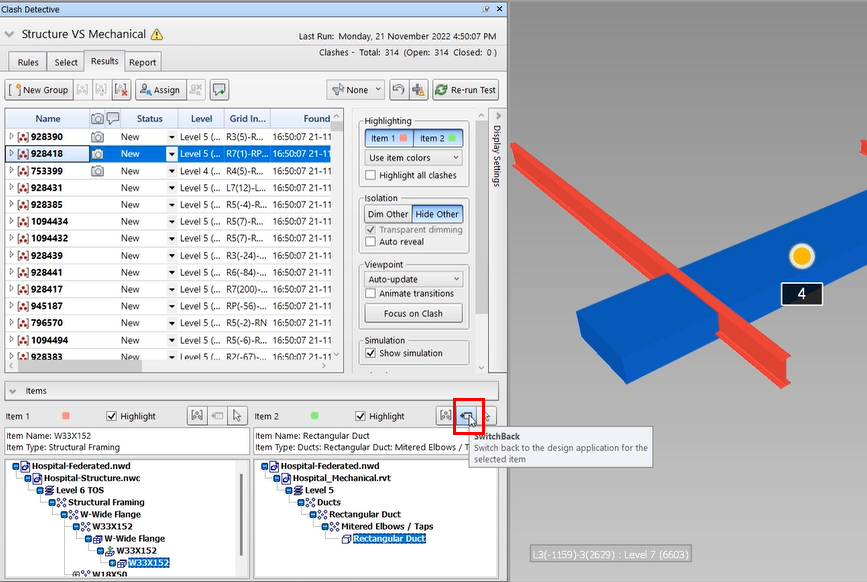
- In the Clash Detective window, expand the Items area from the bottom.
- From the Item 2 area, click on the Select in Scene button to select the clashing duct.
- Next, click the SwitchBack button, as shown below:
- Return to the Revit window and notice the Navisworks SwitchBack 3D view with the duct highlighted.
- Orbit the model to get a better view of the clashing duct, as shown below:
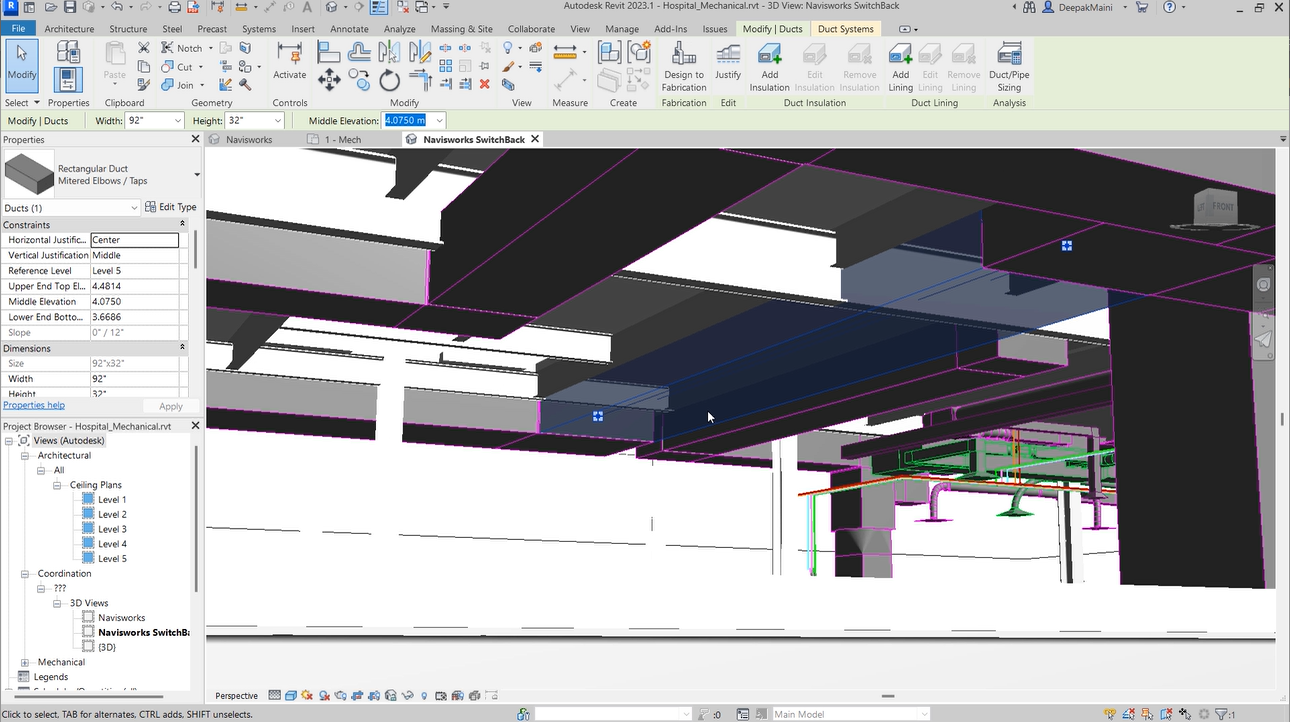
- With the duct still selected, create a section box around it.
- Navigate close to the section box and then adjust it to show only the duct and the clashing structural sections, as shown below:
