Importing MicroDrainage Files
Any referenced datasets can be downloaded from "Module downloads" in the module overview.
Video quiz
Step-by-step:
One useful feature of InfoDrainage is its ability to import old models that have already been created in MicroDrainage, the predecessor to InfoDrainage.
- On the ribbon, Import tab, MicroDrainage panel, click Import Design.

- In the file browser, navigate to where the MicroDrainage file is saved and open it.
- You may receive an import warning notification. Click OK to import the model.
- On the ribbon, in the Rainfall/Pollutants tab, Rainfall panel, select the Rainfall Manager.
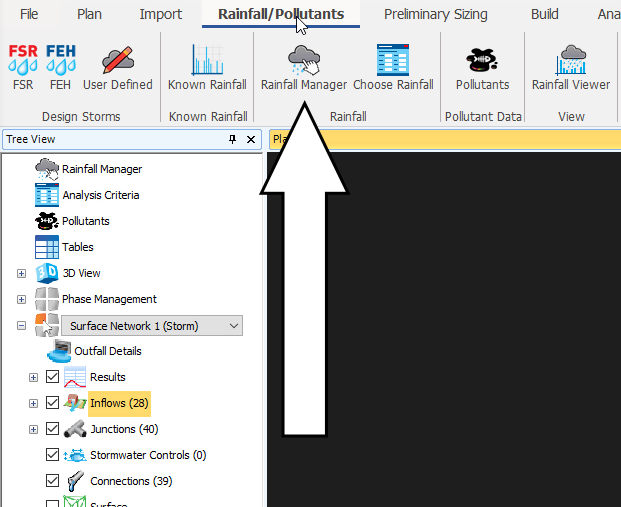
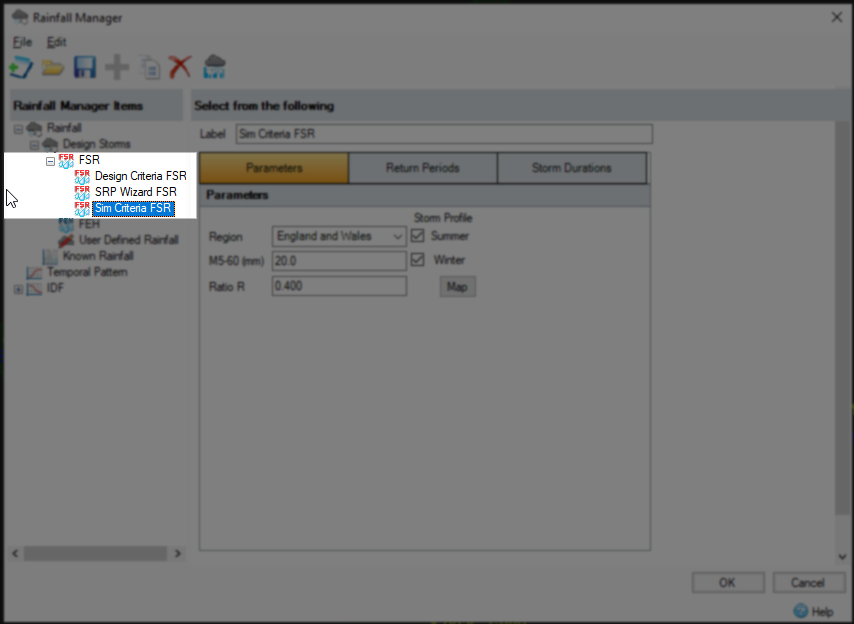
- In the Rainfall Manager dialog box, under Rainfall Manager Items, review each of the FSR nodes and their parameters.
- When finished, Close the dialog box.
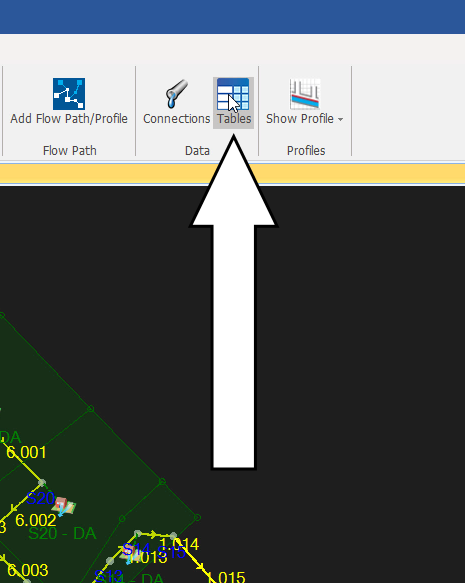
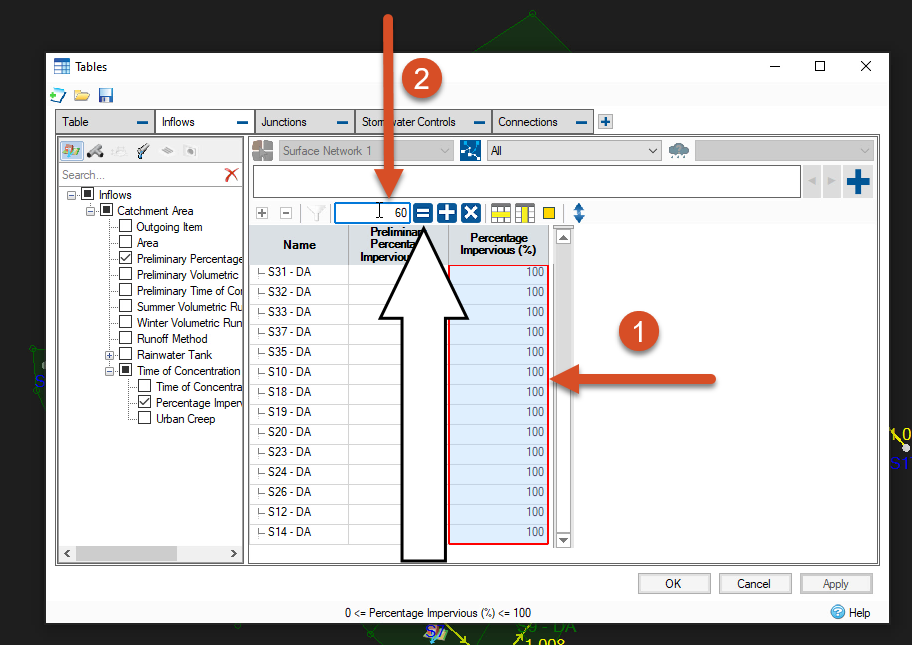
- On the ribbon, Build tab, Data panel, select Tables.
- In the Tables dialog box, click the Inflows
- Expand the Inflows items until you see both the Percentage Impervious and the Preliminary Percentage Impervious.
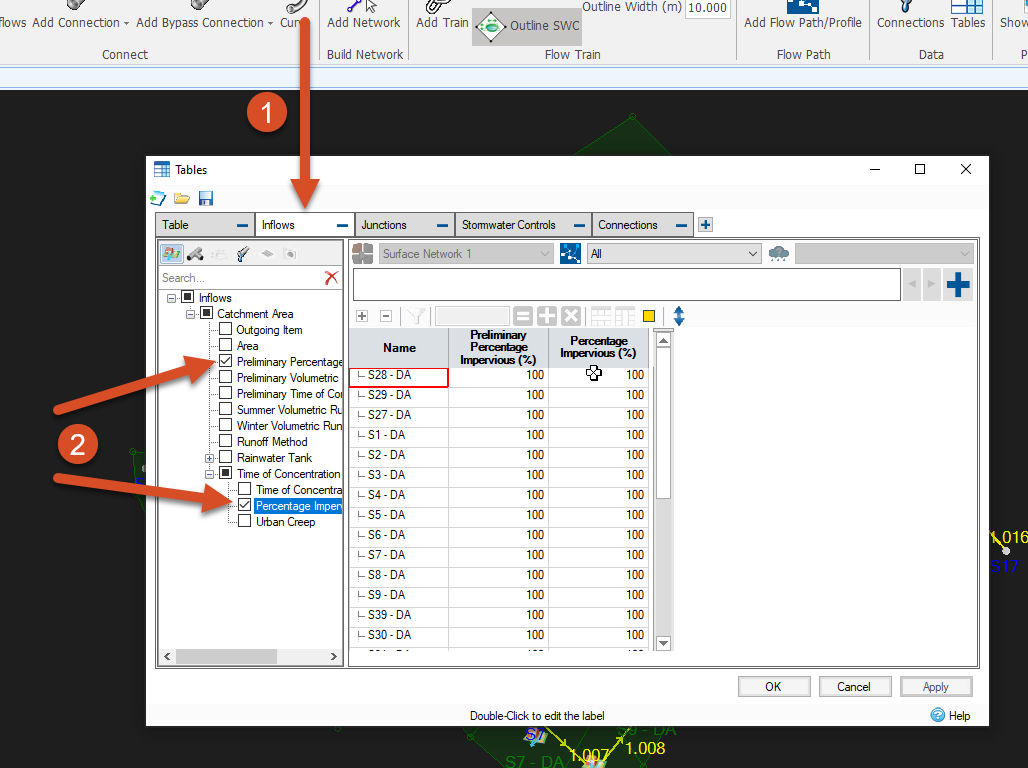
- Click and drag to highlight the whole of the Percentage Impervious column.
- Enter 60 into the value box.
- Click = (equal sign).
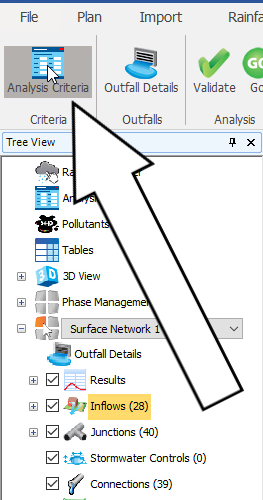
- On the ribbon, Analysis tab, Criteria panel, click Analysis Criteria.
- In the Analysis Criteria dialog box, enable SRP Wizard FSR.
- Disable the Design Criteria FSR.
- Disable Sim Criteria FSR.
- Set the Output Interval to 5 minutes.
- Set the Time Step to Default.
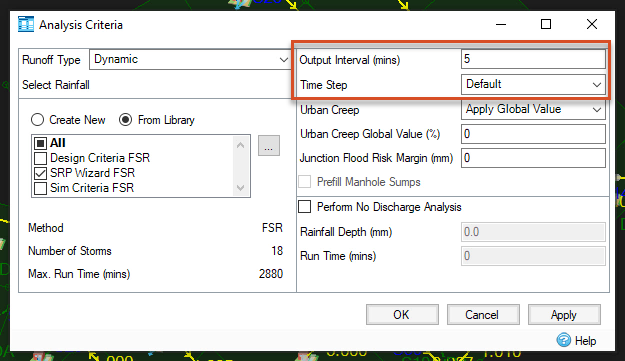
- Click OK.
- On the ribbon, Analysis panel, click Validate.
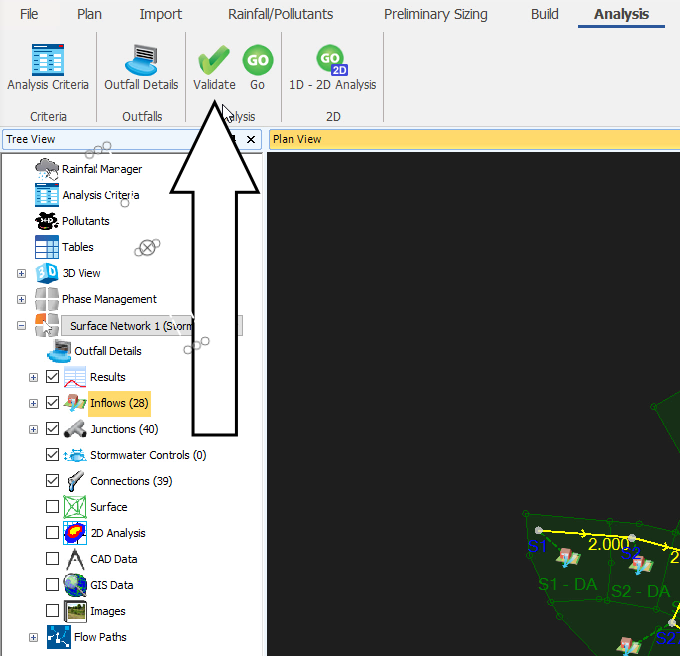
- Review the Validate dialog box to ensure the validation is OK.
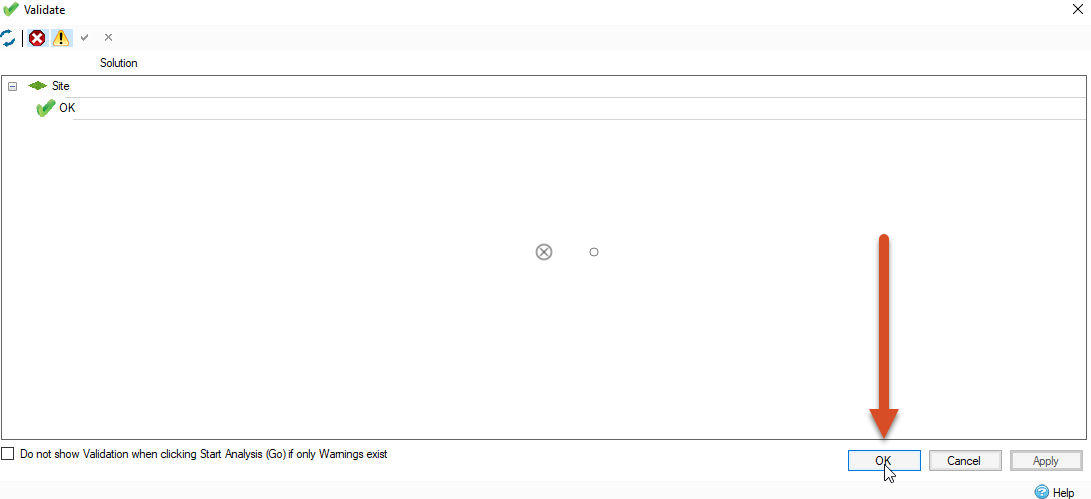
- Click OK to close the Validation dialog box.
- In the ribbon, Analysis panel, click Go.
InfoDrainage will show progress bars during the simulation process, as well as how much time has elapsed. The simulation times can vary, depending on your machine’s capabilities.
- Once the simulation is complete, a Connections Summary dialog box shows details of the results. Click Critical Storm to highlight the impact of the worst simulated storm.
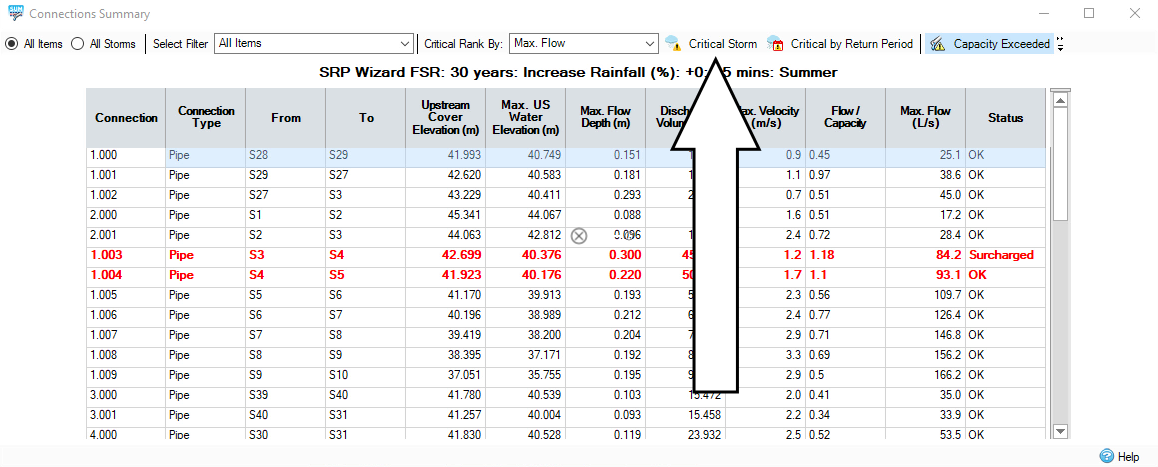
You can then gather and view the results in a variety of ways by selecting the options in the Results tab.
- Save the file.