Creating a surge protection device
Create a surge protection device to control transients in the hydraulic model.
Tutorial resources
These downloadable resources will be used to complete this tutorial:
Step-by-step guide
The objective in transient control is to reduce the magnitude (and if possible, the frequency) of the pressure disturbance. This means avoiding more sudden changes that will exacerbate the existing transient event. Slowly opening and closing valves and slowly starting and stopping pumps can be effective in controlling transients. Additionally, implementing certain devices in a network can alleviate the effects of pressure waves by releasing and replenishing excess positive and negative pressure.
The optimal method to alleviate a surge varies depending on the situation. In this example, a Closed Surge Tank is implemented.
- Open the network.
- From the Model Group window, expand the TS Model group.
- Open the TS Network and TS Control by double clicking TS Network.
OR by dragging it onto the main window.
To set the properties for the surge tank:
- Use the Find Network Objects tool to locate the node with asset ID Surge Tank 1.
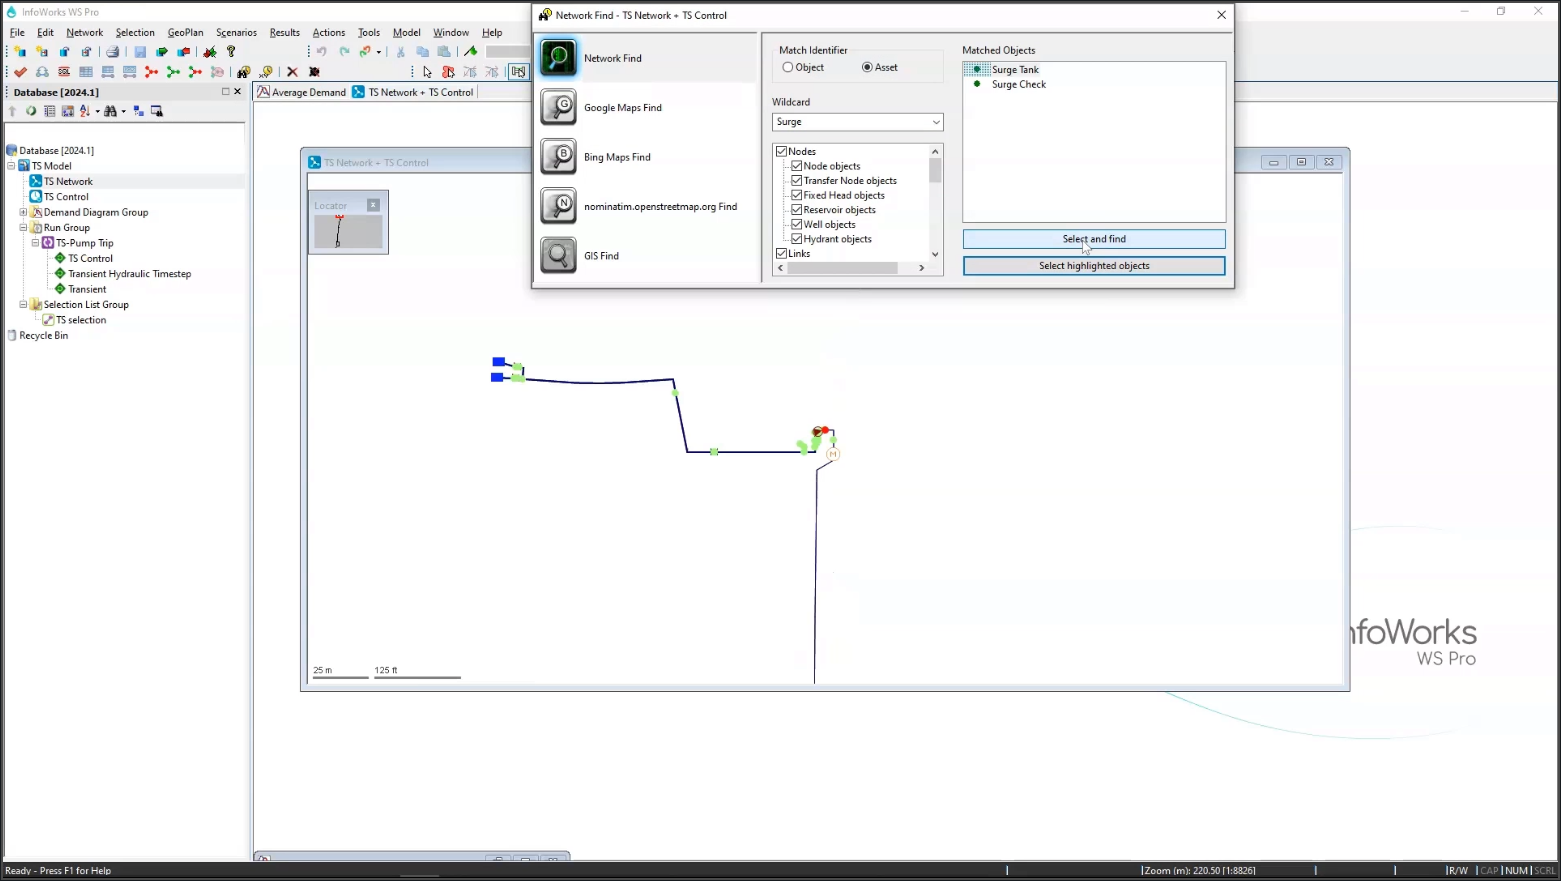
- In the Tools toolbar, click Properties to open the Properties window for the node.
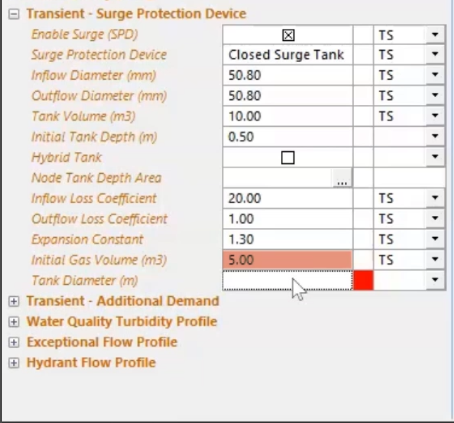
- Scroll down to find Transient-Surge Protection Device.
- Click the plus sign (+) to expand Transient-Surge Protection Device.
- Select the Enable Surge (SPD) checkbox.
- Expand the Surge Protection drop-down.
- Select Closed Surge Tank.
- Set the Inflow Diameter to 50.8mm.
- Set the Outflow Diameter to 50.8mm.
- Set the Tank Volume to 10m3.
- Set the Initial Tank Depth to 0.5m.
- Set the Inflow Loss Coefficient to 20.
- Set the Outflow Loss Coefficient to 1.
- Set the Expansion Constant to 1.3.
- Set the Initial Gas Volume to 5m.
- Set the Tank Diameter to 1m.
- Commit your changes to the database.
To create a new run:
- In the Model Group, right-click Run Group.
- Select New > Run.
- In the Schedule Hydraulic Run dialog box, in the Title field, name this run “TS-Pump Trip with SPD”.
- From the Model Group window, drag InfoWorks TS Network and drop it into the Network box.
- Drag InfoWorks TS Control and drop it into the Control box.
- Drag Average Demand and drop it into the Demand Diagram box.
- Click the checkbox next to Experimental.
- In the Run Type group box, expand the drop-down.
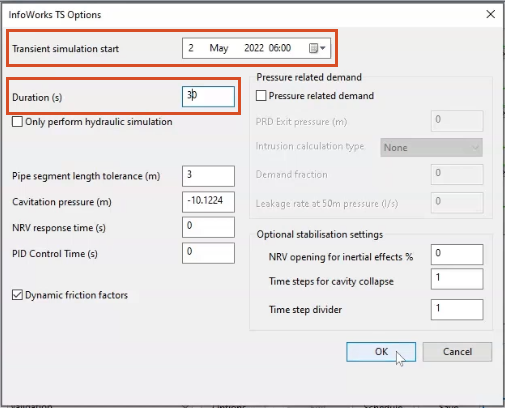
- Select InfoWorks TS to open the InfoWorks TS Options dialog box.
- Change the Transient simulation start to 2 May 2022 at 06:00.
- Set the Duration to 30 seconds.
- Leave the remaining options as the defaults and click OK.
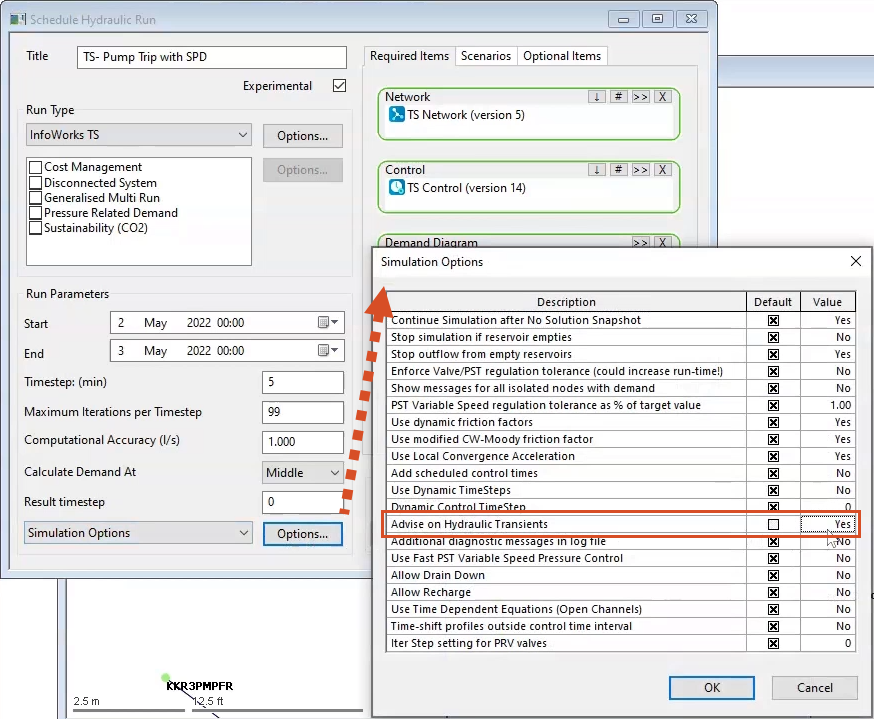
- Back in the Schedule Hydraulic Run dialog box, at the bottom of the Run Parameters group box, expand the drop-down and select Simulation Options.
- Click the Options button next to it to open the Simulation Options window.
- In the Description column, locate the Advise on Hydraulic Transients option.
- In the same row, in the Default column, deselect the checkbox so that the Value column says Yes.
- Click OK to close the window.
- Click Save.
- Click Run.
To compare these results:
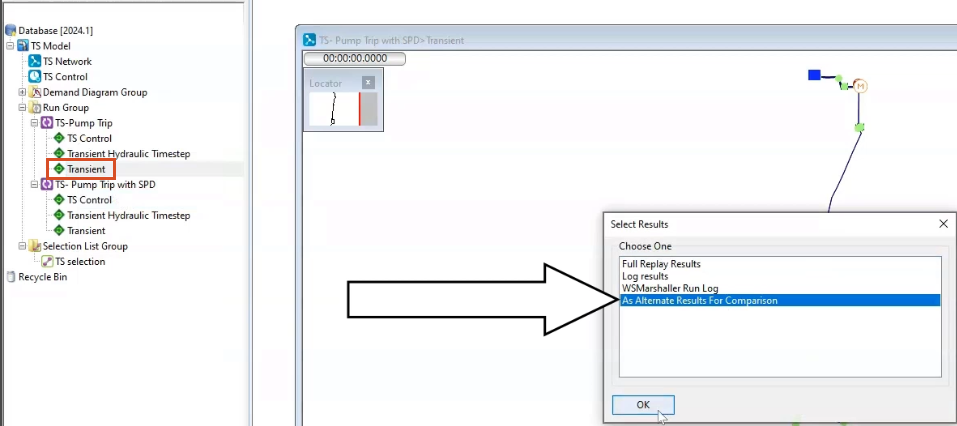
- In the Model Group, double-click the TS-Pump Trip SPD Transient run to open it in the GeoPlan.
- Right-click the TS-Pump Trip > Transient run.
- Click Open As.
- In the Select Results dialog box, select open As alternative results for comparison.
- Click OK.
To graph the flow through pipe SV002.Surge Check.1:
- On the Tools toolbar, click the Graph tool.
- In the Select what to graph for dialog box, enable Graph alternate results.
- Select Velocity (m/s).
- Enable Graph alternate results.
- Click OK.
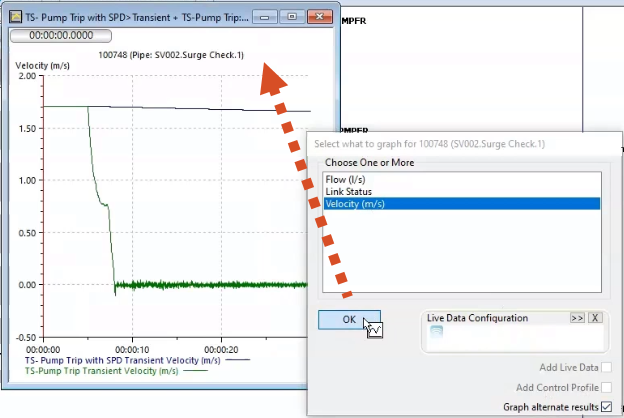
Although the flow is still flashy, there is still flow through this pipe when using the surge tank.
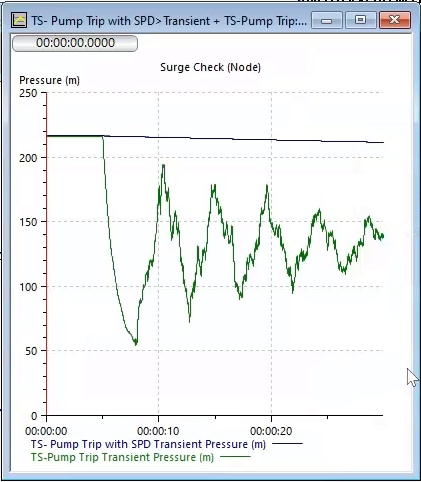
Graph the pressure through the Surge Check node:
- Select the Surge Check node.
- In the Select what to graph for Surge Check dialog box, select Pressure (m).
- Click OK.
Notice that the surge protection device (surge tank) significantly dampens the transient:
