File storage and versioning
Any referenced datasets can be downloaded from "Module downloads" in the module overview.
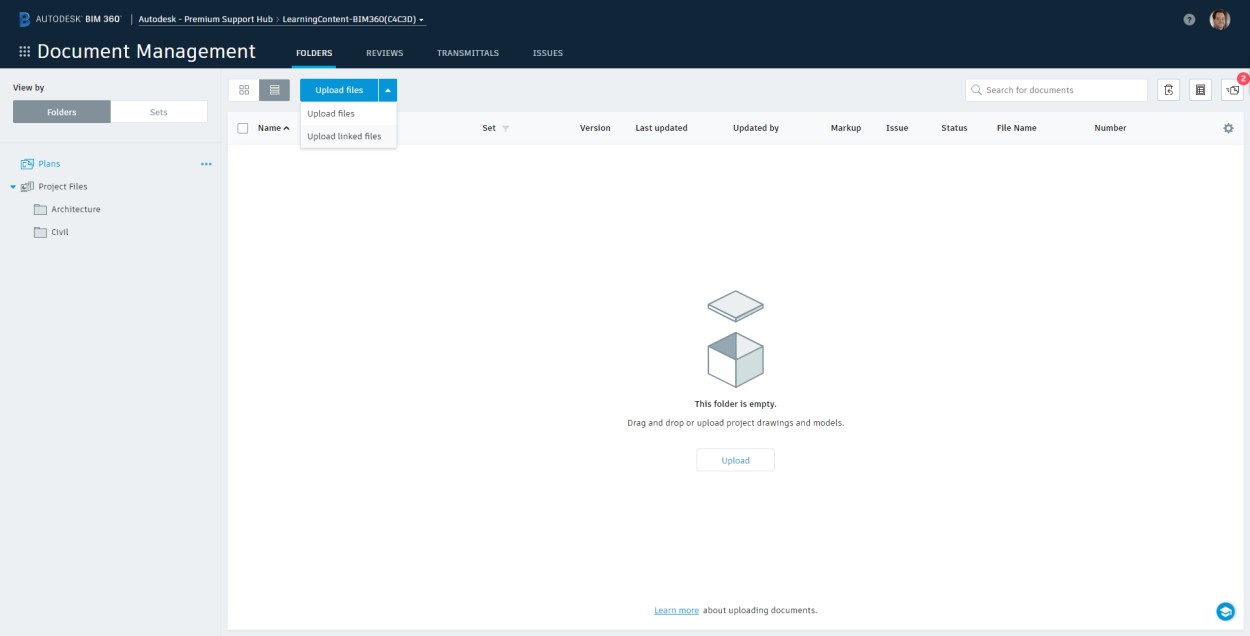
Upload files to BIM 360 - Exercise
Task 1: Uploading files to BIM 360
- Log in to BIM 360 via a web browser.
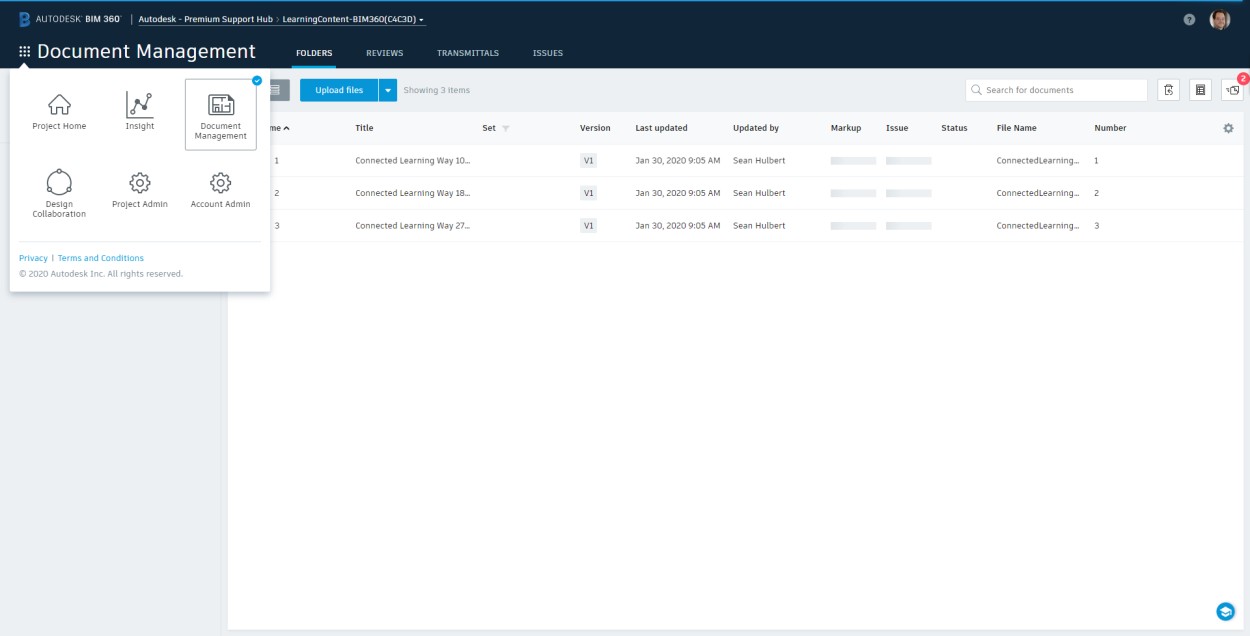
- Select the Module Selection Icon to change modules to Document Management.
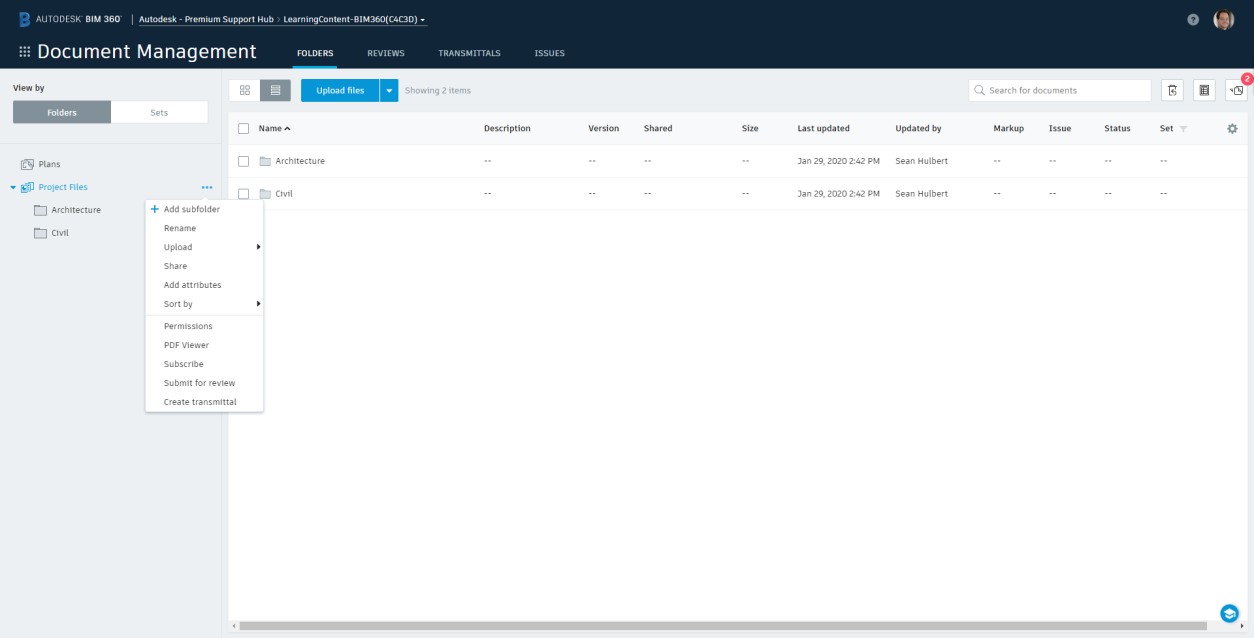
- If a Project Template was leveraged, you should see subdirectories.
- Otherwise, select the ellipses next to Project Files and create the following subdirectories.
- Architecture
- Civil
- Navigate to the Plans folder in BIM 360 and select Upload Files.
- Navigate to the ConnectedLearningWay.pdf and select OK.
- Select Continue to allow the PDF to upload without assigning a template – we will do that in the next step.
- Select Define to create template for collecting data from your title blocks.
- Use the crop tool to select the title block area of your sheet. In the Title Block Information dialog box, do the following:
- Name*: ConnectedLearning.
- Number*: Select the area where the sheet number is located.
- Title: Select the area where the sheet information is stored.
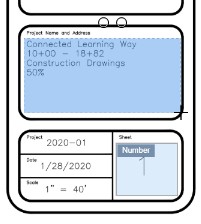
- Select Save to allow BIM 360 to extract the Title Block information.
- Make any necessary corrections to the information extracted.
- Open one of the uploaded sheets to review, then select the X in the upper right corner to close.
- Select Upload Files and navigate to the ConnectedLearningWay.pdf file located in the Rev01 directory and select OK.
- Choose the ConnectedLearning Layout Template and select Continue.
- Make any necessary corrections to the information extracted.
- Open one of the recently uploaded sheets and select the Compare icon on the tool bar at the bottom of the screen.
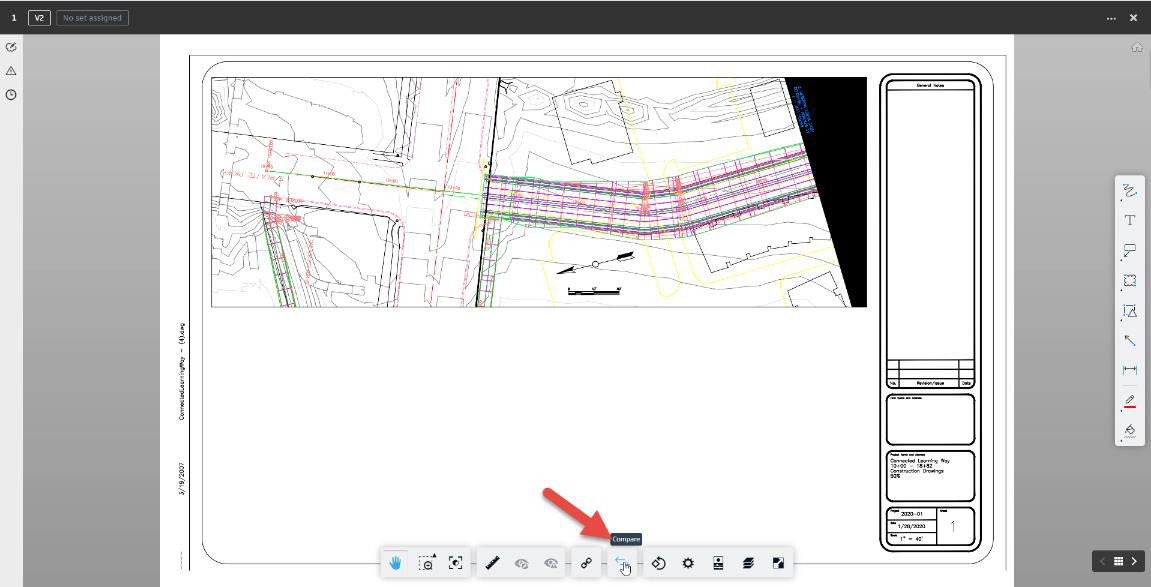
- Select Version 1 to start and select Compare to see the two files overlaid.
- On the tool bar at the bottom, you can change from overlay to side-by-side view.
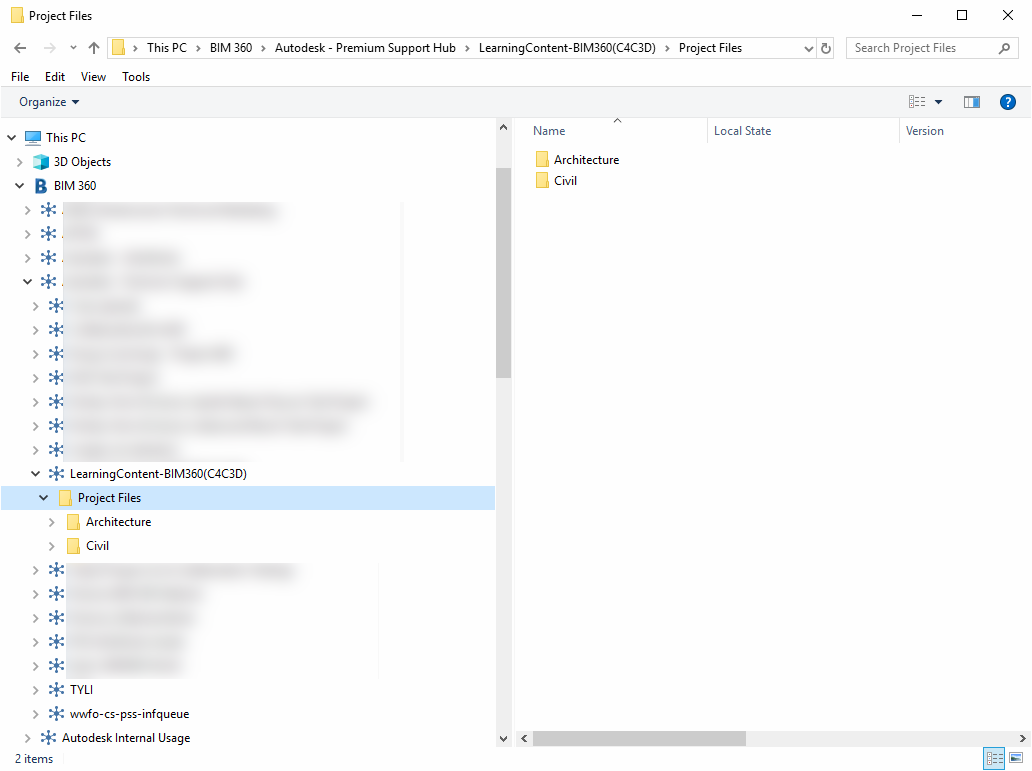
Task 2: Explore local cache for BIM 360 data
- Open Windows File Explorer.
- Navigate to This PC, then to BIM 360.
- Expand the BIM 360 Hub where you created your project.