Changing member sizes
Any referenced datasets can be downloaded from "Module downloads" in the module overview.
Changing member sizes - Exercise
In this practice, you will step through the process of updating the Revit model with section changes made in Robot. This practice is possible only when both Robot and Revit are installed on the same machine. In the opposite case, SMXX intermediate file should be used instead of Direct Integration.
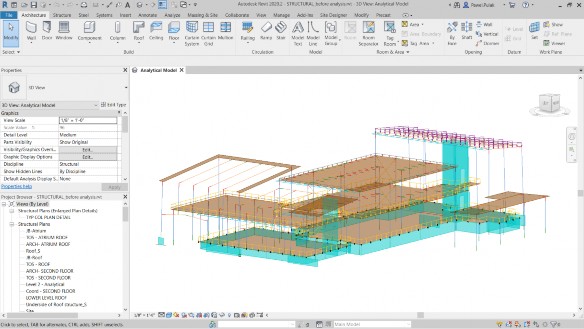
- Start Revit 2020 and open the project STRUCTURAL before analysis.rvt.
- Start Autodesk Robot Structural Analysis Professional 2020 and open the project STRUCTURAL_after design.rtd.
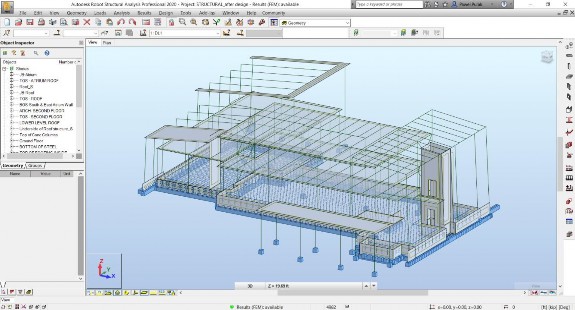
- Select graphically several bars on the roof, as marked below. If mouse cursor is not in selection mode prior to this operation, switch it to this mode by clicking the right mouse button and selecting Select from the context menu.
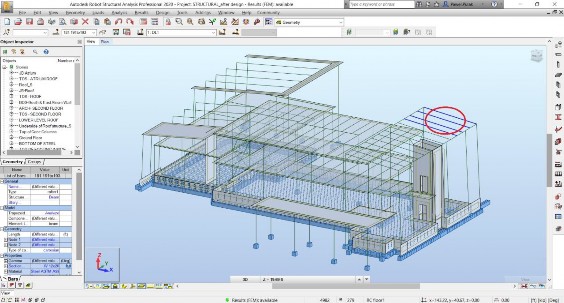
- Check in the bottom part of the Object Inspector that the section assigned to these selected bars is W 12x26.

- Switch to Revit 2020, open in point 1.
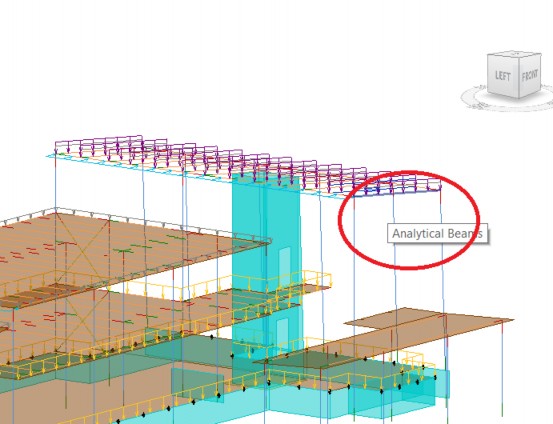
- Move the mouse cursor over the beam marked below and use Tab until the highlight toggles from loads to Analytical Beams, then click the left mouse button to select the beam.
- When the analytical beam is selected, check in Properties that the section assigned to the selected beam is W 21x44.

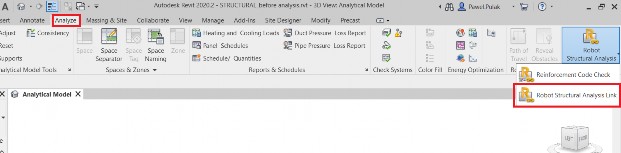
- Select Robot Structural Analysis Link from the Structural Analysis panel on the Analyze ribbon.
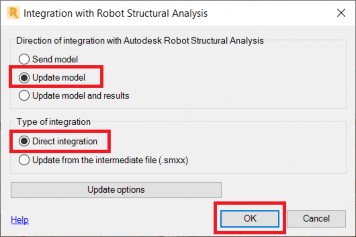
- The Integration with Robot Structural Analysis dialog box is opened. Activate Update model and Direct integration and select OK, as shown below.
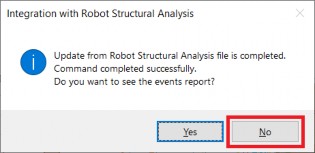
- At the end of the update, the dialog box is displayed, informing about possible warnings or errors. Answer No.
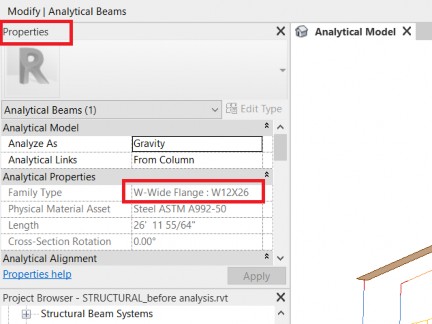
- After completing the update, check in Properties that the section assigned to the selected beam changed from W 21x44 to W 12x26.
- Save the model with a new name using File > Save As > Project.