Rooms
Any referenced datasets can be downloaded from "Module downloads" in the module overview.
Exercise 1–Rooms and Room Tags
Before you can add room tags to label the spaces in your model, you must add Room elements. Adding room elements is as simple as clicking within an enclosed space. Rooms will number automatically as they are placed.
Catch-up file completed to this point: 15_Medical Center_Rooms.rvt
Adding Rooms
Let’s start by adding a room and tag to the plan.
- In the Level 1 floor plan, zoom in on the central area of the plan.
- On the Architecture tab, on the Room and Area panel, click the Room button.
- Click anywhere inside the Exam room near Grid D6 (see Figure 15–1).

Figure 15–1 Add the first room
- Click the Modify tool or esc twice to cancel the command.
Edit a Room
The room will disappear. Rooms are invisible when not selected. If you move your pointer around within the space, you will see a cross through the space highlight as you get near. You can click this to select the room and edit it.
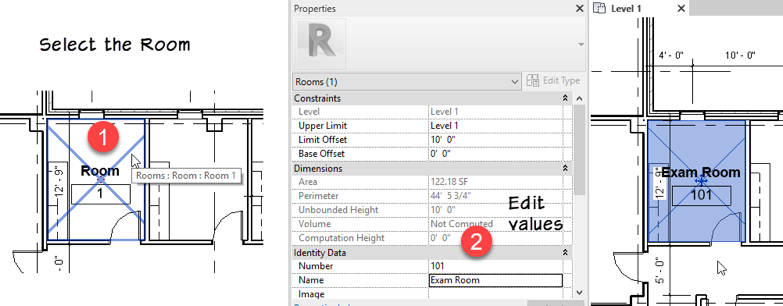
- Select the room we just placed.
- On the Properties palette, locate the Number property and change it to: 101.
- Locate the Name property and change it to: Exam Room (see Figure 15–2).
Notice that the Room Tag will update with the new information!

Figure 15–2 Select a room and edit its properties - the Room Tag will update
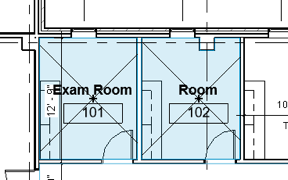
- Run the Room tool again and click in the next exam room space (see Figure 15–3).

Figure 15–3 The numbers will automatically increment sequentially
Notice that the number automatically increments to; 102. The Name will not match however. But if you input a value on Properties before you click, it will use that name.
- On the Properties palette, click in the Name Field and type: Exam Room.
- Click in the next space to place a room.
It will be Exam Room, number 103.
- Place the next two (see Figure 15–4).

Figure 15–4 Place more exam rooms after presetting the value on the Properties palette
- Click below the exam rooms in the corridor to place one more room. Then press esc twice.
Room Placement Strategy
The number continues to sequence nicely, but as you can see, the corridor is still using the Exam Room name. If you remember this, you can plan ahead before you click and change the name on the Properties palette each time you need to change room names. Alternatively, you can edit the name later either by selected the room and using the Properties palette as we did previously, or you can use the Room Tag itself as a shortcut.
- Select the corridor room tag (currently showing Exam Room).
The associated room will highlight in a red color.
- Pause briefly and then click again directly on the Room Name.
If you do this too quickly, Revit could read this as a double-click and you might find you are in the family editor, editing the room tag family. If this happens, clock the tag and try again.
- Edit the room name to: Corridor and press enter to finish (see Figure 15–5).

Figure 15–5 Edit room properties directly from the tag
- Continue adding rooms for the remaining spaces (see Figure 15–6).

Figure 15–6 Add the remaining rooms and tags