Set up and configure a new ReCap project
Set up a new ReCap project, choose the files you want to work with, and adjust the scan settings in preparation of importing the scan data you need in your project.
Tutorial resources
These downloadable resources will be used to complete this tutorial:
This unit will teach you how to set up a new project and configure project options in preparation for importing laser scan files.
Start a ReCap project - Exercise
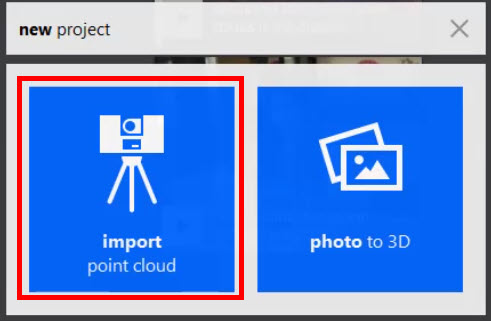
- On the main menu of ReCap Pro, click new project.
- Select import point cloud.
- In the Create new project dialog box, enter ReCap Pro Practice for the project name.
- For the place to save your files, click on the file path and a Browse for Folder dialog box displays. Navigate to your C:\Temp folder and click Select Folder.

- Click proceed.
- Click select files to import.
- In the Import Point Clouds dialog box, navigate to the Lee Dataset>Lee Set Support folder (from the supplied dataset).
- Select Lee_Lg_10.rcs, Lee_Lg_11.rcs, Lee_Lg_12.rcs, and Lee_Lg_13.rcs, then click Open.
- In the upper-right corner, click on the home icon to suspend the project.

- In the suspend project dialog box, click suspend.