Reviewing and adjusting space settings
Any referenced datasets can be downloaded from "Module downloads" in the module overview.
Reviewing and adjusting space settings - Exercise
- Open the practice file, Small Medical Center - Analysis Running01.rvt.
- An important factor to remember – you cannot run a loads analysis on a model until you set the computation mode to include Volume.
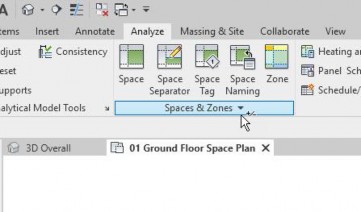
- In the Analyze tab> Space and Zones panel, select the dropdown arrow.
- Select the dropdown arrow on the bottom of the Space and Zones panel.
- Select Area and Computations, and make sure Area and Volumes is checked.
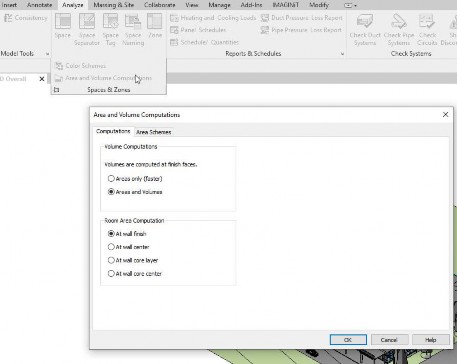
- Click OK to continue.
- Now we can set the mechanical space information.
- Open the 01 Ground Floor Space Plan view.
- Zoom in to your work scope area and select one of the mechanical spaces.
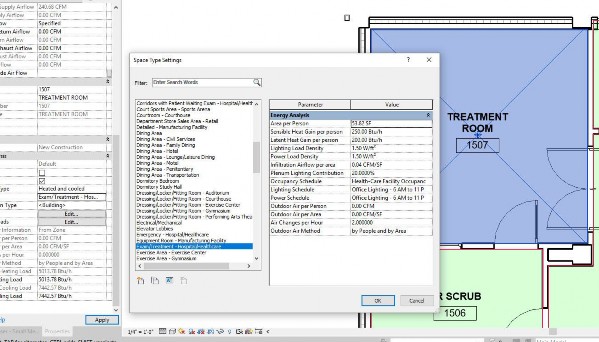
- On the Properties box, scroll down to the Energy Analysis parameter category and select Space Type.
- Select the dropdown arrow on the far right.
- Scroll through until you find the appropriate space type.
- Use the Filter at the top to isolate the space type categories quicker.
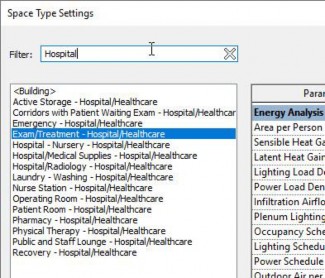
- Review the list and select the space type for that room – in this case, Treatment/Triage.
- Make sure and set the "Specified Supply Airflow" cfm value at this point to your design requirements.
- During the building of the supply air system, the space supply diffuser Flow cfm should also have been set.
- Adjust the remainder of spaces in your work scope area.
- Click OK to continue.