Import data from GIS in InfoAsset Manager
Any referenced datasets can be downloaded from "Module downloads" in the module overview.
Import data from GIS in InfoAsset Manager
Step-by-step guide
Network data can be imported into InfoAsset Manager from a range of sources, including InfoAsset Planner models, manhole survey data files, GIS files, and CSV files. While direct import from these sources is possible, it is more common to use the Open Data Import Centre (ODIC), which allows for data to be mapped automatically to the relevant object data table.
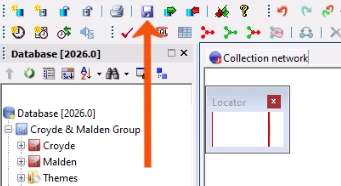
Begin with a new Collection Network created and opened on the GeoPlan.
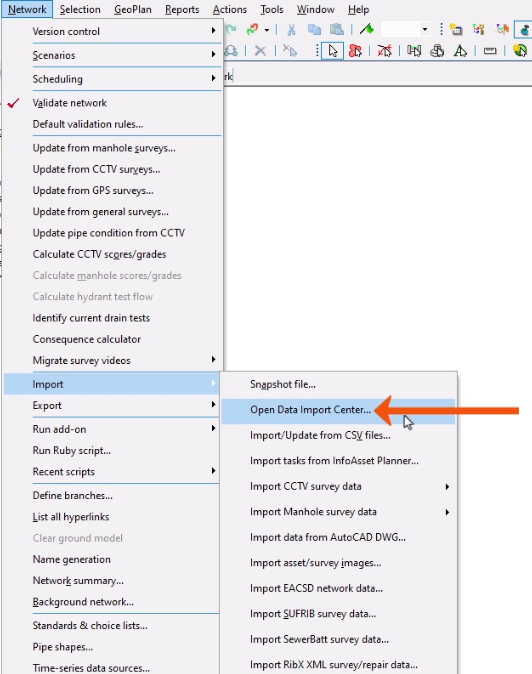
To view and select from available import options:
- In the Network menu, select Import.
- Select Open Data Import Centre to open the ODIC.
In this example, data is being imported from a GIS TAB file that contains information about manhole surveys.
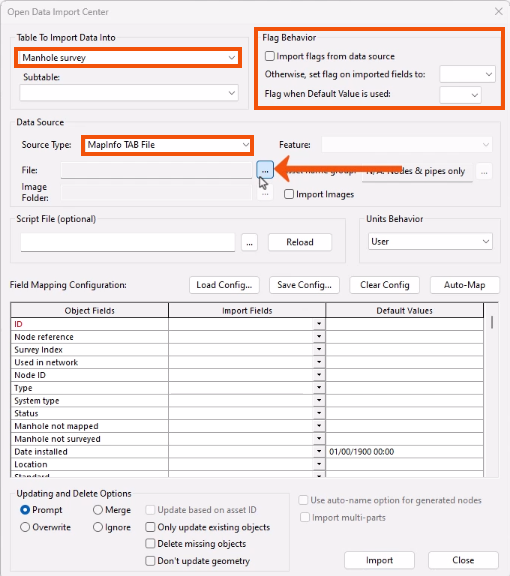
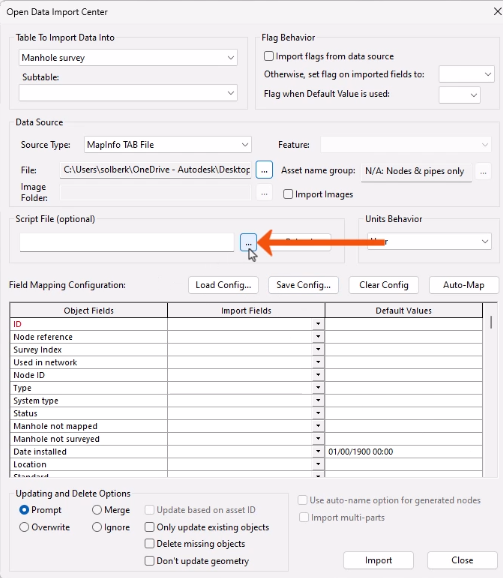
- In the Open Data Import Center dialog, in the Table to Import Data Into drop-down, select Manhole Survey.
- In the Flag Behavior group, select any necessary flags for the imported data.
- Under Data Source, set the Source Type to MapInfo TAB File.
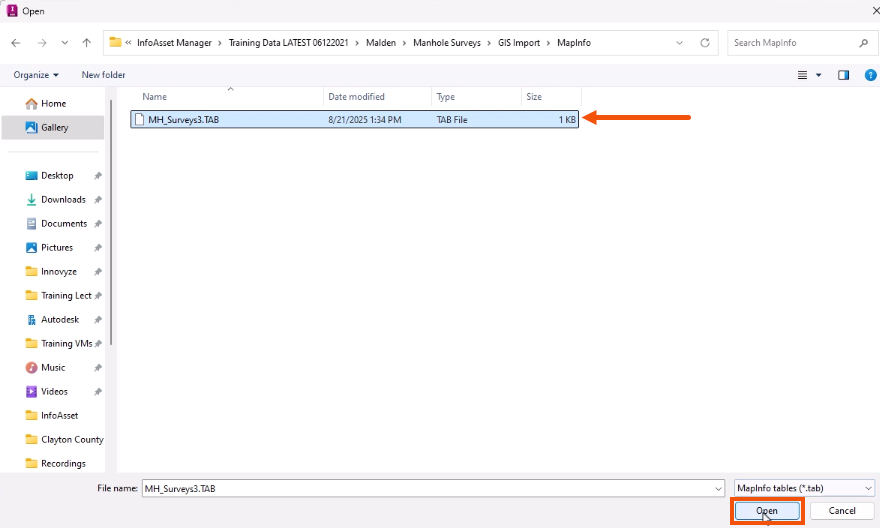
- Next to File, click Browse (…).
- In the Open dialog, locate and select the GIS TAB file.
- Click Open.
In some cases, a script can be used to more precisely control the import process.
- To identify a script file, in the Script File group, click Browse (…).
In this case, the record values in the external GIS tables do not require conversion, so no script file is needed.
Next, use the field mapping grid to define how the external data should be imported into fields in the database. The external Import Fields should match the internal InfoAsset Manager Object Fields, or have Default Values specified, if necessary.
- To start, click Auto-Map to automatically map fields in the external data to fields in the database.
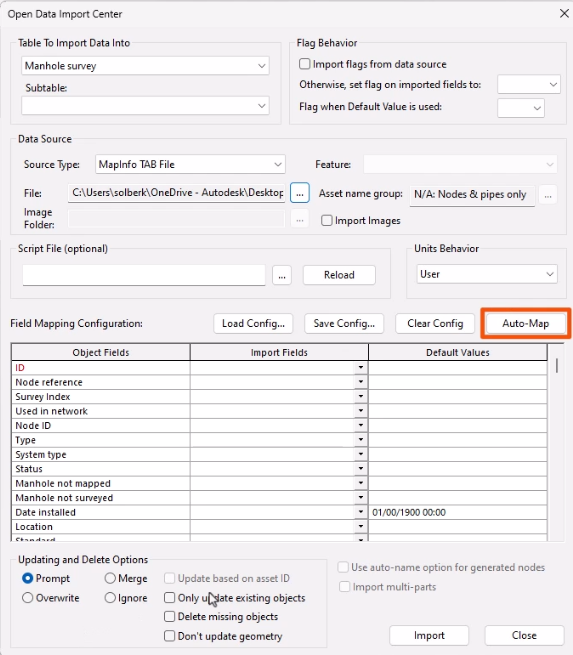
- Use the grid table to manually map any remaining fields.
- Once all the fields have been mapped, click Import.
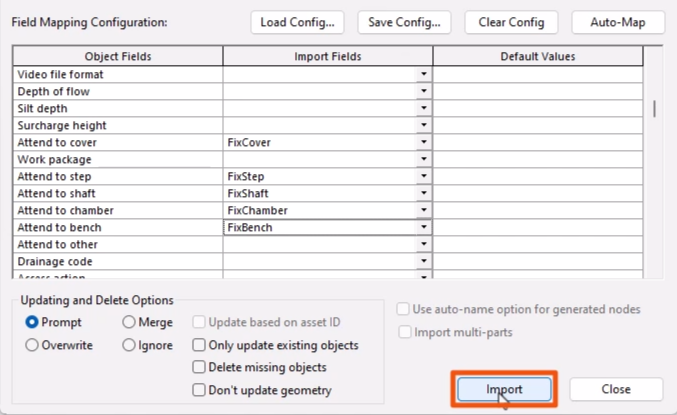
This imports the external data based on the settings in the ODIC.
A dialog reports the number of records created during the import of the external table and any errors that have occurred.
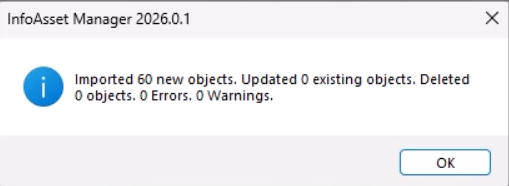
- Click OK.
- In the ODIC dialog, click Close.
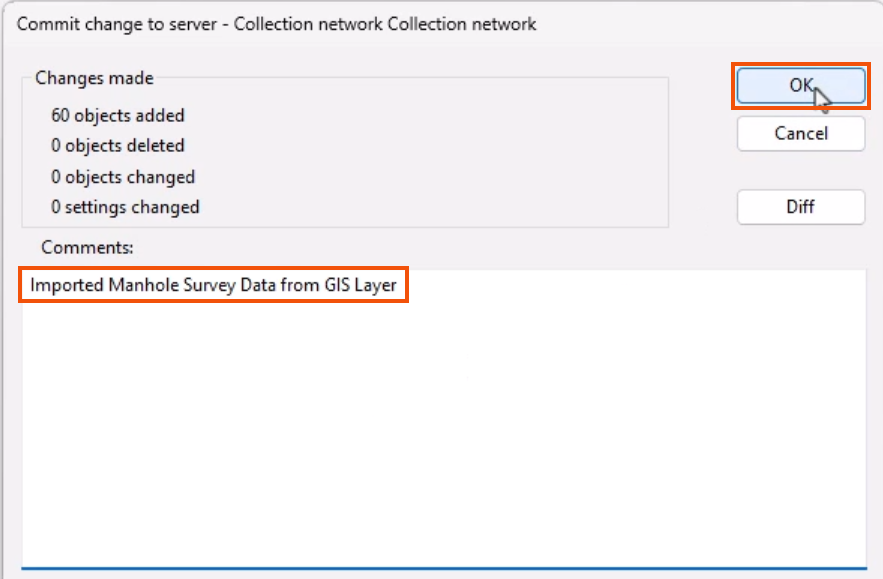
To transfer local data to the server and to make it available to all users of the InfoAsset Manager Database, the changes must be committed.
- From the File toolbar, click Commit changes to database.
- In the Commit change to server dialog, add a comment, such as “Imported Manhole Survey Data from GIS Layer”.
- Click OK.