Specifying scenario facilities
Any referenced datasets can be downloaded from "Module downloads" in the module overview.
Step-by-step:
A scenario may simulate a unique portion of the system or the entire network. For example, proposed pipes should not be included in a scenario that represents the existing conditions.
- Open the appropriate .aprx file in ArcGIS Pro.
- From the ribbon, InfoWater Pro tab, Project panel, click Initialize.
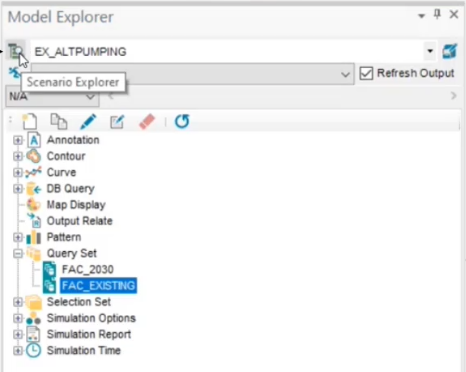
- In the Model Explorer, click the Scenario Explorer icon.

- In the Scenario Explorer, under Network Data Scenario(s), select BASE, Base Network Scenario.
- In the Scenario Explorer toolbar, click Activate.

Note: An active scenario cannot be edited; therefore, activating the BASE scenario ensures that all child scenarios can be edited.
To specify the facility for each child scenario:
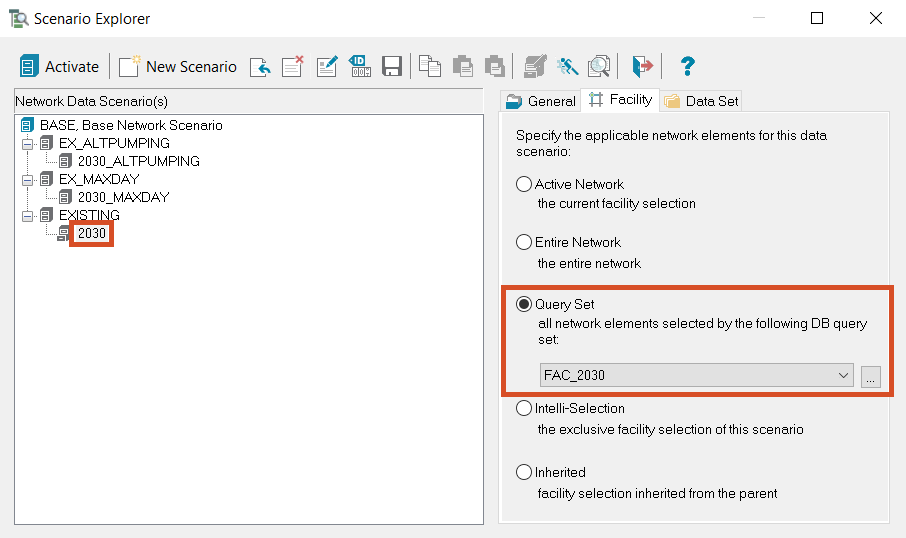
- Select the EXISTING scenario.
- Click the Facility tab.
- Enable Query Set.
- Expand the drop-down and choose FAC_EXISTING.

- Repeat steps 8 and 9 for the EX_ALTPUMPING existing scenario to specify the same existing facilities.
- Repeat steps 8 and 9 for the EX_MAXDAY existing scenario to specify the same existing facilities.
To assign the 2030 facilities to each of the 2030 sub-scenarios:
- Select the 2030 scenario.
- In the Facility tab, click Query Set.
- Expand the drop-down and select FAC_2030.

- Repeat steps 13 and 14 for the 2030_ALTPUMPING future conditions scenario.
- Repeat steps 13 and 14 for the 2030_MAXDAY future conditions scenario.
- Click Exit to close the Scenario Manager.
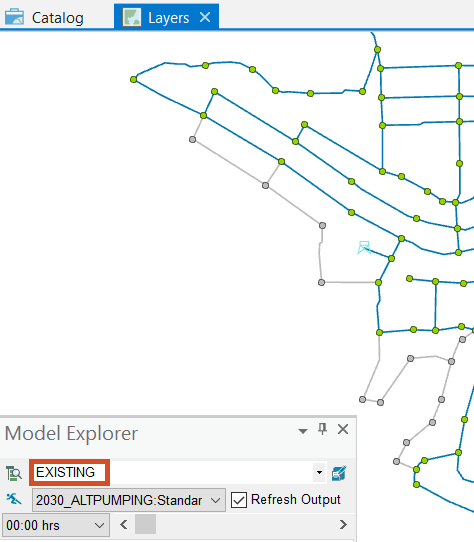
- In the Model Explorer, expand the Scenario drop-down and activate the various EXISTING and 2030 scenarios.
- Cycle through all the scenarios to verify that the correct features are activated for each scenario in the map.
Note: All proposed pipes and junctions should be displayed as grey for the EXISTING scenarios. No pipes or junctions should display as grey for the 2030 scenarios.
