Refining the Pond Design
Any referenced datasets can be downloaded from "Module downloads" in the module overview.
Video quiz
Step-by-step:
After a pond has an estimated volume and the inlets, outlets, and overflows have been defined, it is time to accurately size the pond using dynamic simulation.
- In the ribbon, Analysis tab, Criteria panel, click Analysis Criteria.
- In the Analysis Criteria dialog, enable SRP Wizard FSR.
- Set the Output Interval to 2 minutes.
- Change the Time Step drop-down to Shortest.
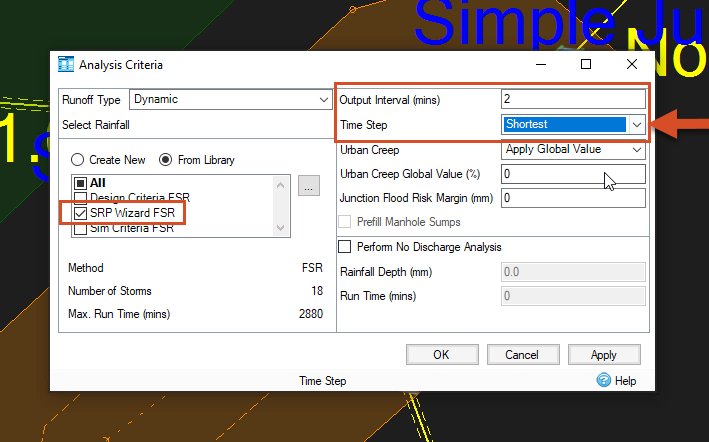
- Click OK.
When running simulations, you must strike a balance between getting accurate results and how long it takes to get them. Complex models require complex hydraulic calculations, so setting the Time Step to Shortest will make for a longer but more stable simulation.
- On the ribbon, in the Analysis panel, click Validate.
- In the Validate dialog, no errors are shown, so click OK.
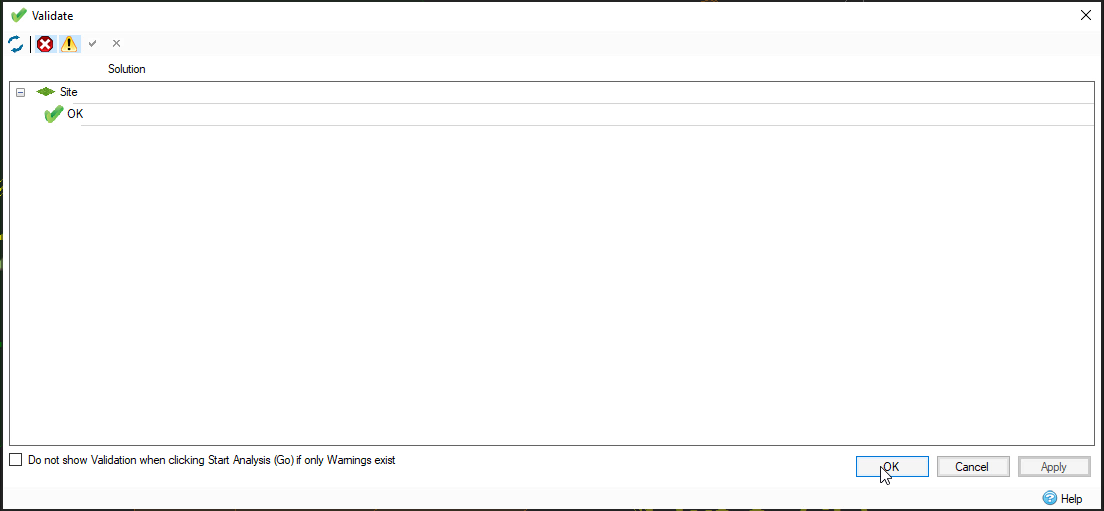
If there were any errors—for example, a pipe or orifice missing a crucial measurement—you would double-click each listing to see what caused it and resolve each one.
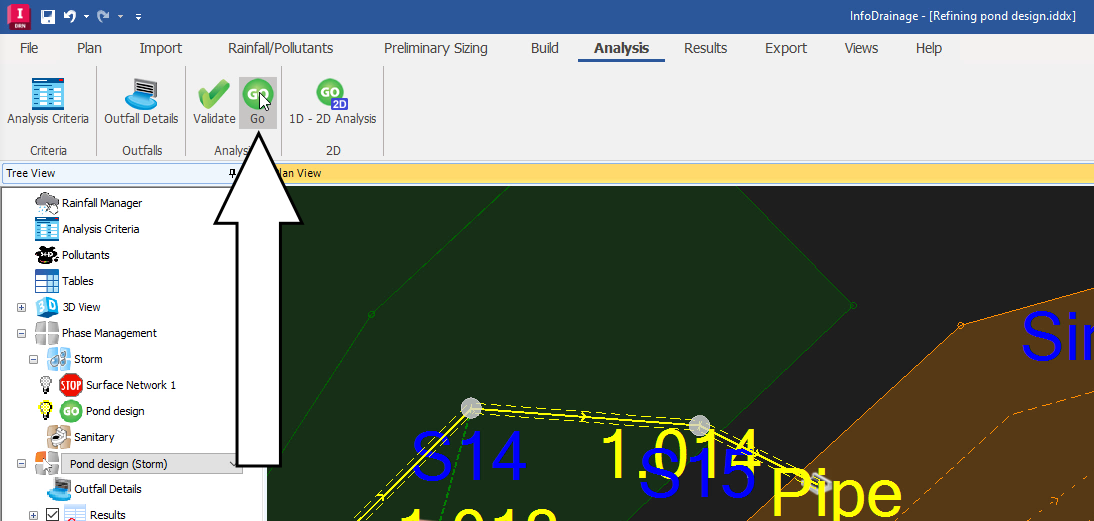
- Save your progress.
- In the ribbon, Analysis panel, click GO to run the simulation.
Once it is finished, the Stormwater Controls Summary displays the results for one 30-year summer storm event. It includes details like the pond’s total discharge volume and the percentage of the pond that was still available to fill during the storm.
- Click Critical Storm to see the results of the most severe weather event in the Stormwater Controls Summary dialog box.
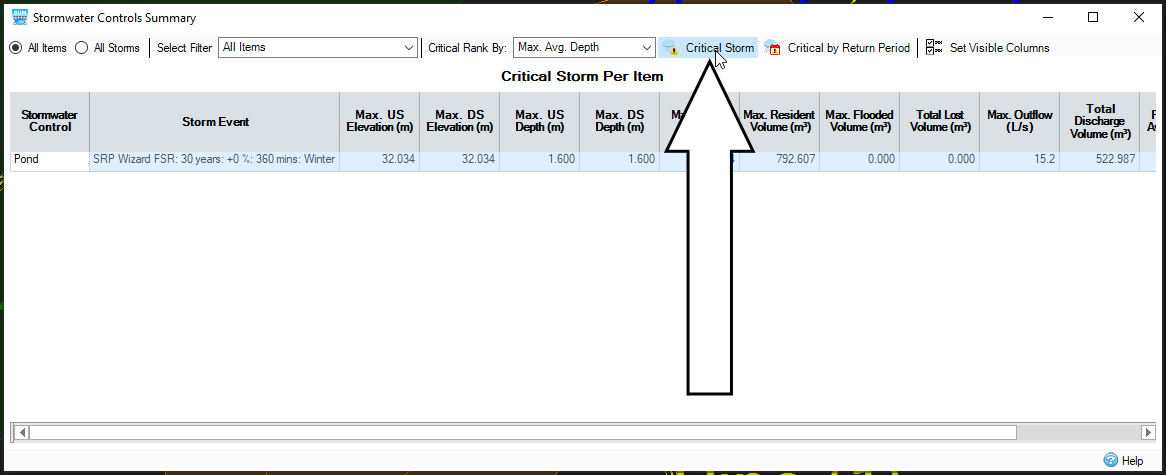
- Click All Storms to see how the model fared during different rainfall events with the critical storm highlighted (in this case, a 360-minute winter storm).
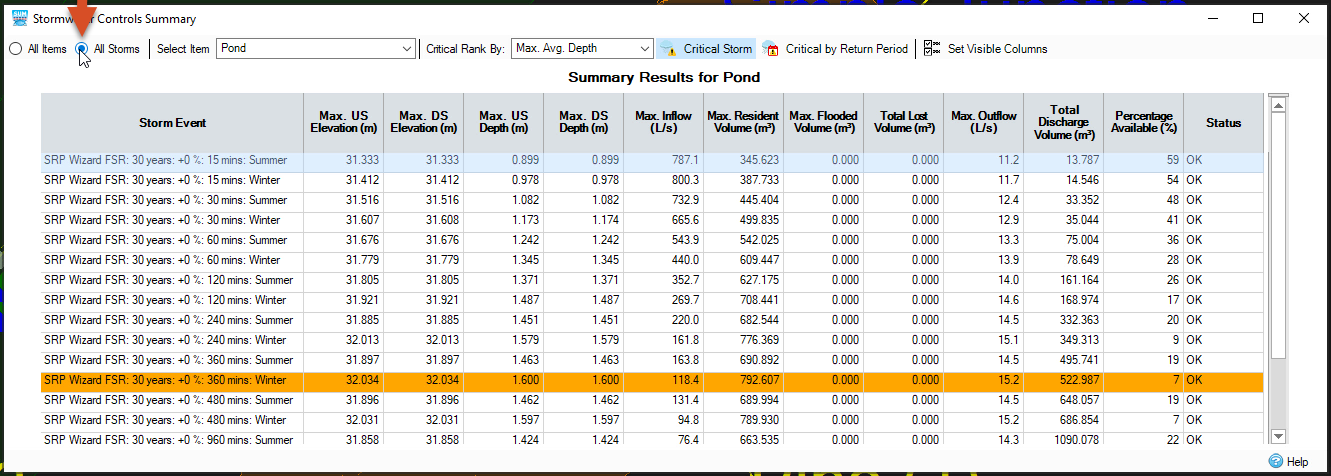
The critical storm lists a Percentage Available (%) of 7, which indicates the pond is slightly oversized, but keep in mind that this pond was designed using rough estimates.
- Close the dialog.
- In the ribbon, Results tab, Summaries panel, select Stormwater Controls.
- In the Stormwater Controls Summary dialog box, click Critical Storm.
- Toggle All Storms ON.
- Note the Maximum Resident Volume during the critical storm = 792 cubic meters.
- Close the dialog.
- In the Plan View, double-click the Pond icon.
- From the Pond dialog box, open the Sizing Calculator.
- Enter a new volume of 795.
- Click OK.
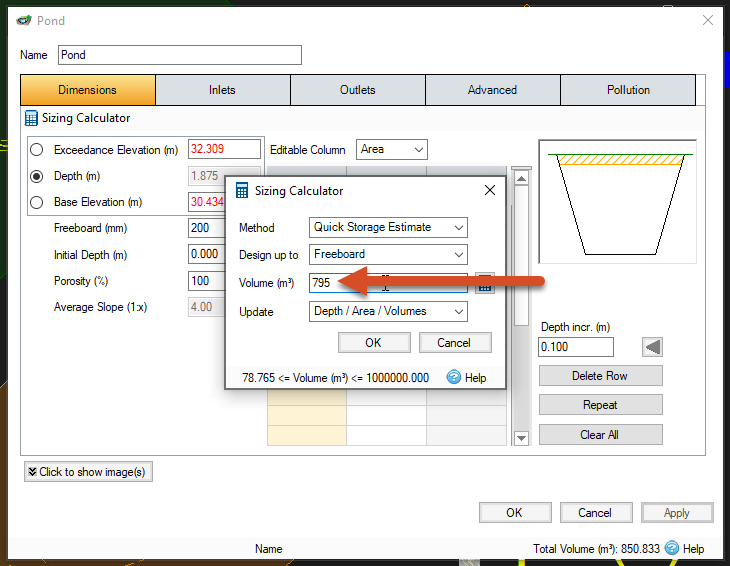
- Click OK again in the Pond dialog.
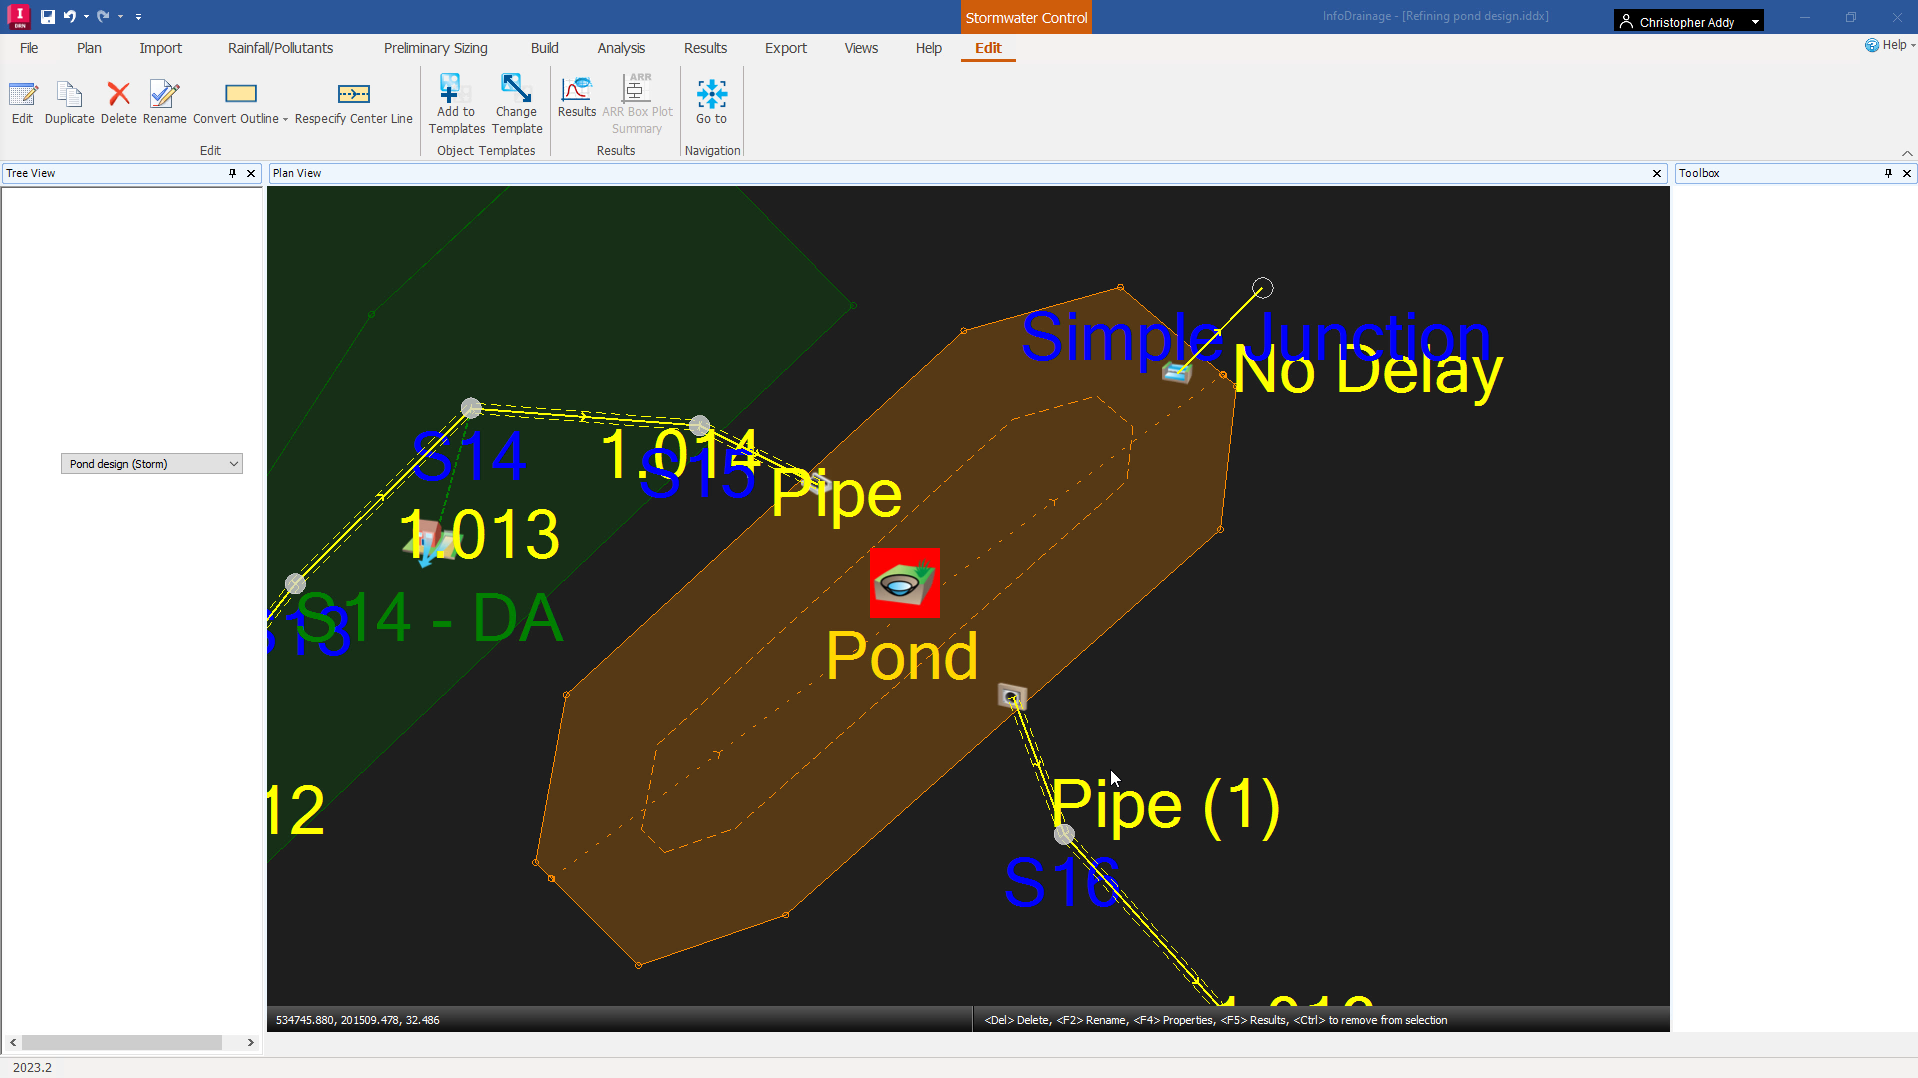
- Observe how the pond’s size decreases slightly in the Plan View.
- In the ribbon, Analysis tab, select Validate again to verify there are no errors in the model.
- Click GO again to re-run the simulation with the new volume.
- In the Stormwater Controls Summary, click Critical Storm, then toggle ON All Storms.
- In the Stormwater Controls Summary, note the Percentage Available value for the Critical Storm.
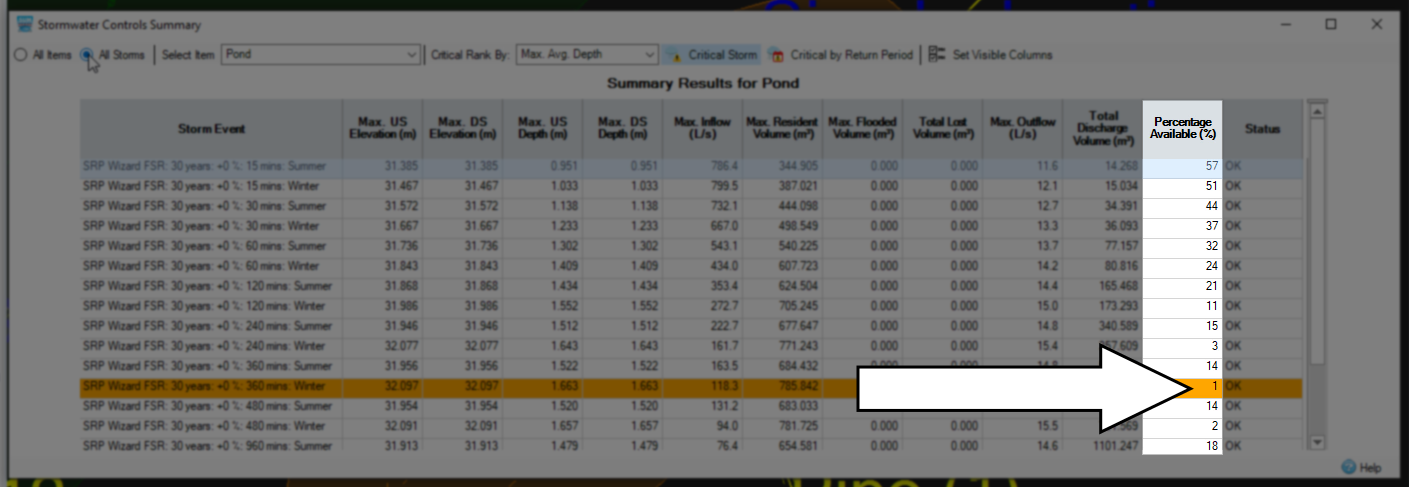
This time, only 1 percent of the pond was available during the critical storm. The maximum depth and discharge are also closer to—but do not exceed—the measurements established in the original design criteria, meaning the pond’s size is now properly optimized.