Sharing AutoCAD objects
Any referenced datasets can be downloaded from "Module downloads" in the module overview.
Introducing the Insert Gallery and the Blocks Palette - Exercise
In the previous video, you learned about the Tool Palette and Design Center. You can also use the Blocks Palette and the Insert Gallery as alternative methods for sharing AutoCAD objects. Blocks are listed in the Insert Gallery and in the Blocks Palette and can be quickly inserted into the current drawing. When inserting a block, you have the option to specify the insertion point, scale, and rotation.
Insert Gallery
This is the method for using the Insert Gallery:
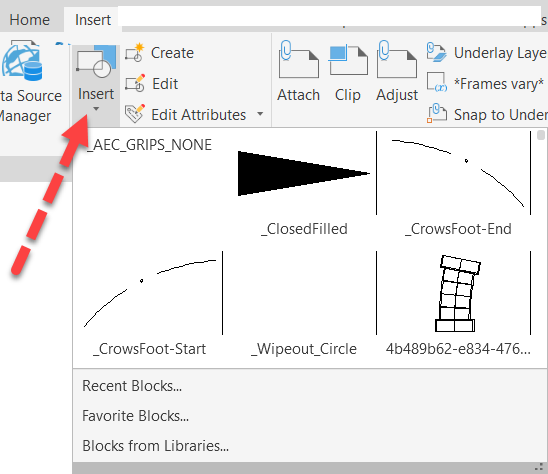
- In the Insert tab>Blocks panel, expand the Insert icon to display blocks defined in the drawing, as shown below.
- Select a block from the list.
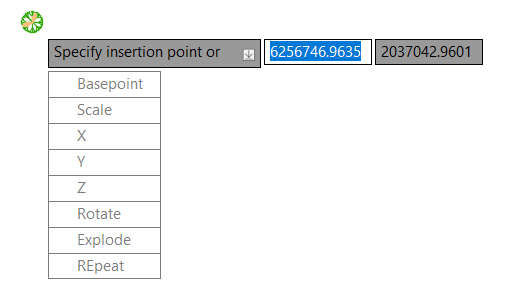
- When a block in the gallery is selected, the block image gets attached to the cursor along with the Specify insertion point: prompt.
- In the drawing, either pick the insertion point for the block or select one of the insertion options by using the <Down Arrow> key, as shown below.
In the Insert Gallery, clicking Recent Blocks, Favorite Blocks, or Blocks from Libraries opens the Blocks Palette to the respective tab.
Blocks Palette
The Blocks Palette is another tool for inserting blocks into the drawing.
In the Insert Gallery, select Recent Blocks, Favorite Blocks, or Blocks from Libraries to open the Blocks Palette.
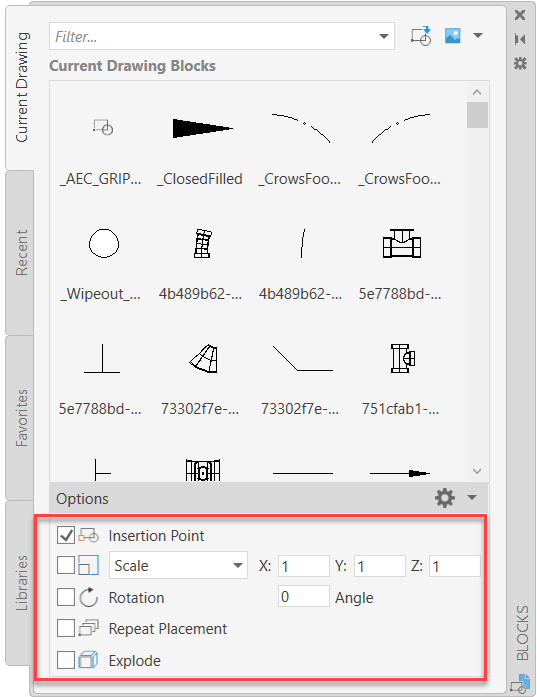
The Blocks Palette contains four tabs, as shown in the following image:
- Current Drawing tab
- Recent tab
- Favorites tab
- Libraries tab
This is the method for using the Blocks Palette:
- In the Blocks Palette, open the required tab and select the block to be inserted.
- Specify the Insertion Point, Scale, and Rotation. You can set these in the lower portion of the Blocks Palette or on-screen.
- In each tab, various insertion options have been provided that can be used while inserting the blocks.
- The drag-and-drop method inserts the block without any options, so it might need to be adjusted later.
- The Rotation option presets the rotation angle.
- The Scale, X, Y, and Z options preset the various scales. (If a block is inserted into a drawing that uses different units, the block is scaled automatically.)
- The Repeat Placement option inserts multiple blocks in a single step.
- The Explode option converts the block into its component parts when it is inserted. (You can also explode a block after it has been inserted using the Explode command.)
Sharing AutoCAD objects - Exercise
- Start a new drawing.
- In the Home tab>Palettes panel, click Tool Palette if the tool palettes are not already displayed.

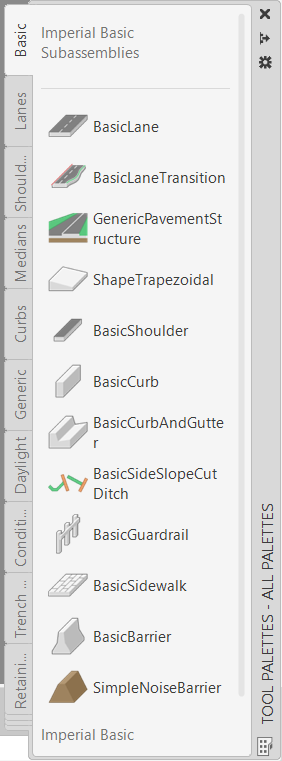
- The Tool Palette is divided into multiple tabs along the side, categorizing the various tools into their own palettes, as shown in the image below.
- In the Tool Palette, right-click on any tab and select New Palette.
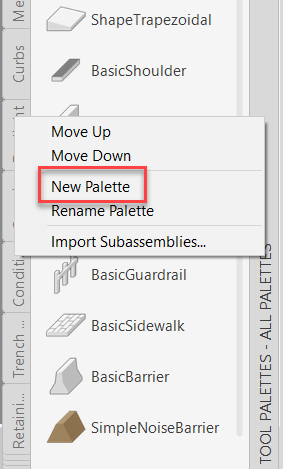
- Name the new palette BLOCKS.
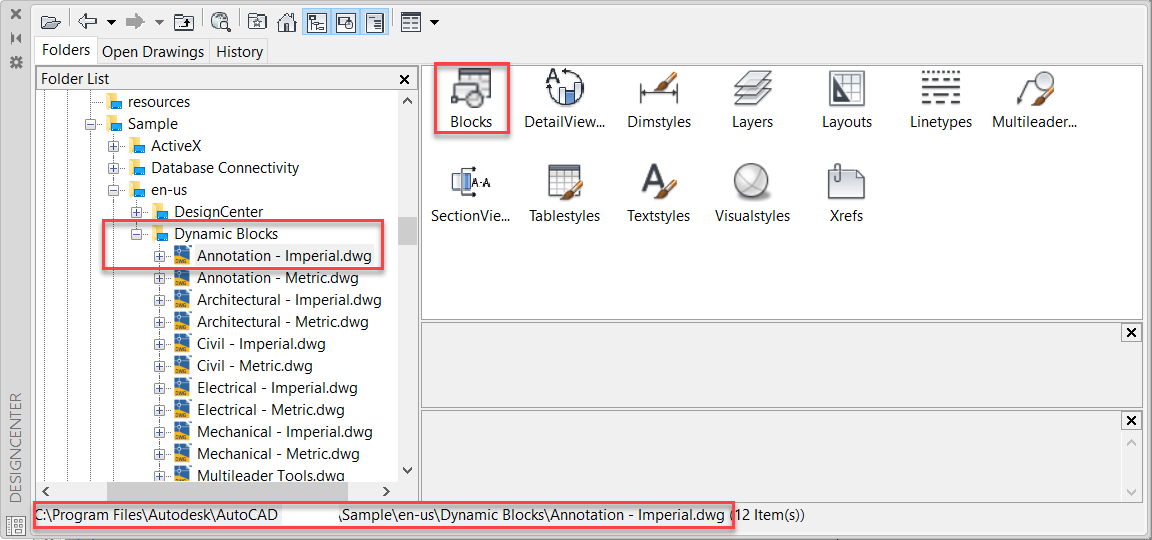
- Use the keyboard shortcut <Ctrl>+<2> to open the Design Center.
- In the Folder List on the left-hand side, expand the Dynamic Blocks node and select Annotation - Imperial.dwg, then select Blocks from the right-hand pane, as shown in the image below.
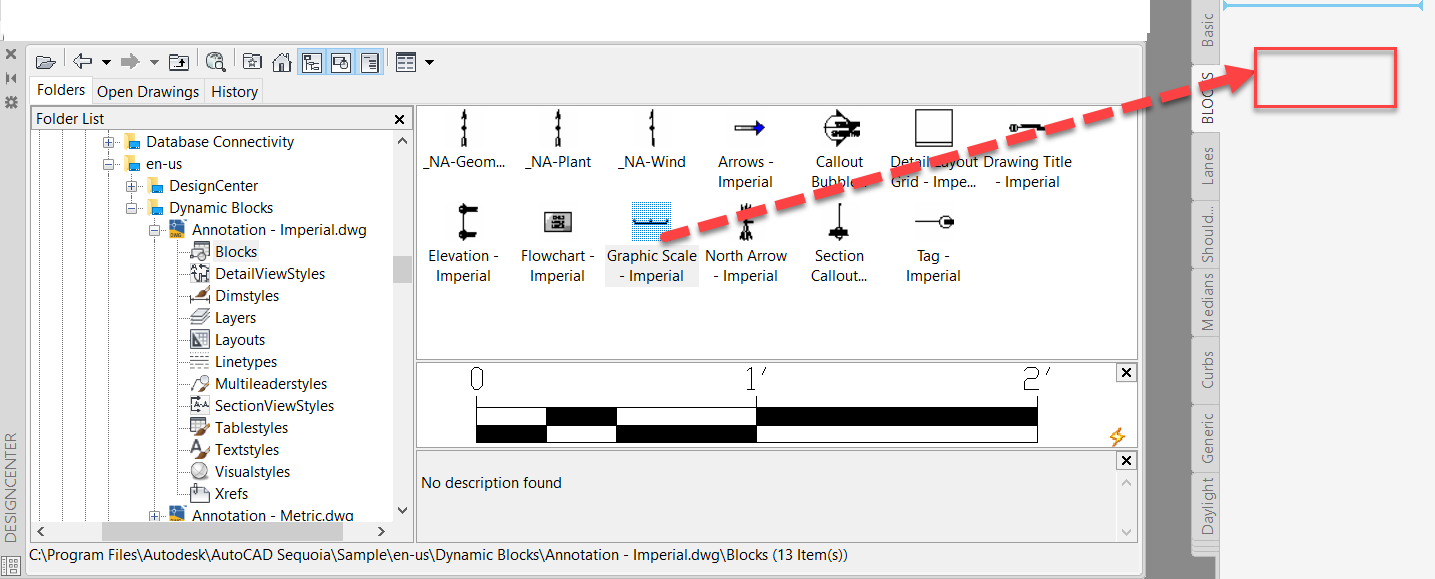
- Select the Graphic Scale - Imperial block from the list and drag and drop it into the BLOCKS Tool Palette.
- Switch to a layout tab and ensure that you are in Paperspace.
- Click on the Graphic Scale in your new BLOCKS Tool Palette, then pick a point in the drawing to insert it. You don't drag and drop!
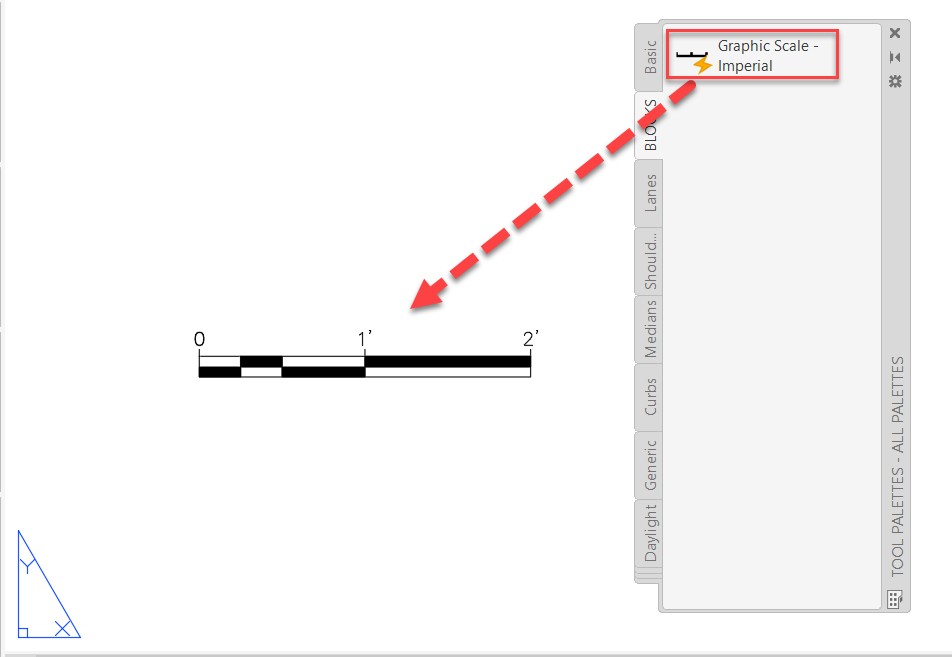
- Zoom extents to see the new graphic scale symbol in your drawing.
- Close the drawing without saving it.