Manage users and their products
Any referenced datasets can be downloaded from "Module downloads" in the module overview.
Manually Add Users and Assign Them Autodesk Products
In this section, you will learn how to manually add users in Autodesk Account and review seat availability and how to assign software to your users. The tasks detailed in this step-by-step guide are all done in Autodesk Account (manage.autodesk.com) as a primary admin.
Add Users in Autodesk Account
As a primary admin, you need to first add users to your account in Autodesk Account in the User Management section. This allows you to manage your users and all software assigned to them.
How to Add Users
- In the navigation panel>User Management section, select By User, as shown below.

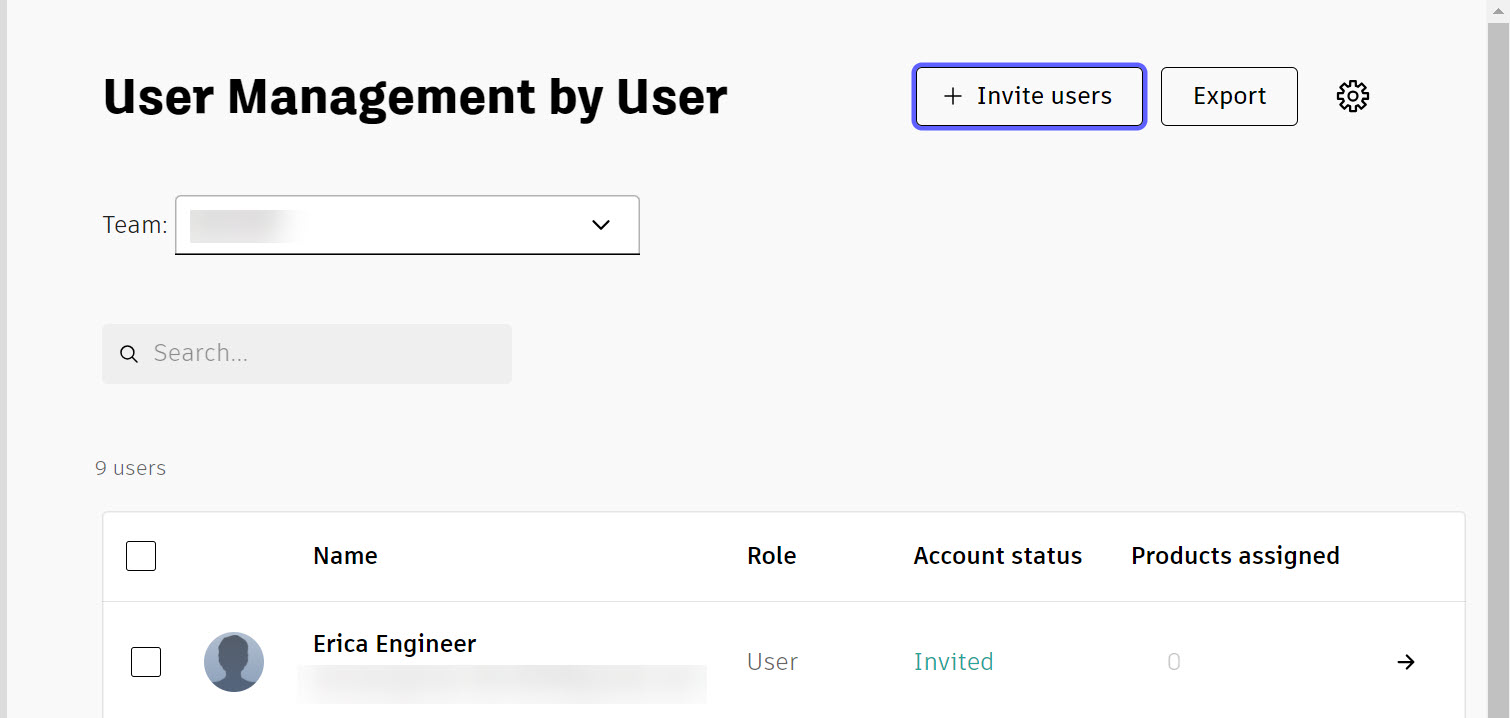
- The User Management by User page will display. Click Invite users to open the Invite users dialog box.

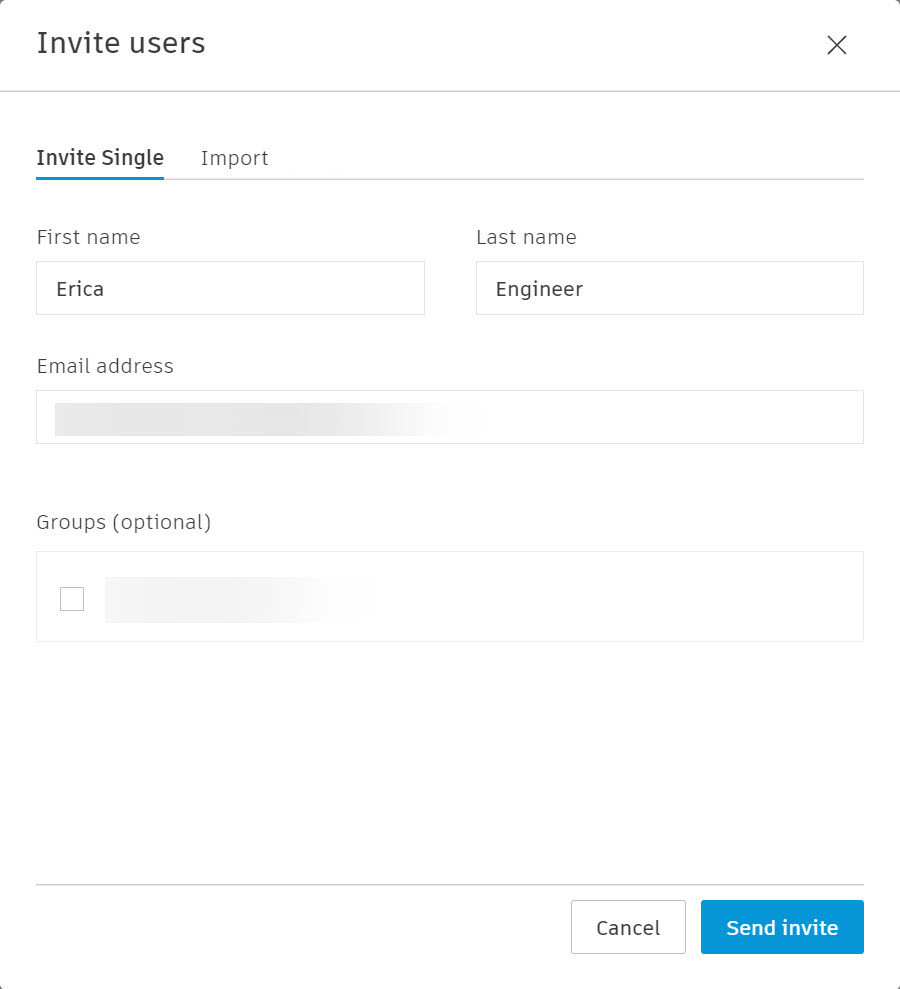
- In the Invite users dialog box, fill out the user’s First name, Last name, and Email address, and click Send invite.
Note: The email address used to create a user account must be the same email address that the administrator used to assign access.
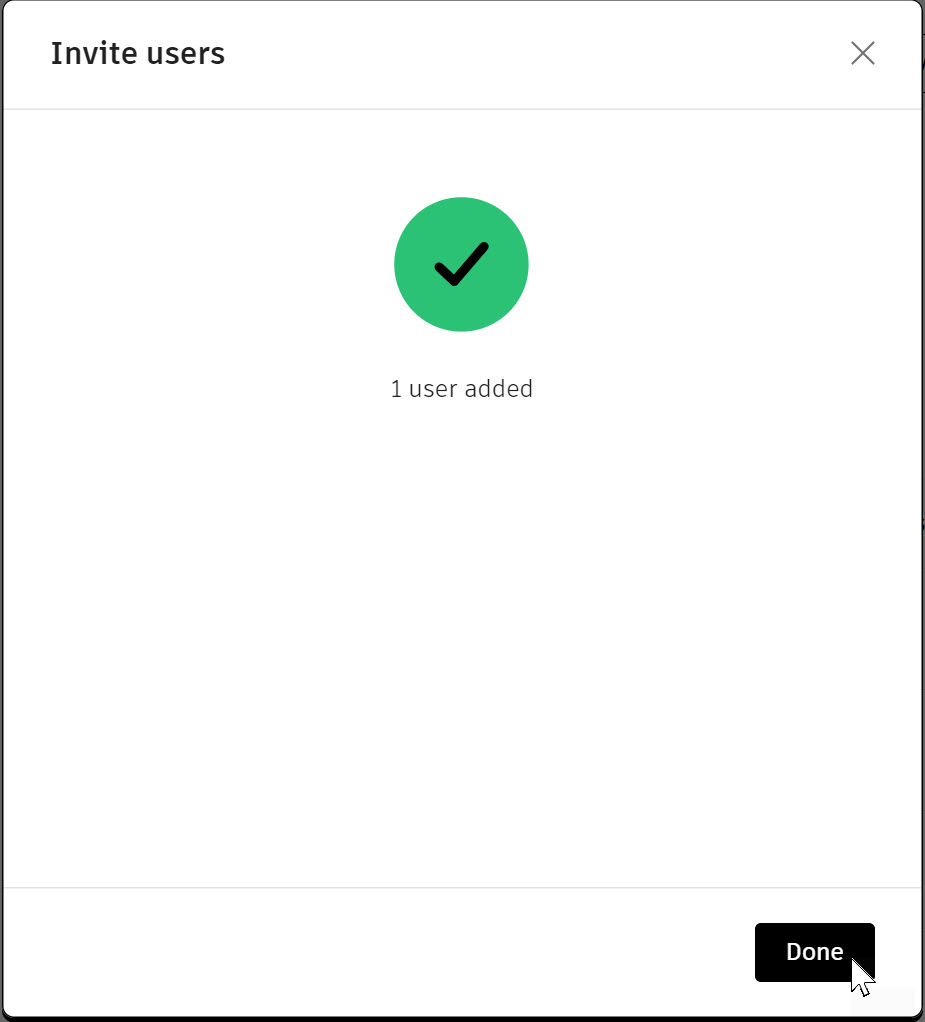
- The Invite users dialog displays that the invite has been sent. Click Done to continue adding users.
- The new user is added to the user list with an Account Status of Invited.
- The user will receive an email that they have been invited, with a link to access their account.
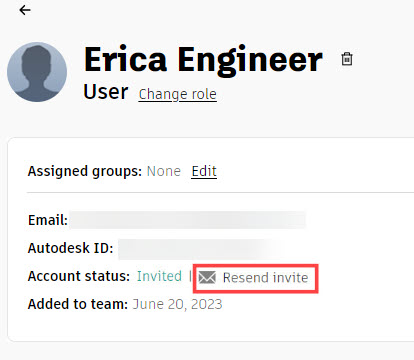
- The invited user has 7 days to access their account via the link in the email invitation. Once the time has lapsed, you will need to resend an invite by going to User Management>By User, selecting the user, and clicking Resend invite, as shown below.
- Once the user has clicked the link in their email and created or verified their account, your new user will show Verified as their account status. (Verification can take a few hours depending on how busy the Autodesk servers are at the time.)

Verify Autodesk Product Seat Availability
Before you assign users to any products, you can verify the available seats for each of the products within your account.
How to Verify Seat Availability By User
- In the navigation panel>User Management section, select By User. The User Management by User page displays with a list of all invited users.
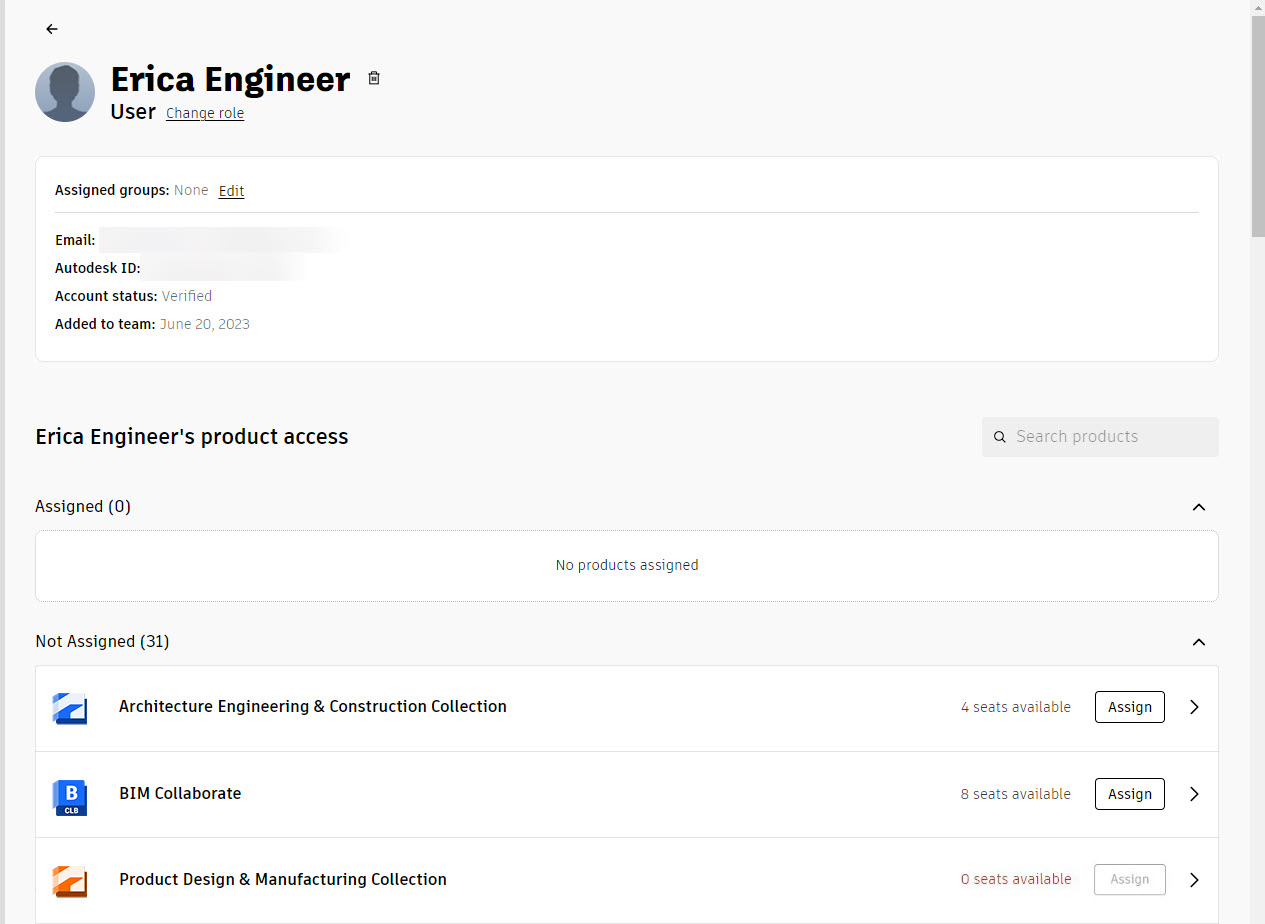
- Select a user. The Not Assigned area shows a list of all available software and industry collections.
- The seats available are displayed next to the software.
- By clicking on the software name, further information displays about the product and any software within the collection in a panel to the right. Hover your cursor over the information icon to see more information about the software/collection.
- Software cannot be assigned to a user twice.

How to Verify Seat Availability By Product
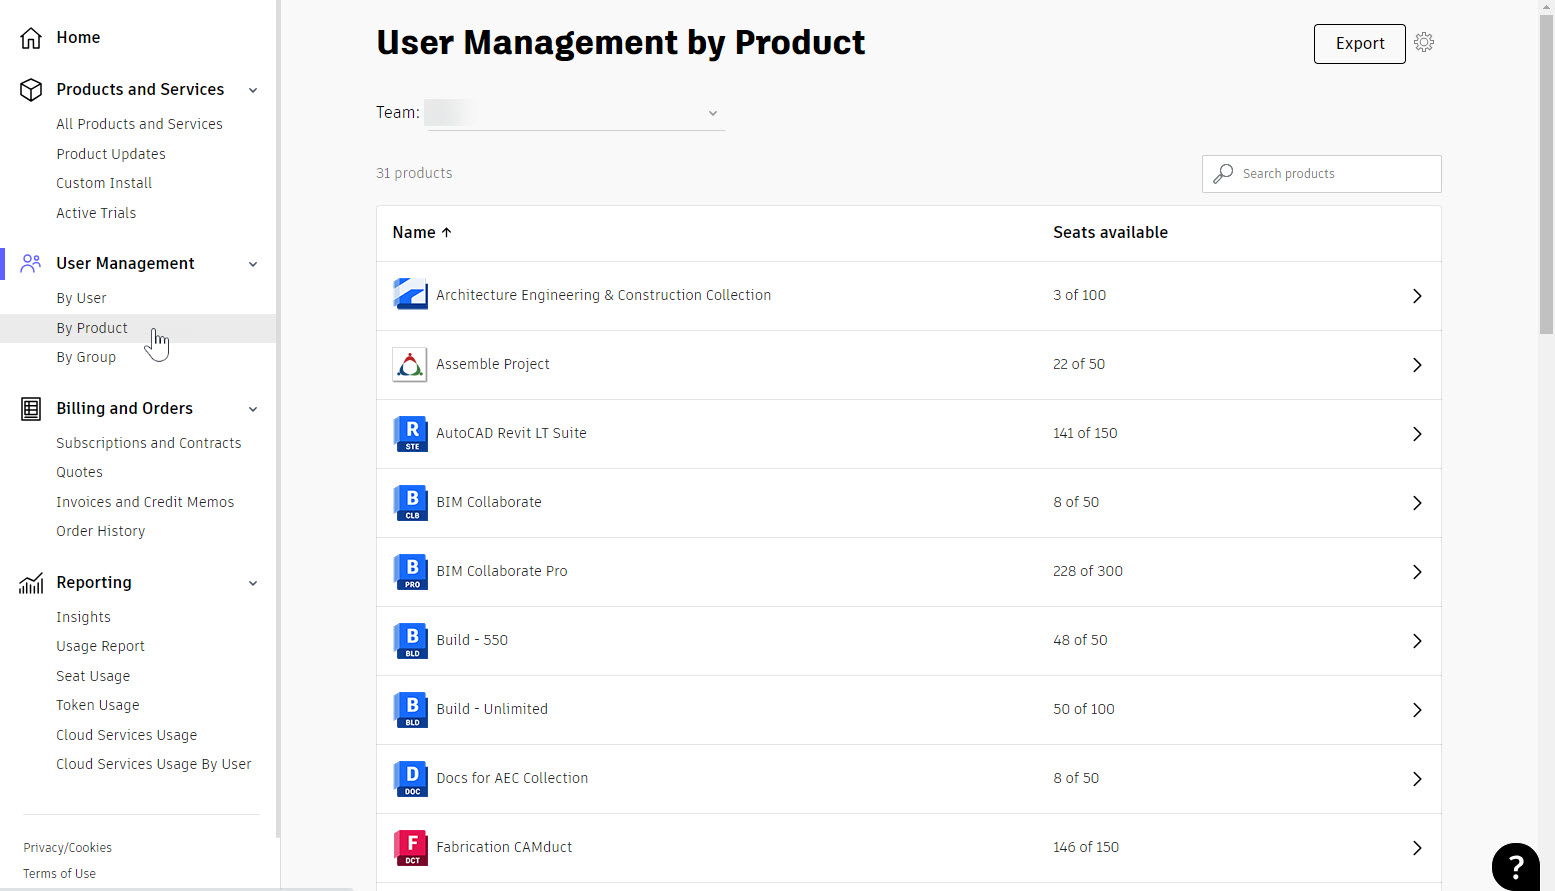
- In the navigation panel>User Management section, select By Product. The User Management by Product page displays with a list of all your Autodesk products and their available seats.
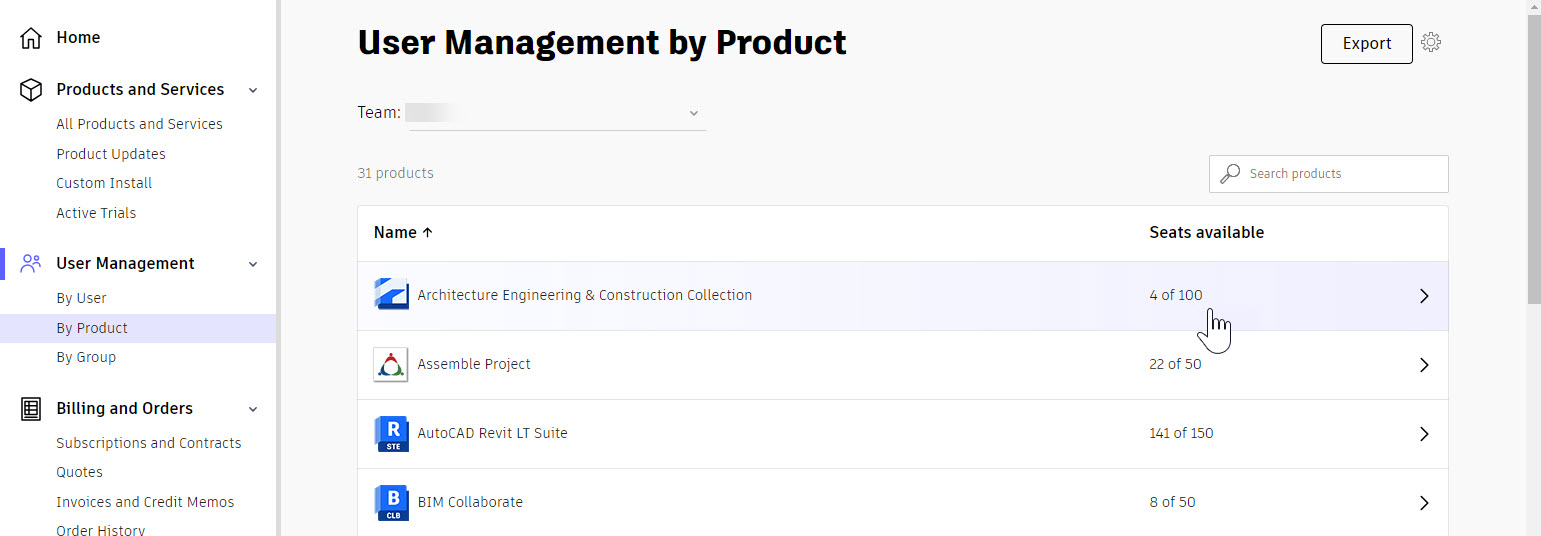
- Select a product to display any users that are assigned to the product.

Assign Products and Services to a User
In this section, you will learn how to assign Autodesk products to your users through the By User and By Product methods.
How to Assign Software to Users By User
- In the navigation panel>User Management section, select By User. The User Management by User page displays with a list of all invited users.
- Click on a user. Below their information is a list of the software assigned to the user, as well as the list of all the available software that can be assigned to them.
- Note that if all licenses have been assigned, the software will show in red text as having 0 seats available.
- Note that if all licenses have been assigned, the software will show in red text as having 0 seats available.
- Click Assign next to the software name, and the product is added to the user’s Assigned software section.
- Note that the software that was assigned is no longer in the list of Not Assigned software.

How to Assign Products to Users By Product
- In the navigation panel>User Management section, select By Product. The User Management by Product page displays, where you will see a list of your company’s Autodesk products. Click on the software or industry collection in the list that you want to assign.
- You will see a list of all the users who are already assigned to the Autodesk product. You will also see the seats available versus the product’s seats total.
- To add a user to the product, click Assign users. The Assign users dialog box displays.

- In the Assign users dialog box, on the Assign tab, you will see how many more users you can assign to the product.
- If applicable, you can customize which services a user will have access to by clicking Customize.
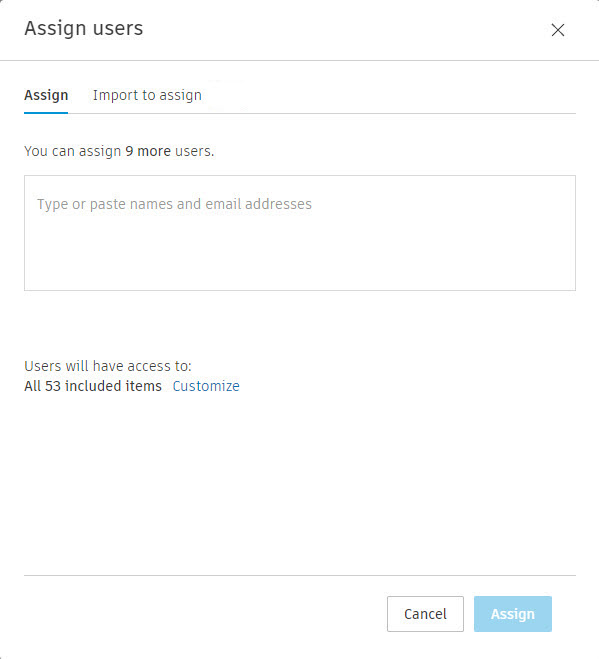
- If applicable, you can customize which services a user will have access to by clicking Customize.
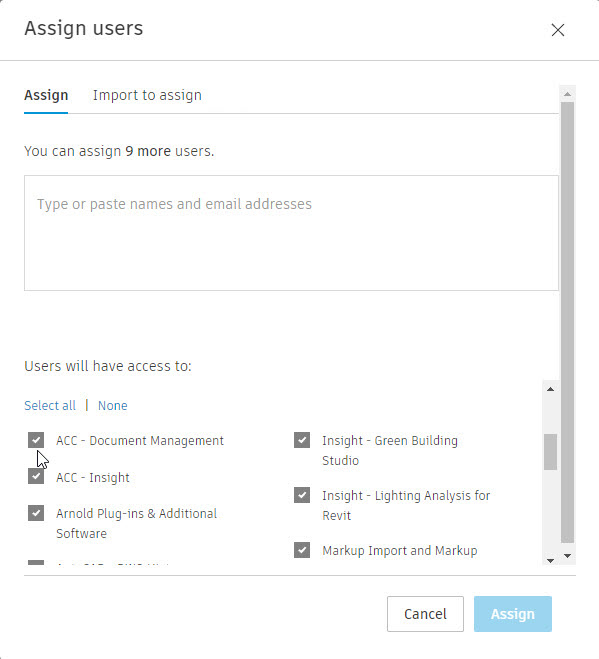
- If you click Customize, you will see what software is included with the product; this is what the user will automatically be assigned. To customize the services that come with the software, scroll down to show Individually assigned items, where you can uncheck software the user doesn’t need access to.
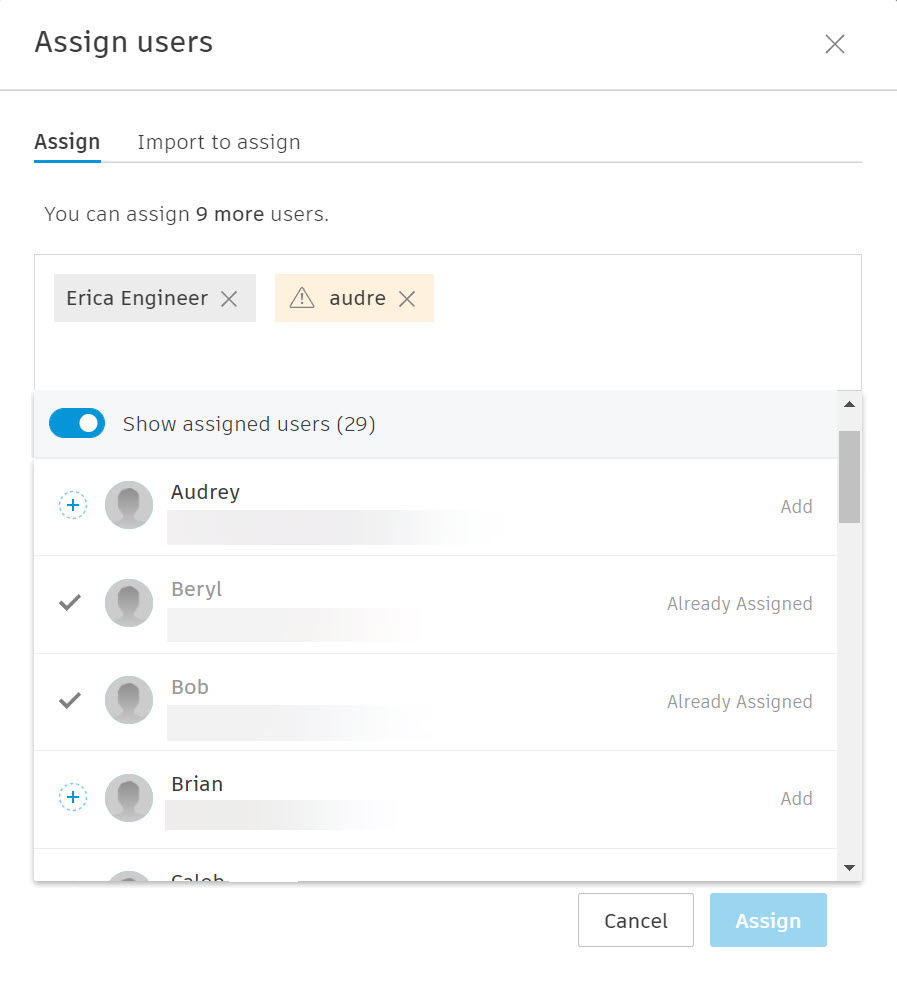
- Enter a user by pasting or typing in a name or email address. You can enter as many users here as needed.
- Toggling on the Show assigned users option updates the list of users to show who is assigned and who is not assigned to the specific product.
- If you type in a name that is not in the user list, you will see a warning symbol indicating that the user you are trying to add is not in your overall company user list under User Management>By User. Click the X next to the name to remove it. The Assign button will be grayed out if there is an incorrect user name or email address.
- Once you have entered the desired users, click Assign.
- Note: If the user doesn’t accept their invitation within 7 days, you will need to resend it.
Remove Products from Users and Remove Users
Remove Software from a User
Important: It is important to communicate with the user before removing software that was assigned to them.
How to Remove Software from a User By User
- In the navigation panel>User Management section, select By User. The User Management by User page displays with a list of your company’s users.
- Select a user from the list.
- Within the user’s product access Assigned software list, click the Unassign button to remove the software from the list, as shown below.

- Note that once the software is removed, it no longer displays in the user’s product access Assigned list, and instead will now display in the Not Assigned
How to Remove Software from a User By Product
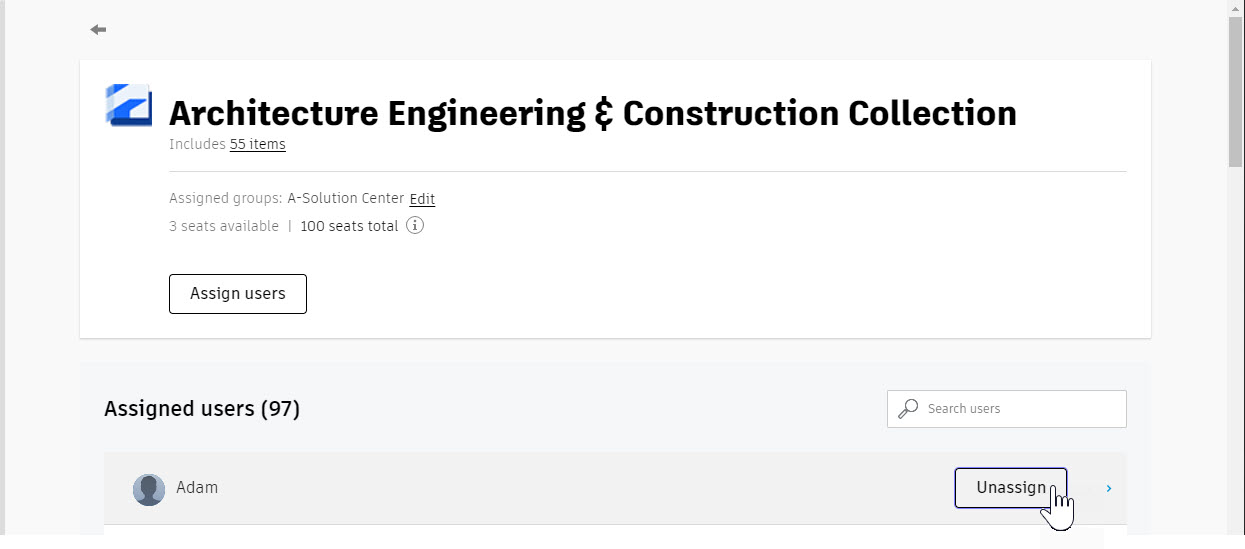
- In the navigation panel>User Management section, select By Product. The User Management by Product page displays with a list of your company’s products.
- Select a product from the list.
- Within the Assigned users list, click the Unassign button next to a user to remove the software from their list.
Remove a User
Important: It is important to communicate to the user that they will be removed from the company’s users list and will no longer see any of the company’s products in their list of All Products and Services, nor will they be able to access the software if it is installed on their machine.
How to Remove a User
- In the navigation panel>User Management section, select By User.
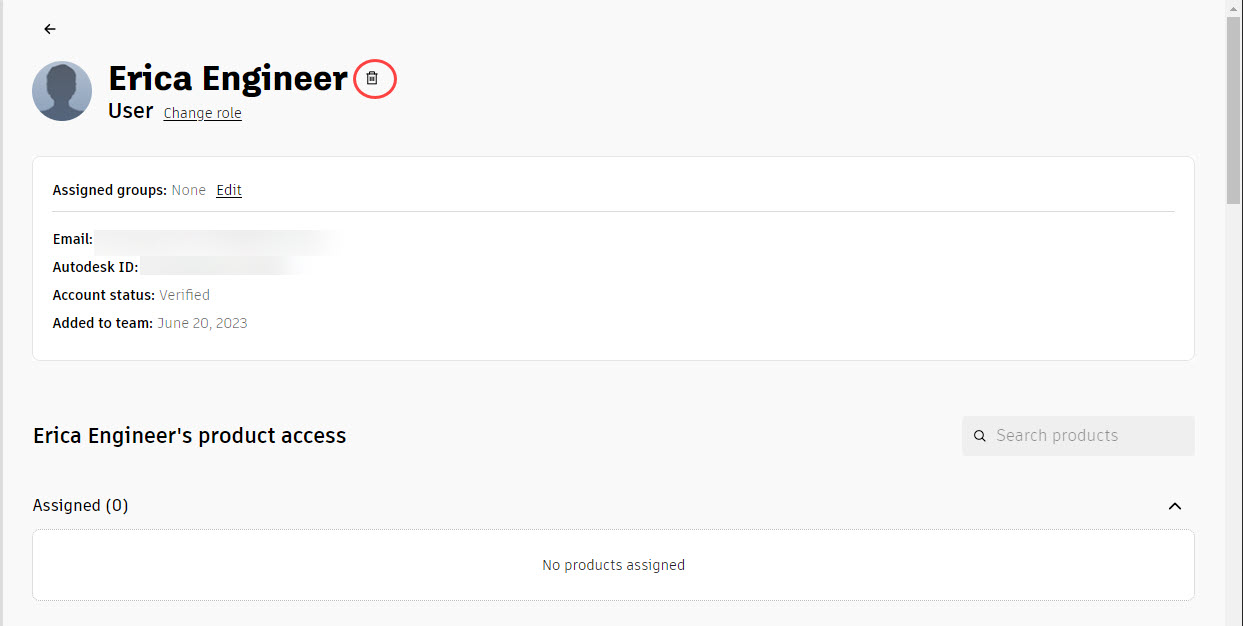
- On the User Management by User page, select the user you need to remove.
- Hint: Use the Search users field to quickly find the user.
- Verify that there are no products assigned to the user.
- Next to the user's name, click the Remove User icon, as shown below.
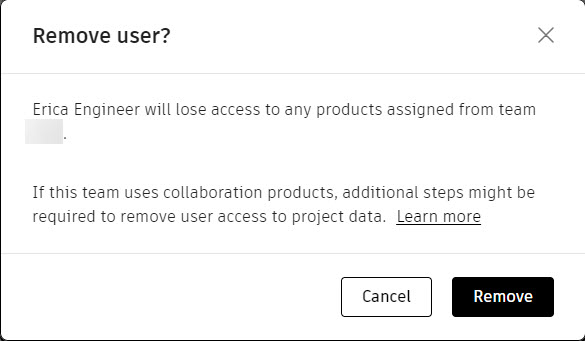
- In the Remove user? dialog box, click Remove.
Get Support for Adding Users or Assigning Products
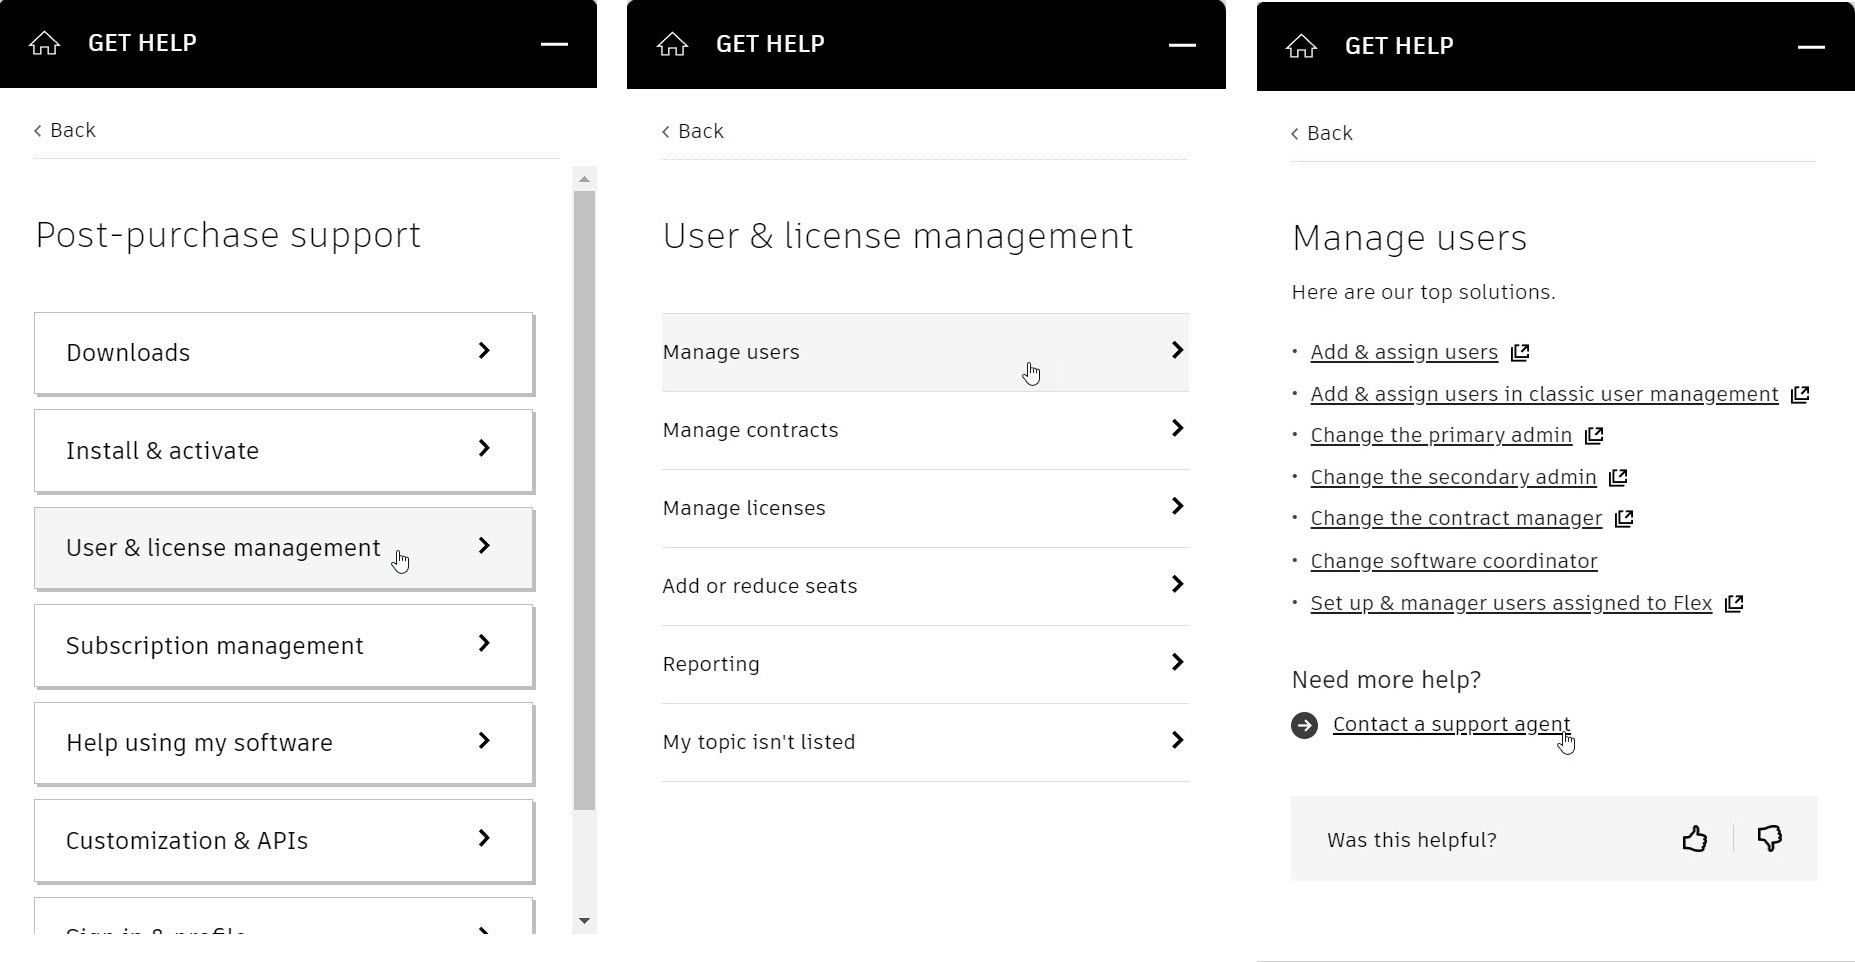
If you have any issues or questions about adding users, assigning products to users, or connecting users to your account, you can click on the ![]() icon in the lower-right corner to access the Get Help menu. Select Post-purchase support > User & license management > Manage users. You can review the Knowledge Network articles or click on Contact a support agent for further help.
icon in the lower-right corner to access the Get Help menu. Select Post-purchase support > User & license management > Manage users. You can review the Knowledge Network articles or click on Contact a support agent for further help.