Using non-structured Point Cloud data in ReCap
Any referenced datasets can be downloaded from "Module downloads" in the module overview.
Using non-structured data in ReCap - Exercise
Note: The complete exercise data is contained in 3 .zip files.
Task 1: Import and index .LAS point cloud data files into ReCap
- Start a New Project in ReCap or ReCap Pro and select Import Point Cloud.
- Type in a Project Name of your choice and then select the folder where you want to save this new project. Click Proceed.
- Drag and drop the 7 exercise point cloud data files. Alternatively, you can browse to them. The files are .LAS file types.
- project_group1_densified_point_cloud_part_1.las
- project_group1_densified_point_cloud_part_2.las
- project_group1_densified_point_cloud_part_3.las
- project_group1_densified_point_cloud_part_4.las
- project_group1_densified_point_cloud_part_5.las
- project_group1_densified_point_cloud_part_6.las
- project_group1_densified_point_cloud_part_7.las
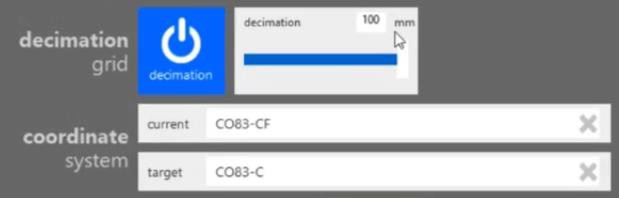
- Select the Advanced Tab and set the Decimation Grid to 100 mm.
- Set the coordinate systems, the coordinate system dropdown list is in alphabetical order, scroll down to find these:
- Current: CO83-CF
- Target: CO83-C
- Click Import Files. This will take several minutes.
- Click on Index Scans.
- Click on Launch Project.
Task 2: Create a Top view state
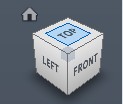
- Use the Nav Cube to set the view to TOP.
- Open the Project Navigator by clicking on the stack icon in the lower left.

- Hover over the View States collection and click on the plus symbol.
- A new view state is added. Double click on the name to rename it to Top.
Task 3: Verify number of points and toggle on and off scan locations
- Expand the Scan Locations collection. Each of the individual point file imports is listed.
- Hover over the file names so that you see the number of points in each file.
- Toggle the visibility off and on for each scan location using the eye symbol icon.
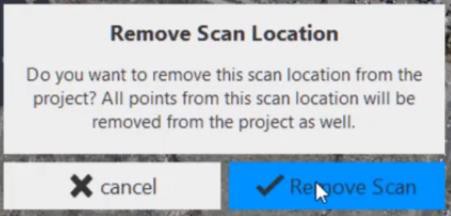
- Notice that three of the scan locations are in areas that are not needed. And they should be removed to make the point cloud smaller. Remove three unused scans by selecting the X symbol.
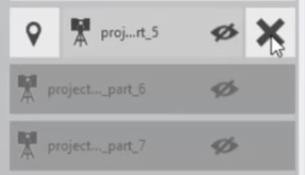
- Select Remove Scan to verify that you want to remove all of the points in the scan. Remove the scan locations for:
- _part_5
- _part_6
- _part_7
Task 4: Create regions for data to keep and data to remove
- Hover over the Window Select icon to fly out the selection options. Click on Fence.
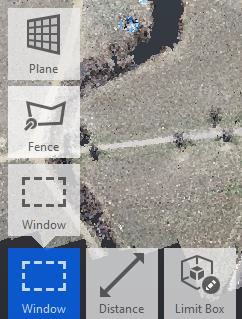
- Carefully pick to select the area of the point cloud to keep for use in our design project. Double-click to finish the selection.
- Hover over the Region icon and click on New Region.
- Name this region: Development Area – Keep.
- In the Project Navigator in the Scan Regions collection, turn off the visibility of this newly made region.
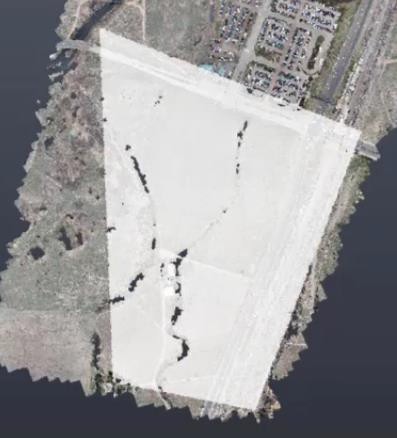
- Use the window selection tool to select the remaining point cloud. Create a new region.
- Name this region: Remove.
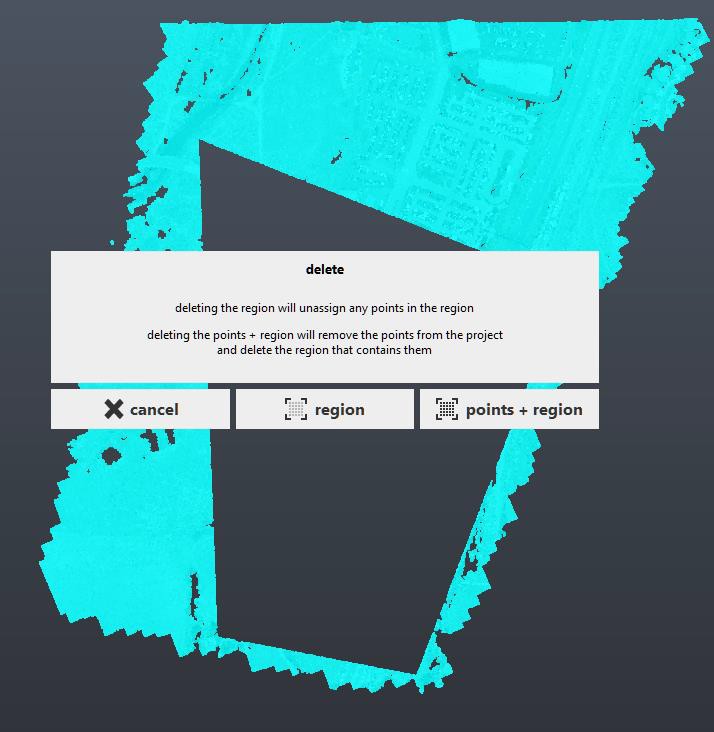
- In the Scan Regions collection, select the X symbol.
- Click on point + region.
Task 6: Save and optimize project
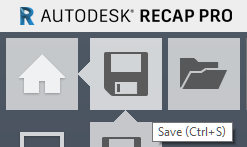
- Hover over the Home icon to fly out the menu items. Click on the save icon.
- Select Optimize.
Task 7: Export point cloud
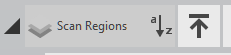
- Hover Scan Regions header in the Project Navigator and click on the export icon.
- Select the .RCS file format.
- Browse to the folder location where you want to place these export files. Each region will create an RCS file with the name of the region.
- Click on Unify Settings and set the Refine Grid spacing to 100 mm.
- Each region will create an RCS file with the name of the region.