Validate and import Advance Steel data
Any referenced datasets can be downloaded from "Module downloads" in the module overview.
Validate and import Advance Steel data in Autodesk Revit - Exercise
Task 1: Export the SMLX file from Advance Steel
- Start Advance Steel 2021 and open the Medical-Center-Documentation.dwg file that you saved in the previous objective.
Note: This file should have the two extra beams labeled as 1 and 2 in the following figure and the connections applied to them. These two beams were imported during synchronization with the revised Revit model in the previous objective.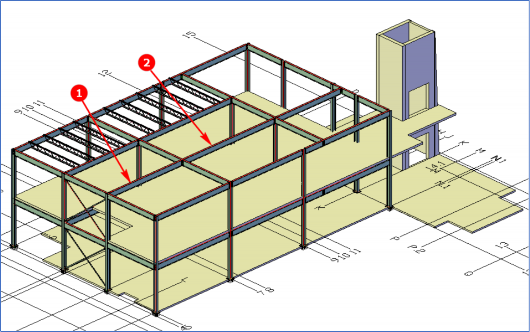
- Press ESC to make sure nothing is selected.
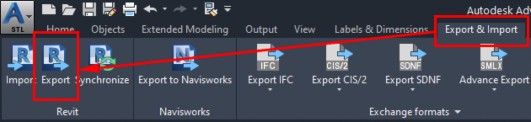
- From the Export & Import ribbon tab > Revit ribbon panel, click Export, as shown in the following figure. The Save As dialog box is displayed.
- Save the SMLX file with the name Medical-Center-Documentation-AS.smlx.
Task 2: Validate the Advance Steel detail model with the design model in Autodesk Revit
- Start Revit 2021 and open the Medical-Center-Structure-Design-V2.rvt file.
- From the Add-Ins ribbon tab > Advance Steel Extension ribbon panel > Advance Steel Extension flyout, click the Synchronization button, as shown below. The Synchronisation dialog box is displayed.

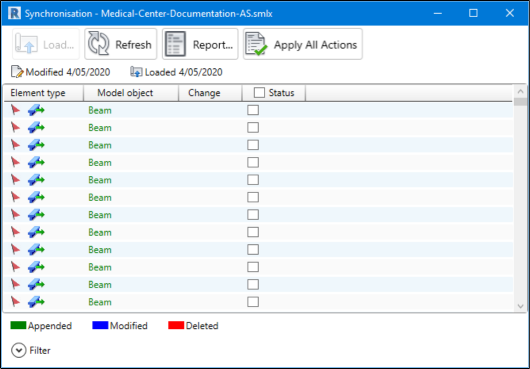
- In the Synchronisation dialog box, click the Load button and load the Medical-Center-Structure- Design-AS.smlx file you exported in the previous task. The Synchronisation dialog box shows various beams listed in green, suggesting that they were added in the detailed model in Advance Steel.
- From the bottom left in the dialog box, click Filter. The dialog box is expanded and various filters are displayed.
- Click the Clear All button to clear all the filters.
- From the Elements area, select the Column and Beam check boxes.
- From the Changes area, select the Appended check box.
- Click Apply Filter. All the beams and columns that are not available in the Revit model are listed in the dialog box in Green.
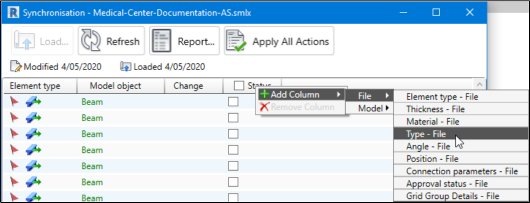
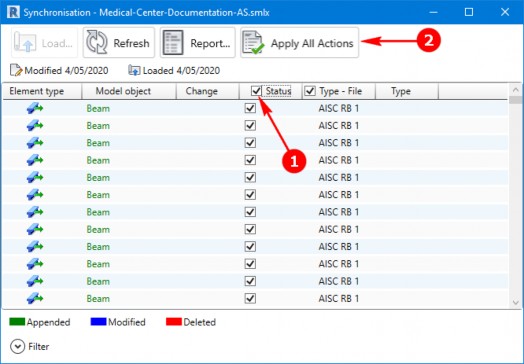
- In the dialog box, right-click on the Status column and select Add Column > File > Type – File, as shown below. The Type – File column is added.
- Similarly, right-click on the Type – File column and select Add Column > Model > Type. The Type column is added in the dialog box.
Notice the sections displayed as appended in the Type – File column are the bracing and joist sections that are not available in the Revit model. You will now add these columns. - Select the check box in the Status column name labeled as 1 in the following figure and click the Apply All Actions button labeled as 2 in the following figure. The process of adding the joist and bracing sections in the Revit model starts.
- From the Changes area at the bottom in the dialog box, clear the Deleted check box, and select the Modified check box.
- Click Apply Filter. The dialog box shows a list of items that are modified.
- Review the Change column and notice that these changes are about material, suggesting the material names are different in Advance Steel and Revit. You can ignore these changes.
Task 3: Import connections from Advance Steel
- With the Synchronisation dialog box still opened, clear the Column and Beam check boxes from the Elements area.
- Select the Connection check box from the Elements area.
- From the Changes area, select the Appended check box.
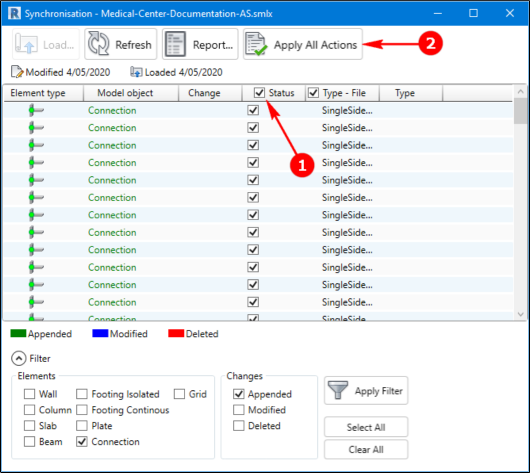
- Click Apply Filter. All the connections that were added to the detailed model in Advance Steel are listed in the dialog box.
- Select the check box in the Status column name labeled as 1 in the following figure and click the Apply All Actions button labeled as 2 in the figure below. The process of importing all the connections begins.
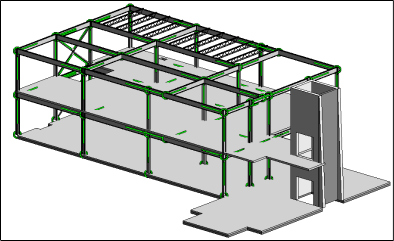
- Once all the connections are imported, close the dialog box. The connections are displayed in green lines and circles, as shown below.
- Save the Revit model.