Adding reinforcement to a footing
Any referenced datasets can be downloaded from "Module downloads" in the module overview.
Add reinforcement to a footing - Exercise
There is a plethora of different footing configurations when it comes to reinforcement. Let’s look at the more common approach.
- Open Revit then the file STRUCTURAL.RVT (or open any Revit project you are working in).
- Go to Footing Section 13.
- Delete that weird bar we used as an example in the last video.
- Select the footing.
- Click the Rebar button.

- Make sure Rebar Shape: 00 is selected.
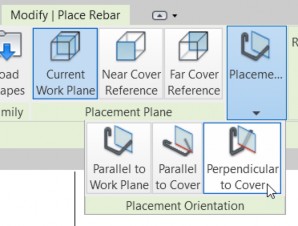
- Make sure Perpendicular to Cover is selected in the Placement Orientation Panel.
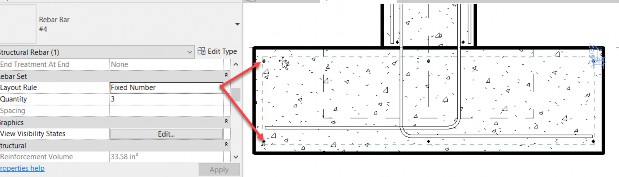
- In the Properties, set the layout rule to Fixed Number.
- Set the Quantity to 3.
- Add this configuration to the top cover and to the bottom cover, as illustrated below.
- Now set Parallel to Work Plane in the Placement Orientation Panel.
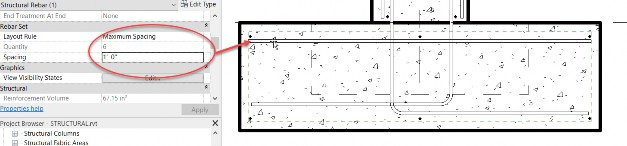
- Set the Layout Rule to Maximum Spacing.
- Set the Spacing to 1'-0".
- Add a bar below the perpendicular bars riding the top cover.