Create publish sets in Autodesk Revit
Any referenced datasets can be downloaded from "Module downloads" in the module overview.
Exercise: Create Publish Sets in Autodesk Revit
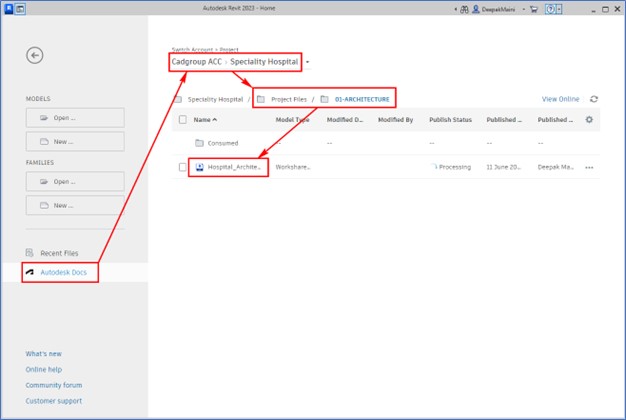
Task 1: Open Cloud-Workshared Revit Model
- Start Revit.
- From the Home Screen, click Data Management and then navigate to your Forma account, project, and the folder where the Revit file is saved.
- Click on the Revit file to open it, as shown in the image below.
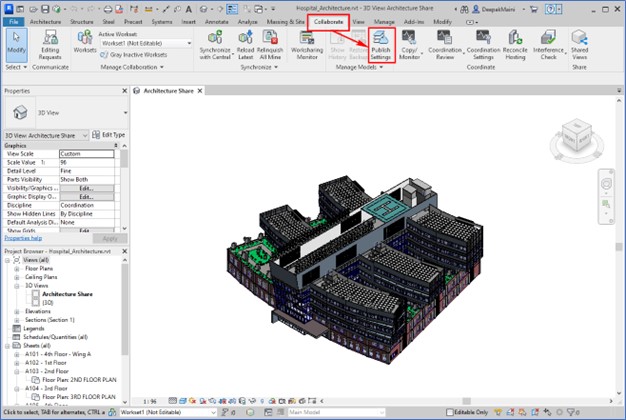
Task 2: Create Publish Sets
- From the Collaborate tab > Manage Models panel, click Publish Settings, as shown below.
- Create New Set to add a new publish set.
Tip: You can click the Preview button on the lower right to expand the dialog box and preview the sheets and views, as shown in the figure below.
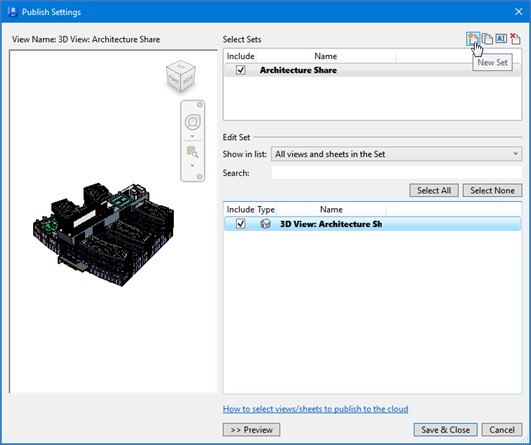
- Rename the publish set.
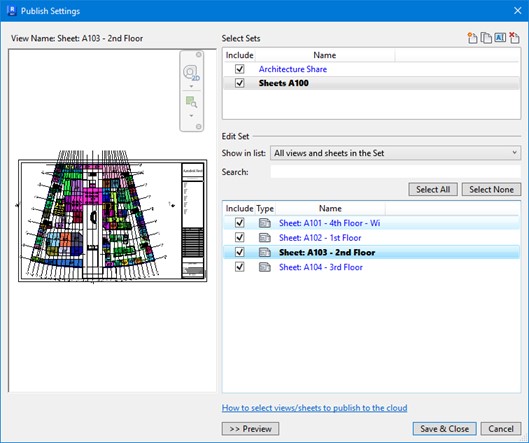
- From the Edit Set area, select the views and sheets to be included in the new publish set.
- Make sure you select the check box on the left of the new publish set name, as shown in the figure below.
Tip: All the publish sets that have their check boxes selected will be included with the published model for viewing on Forma Data Management and for sharing through Design Collaboration.
- Click Save & Close to save the publish sets.
Task 3: Syncing with the Cloud Central
- From the Quick Access Toolbar at the top of the Revit window, click Synchronize and Modify Settings; the Synchronize with Central dialog box is displayed.
- Enter the description of the changes made to the model, as shown in the figure below.
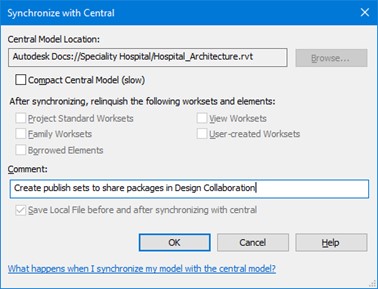
- Click OK to synchronize the model with the cloud central.
Task 4: Publishing the Latest Model
- Close the current Reivt file to return to the Home Screen.
- From the top right, click Refresh the current project to refresh the window.
- Once the refresh is completed, select the check box on the left of the name of the Revit model.
- From the top of the window, click Publish, as shown below.

- In the Publish to the Cloud window, click Publish again to start the process of publishing the latest model to Forma Data Management.