Safely Accepting the Primary Option
Any referenced datasets can be downloaded from "Module downloads" in the module overview.
Accept Design Options - Exercise
Once a client has accepted an option, the other options should be removed from the model so only the primary option is kept.
It is highly recommended you make a copy of your current model as a detached model for archival purposes, which contains all the design options prior to accepting the chosen design option. When you accept a design option, all other options and related views will be deleted.
To accept the chosen design option, follow these steps:
- Open Revit.
- Open your architectural model.
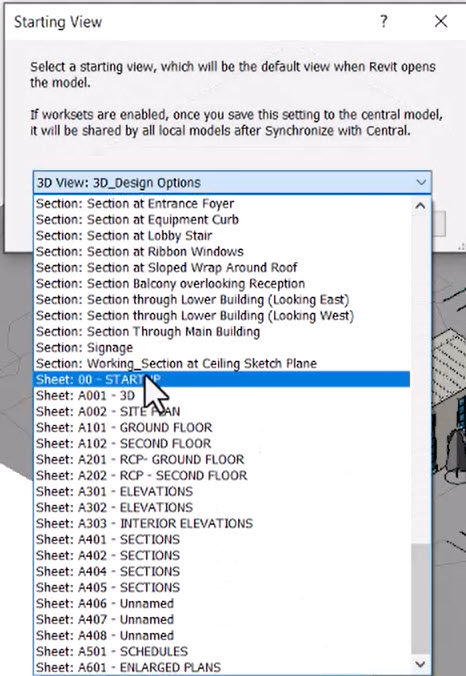
- In the Manage tab>Manage Project panel, select the Starting View command.
- In the Starting View dialog box, select Sheet: 00 - STARTUP from the drop-down list and click OK.
- At the very bottom of the Revit window, click the Design Options button.
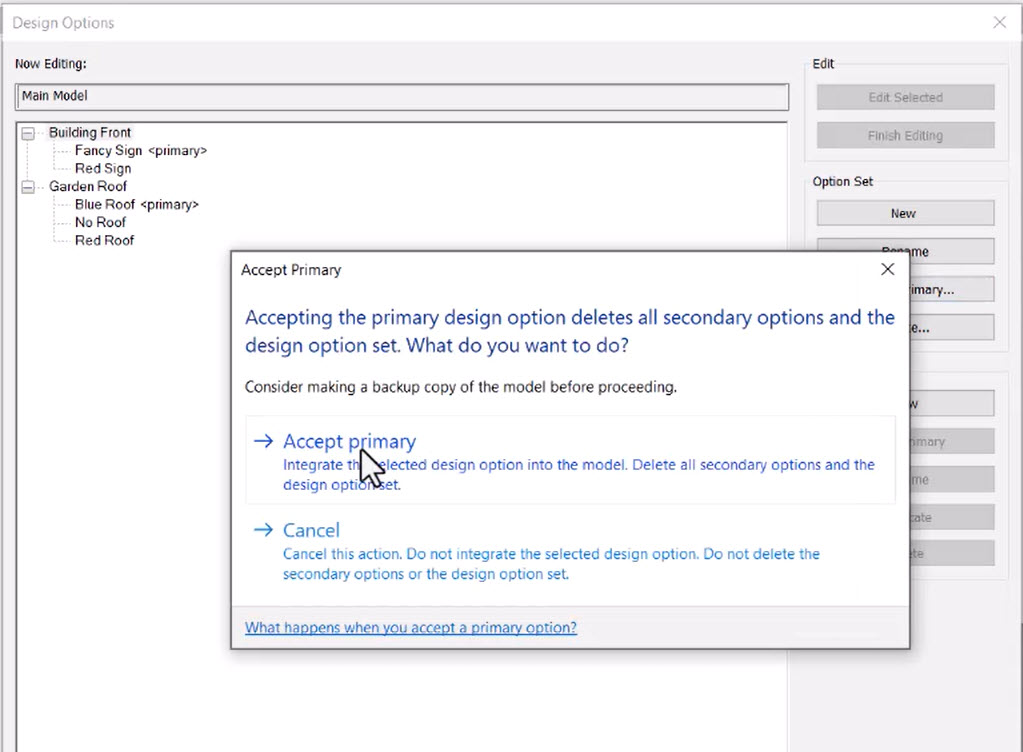
- In the Design Options dialog box, select the Building Front option set.
- In the Option Set panel on the right, click Accept Primary…
- In the Accept Primary dialog box, a warning is displayed that elements might be deleted. Select Accept primary, as shown below.
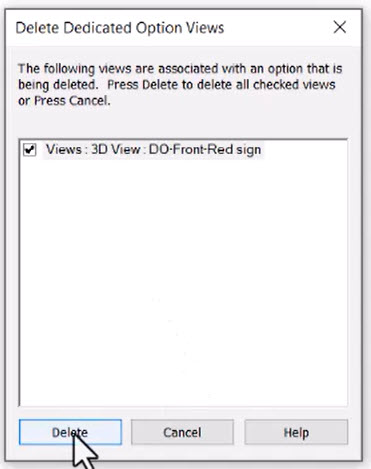
- In the Deleted Dedicated Option Views dialog box, it is indicated that the DO-Front-Red sign view will be deleted. Click Delete to accept.
- The Building Front option set is removed from the list.
- For the Garden Roof option set, select Red Roof.
- In the Option panel on the right, click Make Primary.
- Select the Garden Roof header in the list, to be able to accept the primary.
- In the Option Set panel on the right, click Accept Primary…
- As before, in the Accept Primary dialog box, select Accept primary, then in the Delete Dedicated Option Views dialog box, select Delete to delete the two dedicated options views.
- The Garden Roof option set is removed from the list, and there are no other design options in the project.
- Save and close the model.