Adding a Roof by Face to a Mass
Any referenced datasets can be downloaded from "Module downloads" in the module overview.
Create a Roof from the Mass Model – Exercise
Now that we have our massing, we can convert that mass to a Revit roof object.
To convert the mass to a roof, follow these steps:
- Open Revit.
- Open your architectural model.
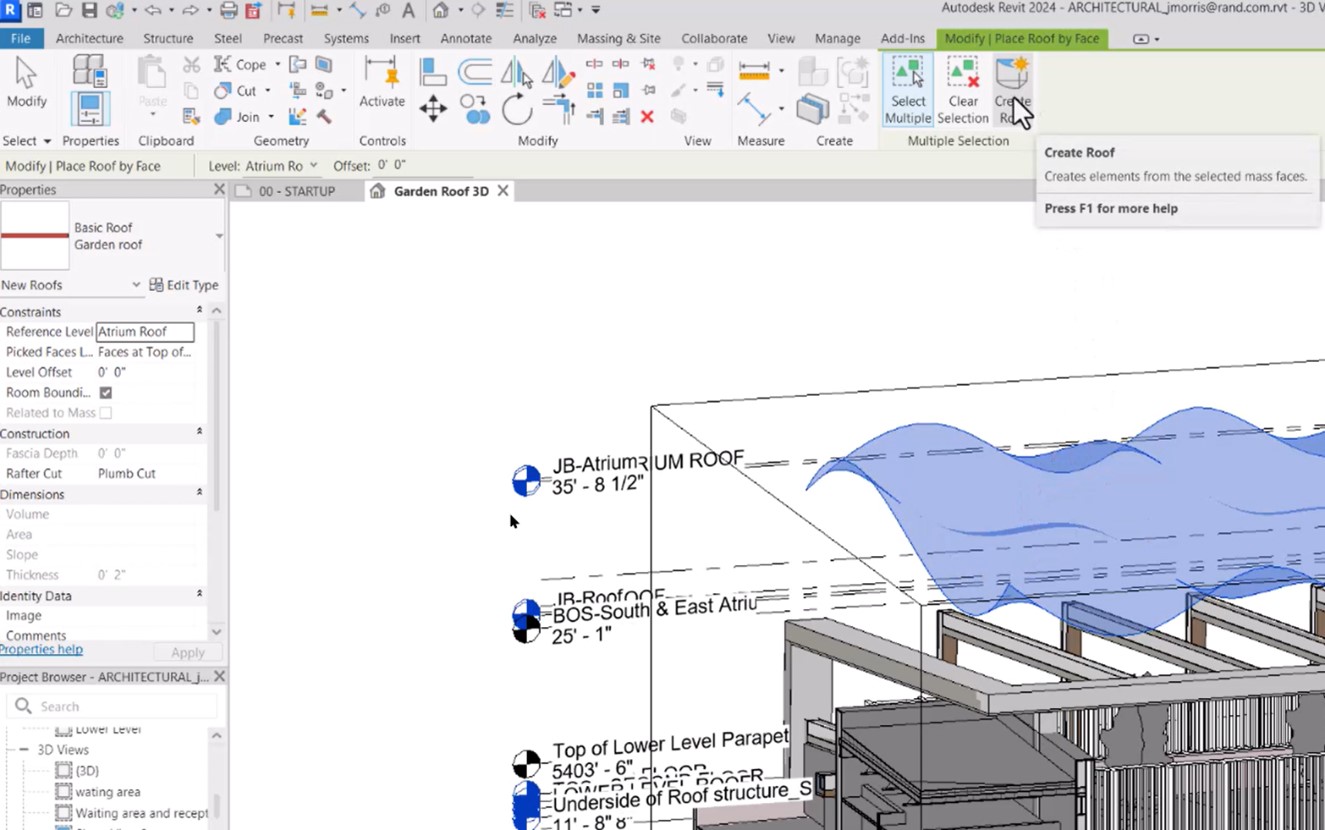
- Open the Garden Roof 3D view.
- Change the visual style of the view to Consistent Colors.
- Open the Visibility/Graphic Overrides (type VG). On the Model Categories tab, scroll down to Mass and enable the visibility by checking the checkbox. Click OK.
- Zoom in on the garden roof.
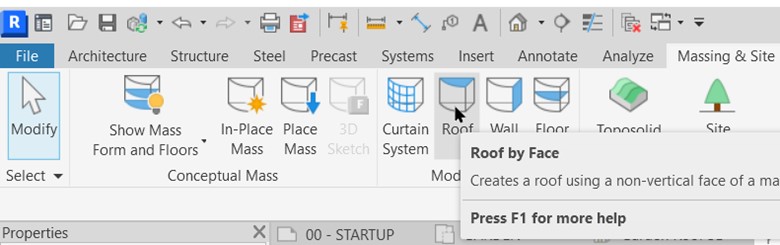
- In the Massing & Site tab>Model by Face panel, click Roof by Face.
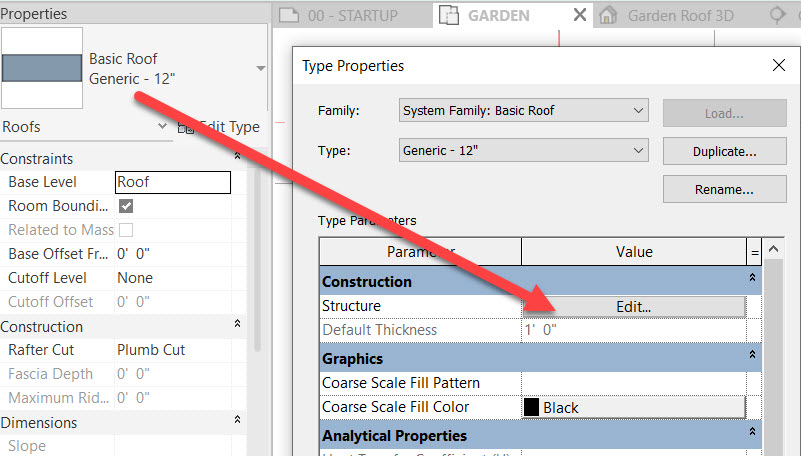
- In Properties, select Basic Roof Generic – 12″.
- Click Edit Type.
- In the Type Properties dialog box, click Duplicate…
- In the Name dialog box, enter Garden Roof and click OK.
- In the Type Properties dialog box, next to Structure, click Edit, as shown below.
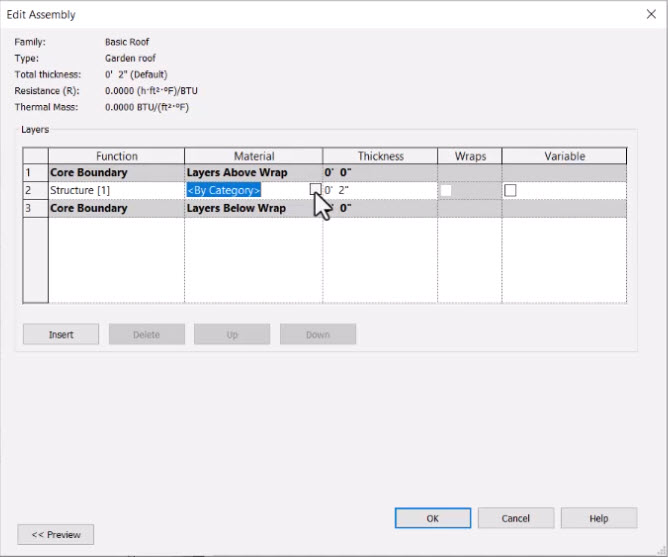
- In the Edit Assembly dialog box, change the Thickness to 2″.
- In the Material cell where it says <By Category>, click the […] button.
- In the Material Browser, click Create New Material.
- Rename the new material to Garden Roof.
- On the Appearance tab, in the Image section, select Red Fabric.
- Select the Transparency checkbox and set the Translucency to 40%.
- On the Graphics tab, set the Shading to Use Render Appearance, as shown below.
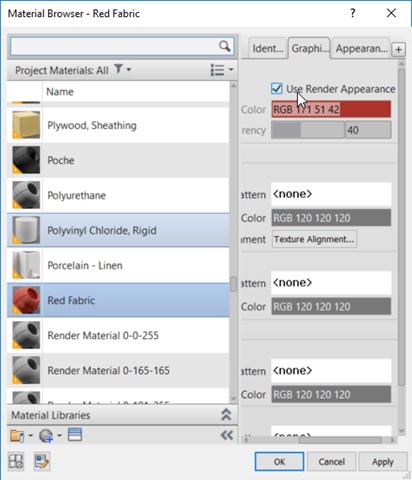
- Click OK to close the Material Browser.
- Click OK to close the Edit Assembly dialog box.
- Click OK one more time to close the Type Properties dialog box.
- Select the mass.
- In the Modify | Place Roof by Face tab, click Create Roof.
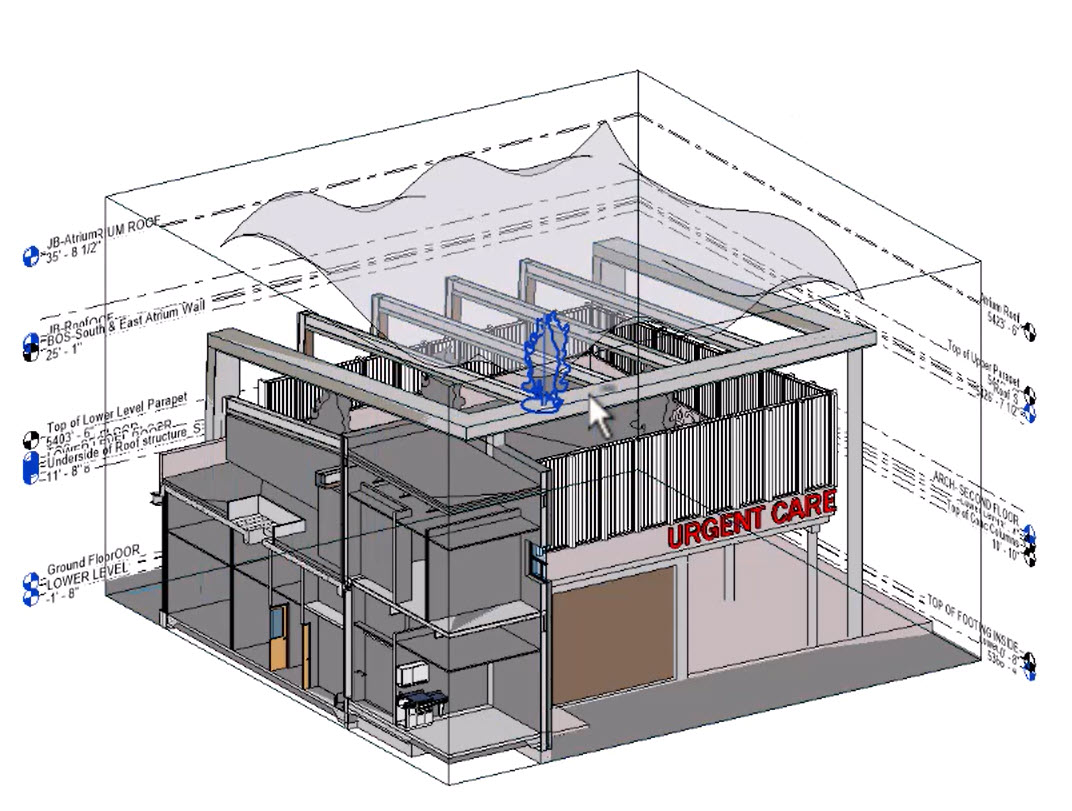
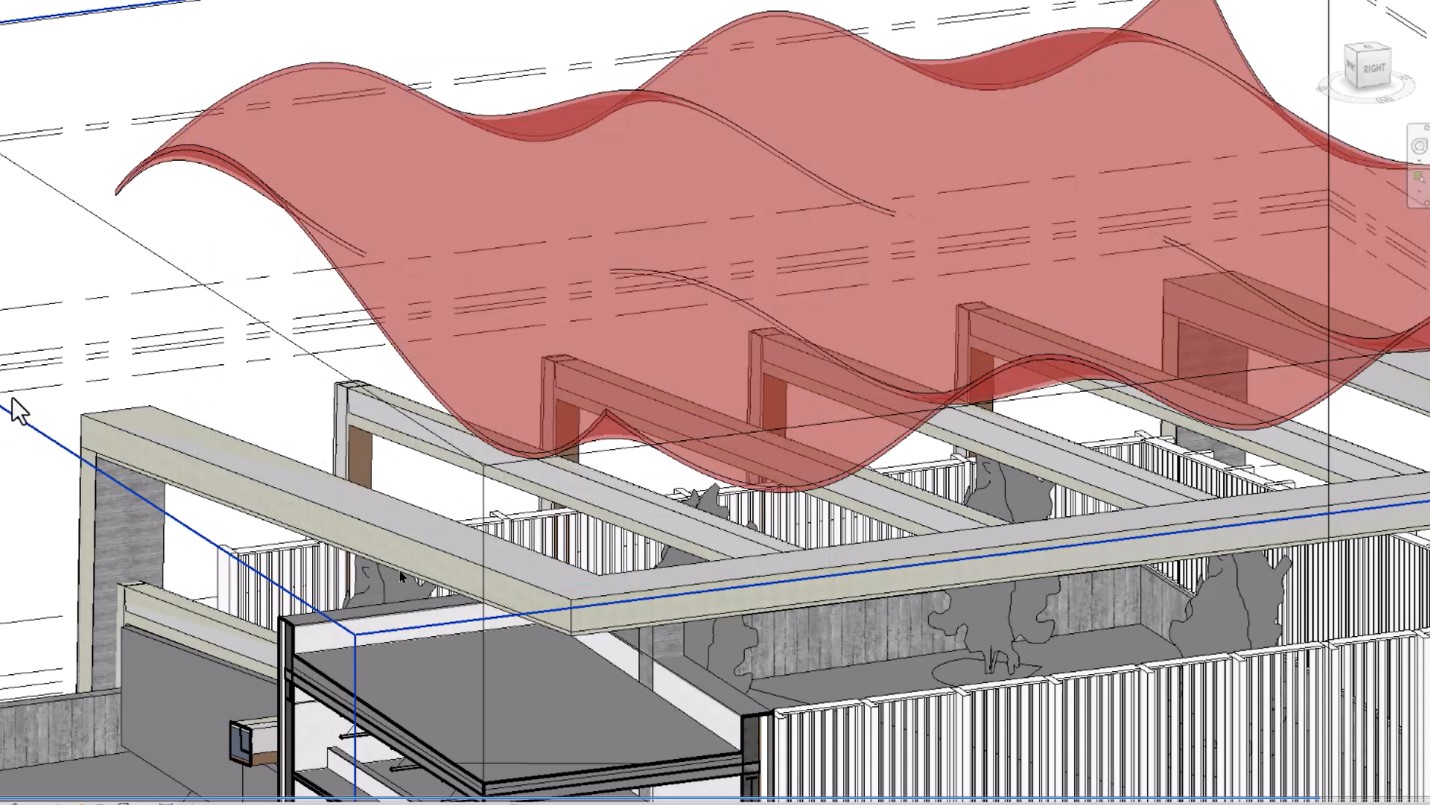
- Your roof should look similar to the one shown below.
- Save the file.