Configuring database annotations
Any referenced datasets can be downloaded from "Module downloads" in the module overview.
Explore Database Annotations - Exercise
In Revit, certain annotation types (elevation markers, section markers, column bubbles, call out bubbles, etc.) seem to magically know which sheet they belong on. In this exercise, you will see how that magic works by examining the relational database that underlies BIM.
To see how sections and elevations work, follow these steps:
- Open Revit.
- Open the Small Medical Center model.
- Open the SECOND FLOOR Floor Plan view.
- Zoom in to the lower-left area of the view to the 2/A405 section marker, as shown below.

- Open the A405 sheet. Note in the lower-left corner is detail #2, which is the Longitudinal Building Section.
- Return to the SECOND FLOOR Floor Plan view.
- Double-click on the 2/A405 section marker, which serves as a hyperlink. The Longitudinal Building Section view opens.
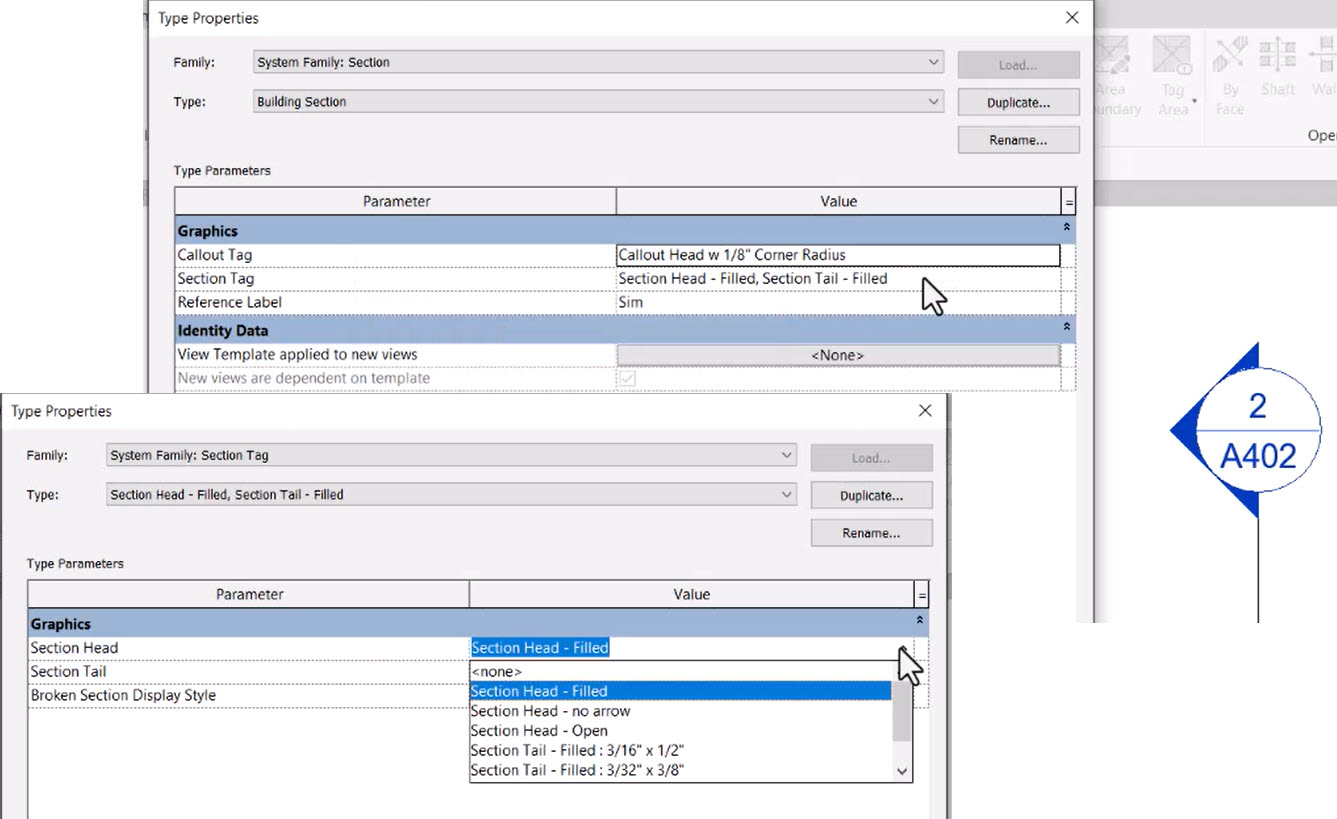
- Examine the section tag by selecting it and clicking Edit Type in Properties.
- Select the Section Tag cell. In the Section Tag Type Properties, note that you can select a variety of section tags. The current one is Section Head – Filled, as shown below.
- In the File menu, click Open>Family.
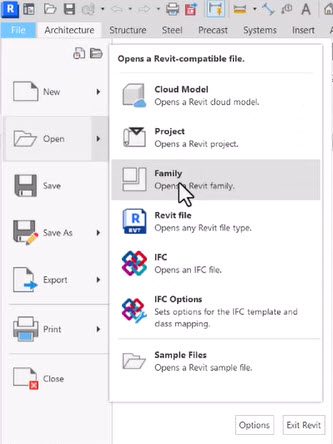
- Navigate to the Annotations folder and open Section Head - Filled.rfa.
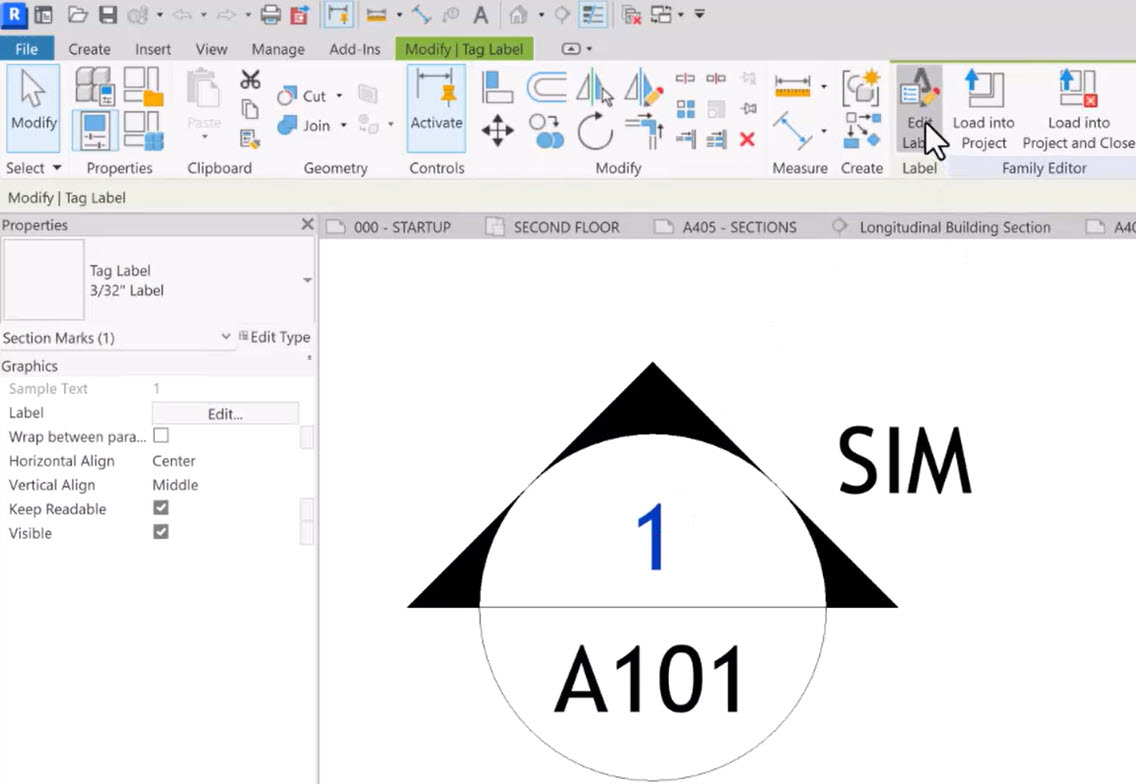
- Click on the number 1.
- In the Modify | Tag Label tab>Label panel, select Edit Label.
- In the Edit Label dialog box, examine the Parameter Name in the right-hand panel and the available Category Parameters in the left-hand panel. Note that this is the Detail Number parameter, as shown below. It will correspond with that number once you drag that view onto a sheet.
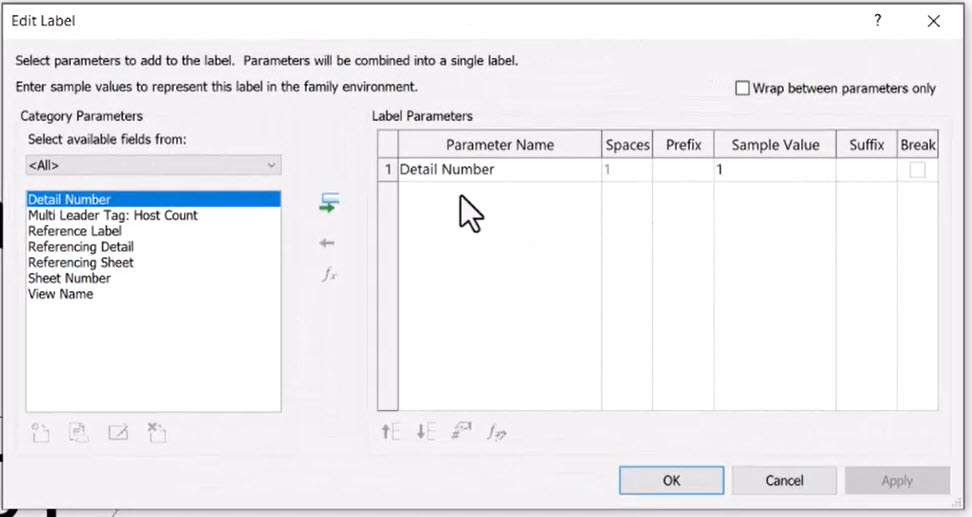
- Click Cancel.
- Repeat this for A101 and note that it represents the Sheet Number, as shown below.
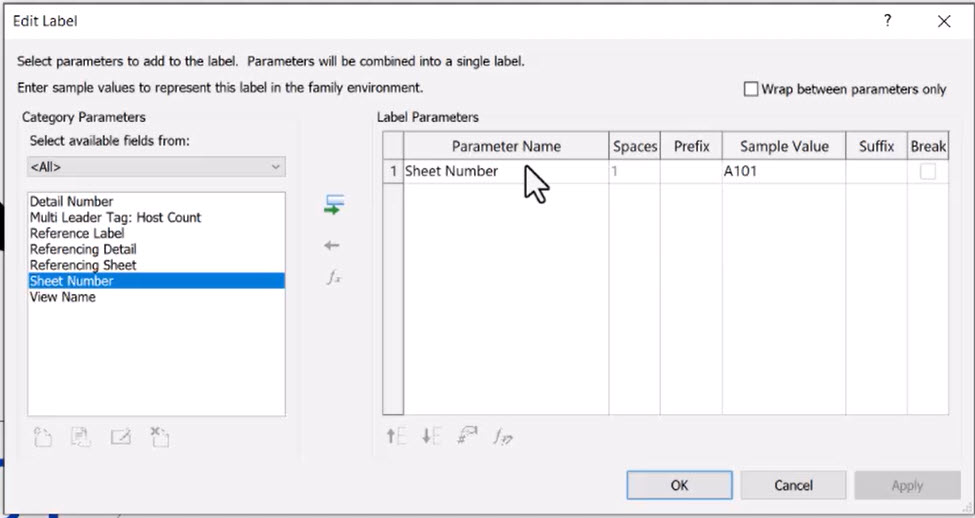
- Click Cancel.
- Close the annotation family without saving it.
- Close the Revit model without saving it.