Configure teams, add members, and assign permissions
Any referenced datasets can be downloaded from "Module downloads" in the module overview.
Configure teams, add members, and assign permissions - Exercise
Teams are established in Design Collaboration to represent either a company or a particular function within it. For instance, a company might have separate teams for architects, structural engineers, mechanical engineers, and other specialized roles. Each team works together on designs within a dedicated team space, where they can manage how data is shared with other teams by using Shared and Consumed folders. These folders are crucial to the data exchange workflows in Design Collaboration and should not be deleted. Additionally, this folder structure enables cross-project data exchange if you are using Bridge for Design Collaboration.
How to configure teams
The following are the ways that you can configure teams.
Method 1: Set up Project Files subfolders when creating teams
- In the Design Collaboration product>Settings tool, select the Team Setup tab.
- Click in the box that says Enter a team name, enter a name, and click Add.
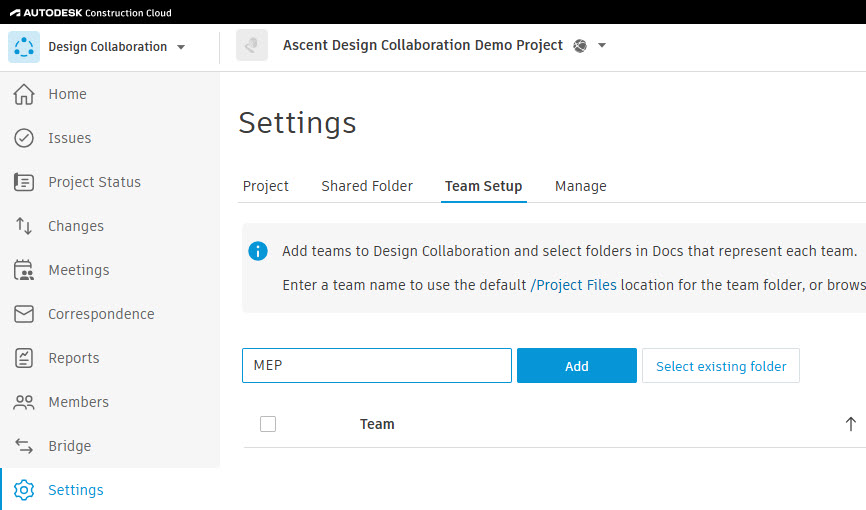
- The team is added to the list below. You can do the following for the new team:
- Click the colored dot to change the team color.
- Select the team name to edit the name.
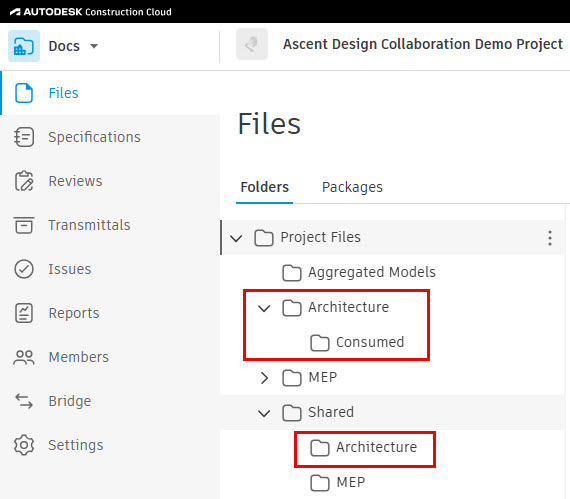
- To verify the folder was created, switch to the Docs product. Expand the Project Files folder and you will see the new folder that was created during team setup. Expand the new folder to see a new subfolder called Consumed. Expand the Shared folder to see the new team subfolder.
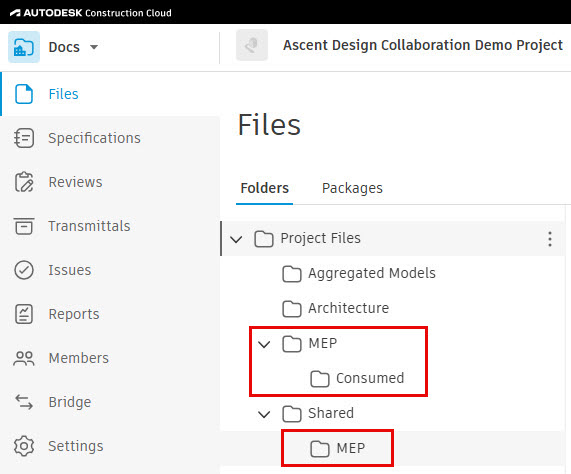
Method 2: Create teams from existing folders
- In the Design Collaboration product>Settings tool, select the Team Setup tab.
- Click Select existing folder.
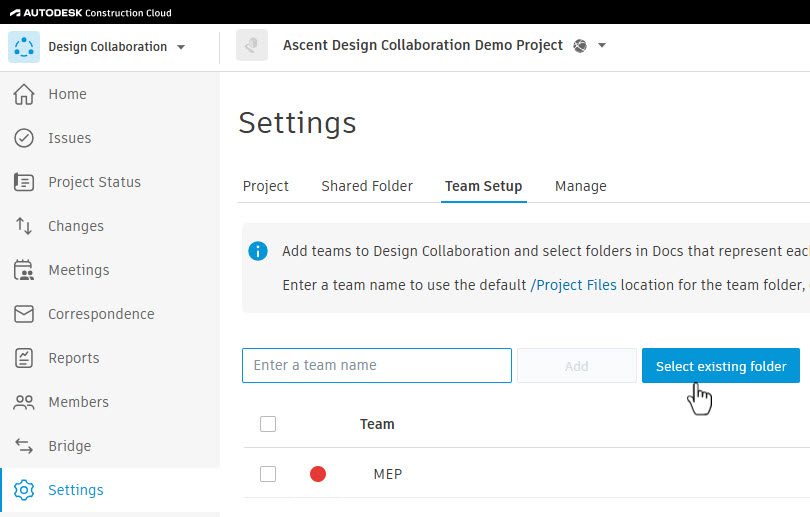
- In the Select a team folder dialog box, expand Project Files and select the folder you want to use to create the team. Note: The folder you select cannot already be associated with a team.
- Click Add Team.
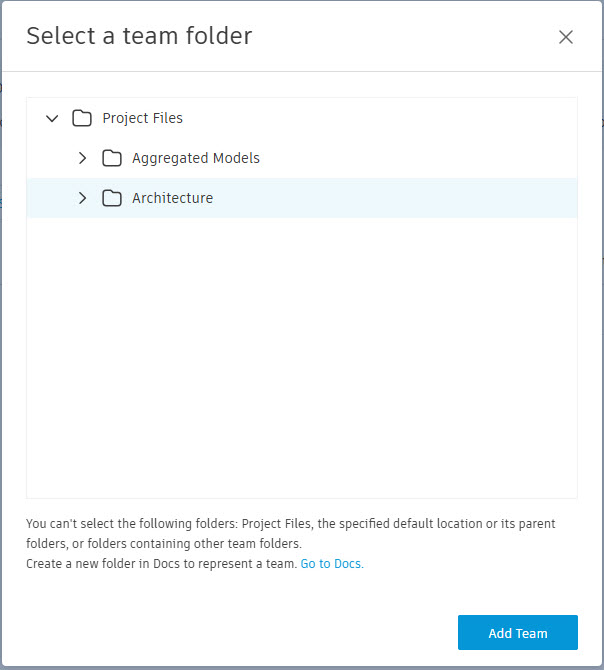
- To verify the folder was created, switch to the Docs product. Expand the Project Files folder and you will see the new folder that was created during team setup. Expand the new folder to see a new subfolder called Consumed. Expand the Shared folder to see the new team subfolder.
Method 3: Create teams by scanning for new teams
- In the Design Collaboration product>Settings tool, select the Team Setup tab.
- Design Collaboration will scan for any new team folders that contain supported models and are not associated with a team. You can manually start a scan by clicking the refresh icon in the upper-right corner.
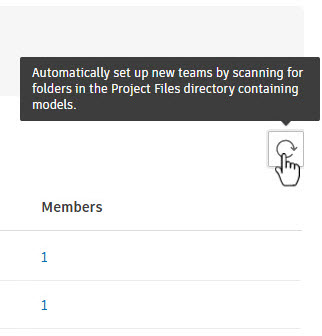
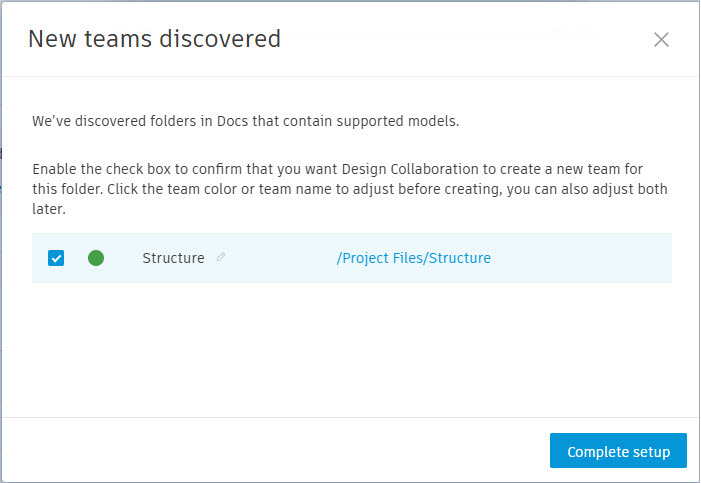
- Click the New teams discovered link to open the New teams discovered dialog box.
- Check the checkbox next to the team names you want to add. You can change each team’s color or edit the team names, then click Complete setup to add the teams to the team setup.
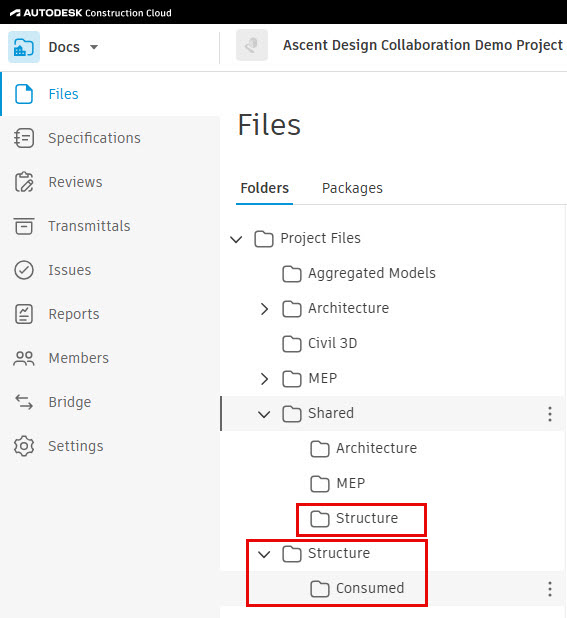
- To verify the folder was created, switch to the Docs product. Expand the Project Files folder and you will see the new folder that was created during team setup. Expand the new folder to see a new subfolder called Consumed. Expand the Shared folder to see the new team subfolder.
How to add team members and assign permissions
Before adding team members through the Team Setup tab, the roles, companies, and members must already be established in the project.
- In the Design Collaboration product>Settings tool, select the Team Setup tab.
- In the Members column, click on the number for the team name you want to add members to.
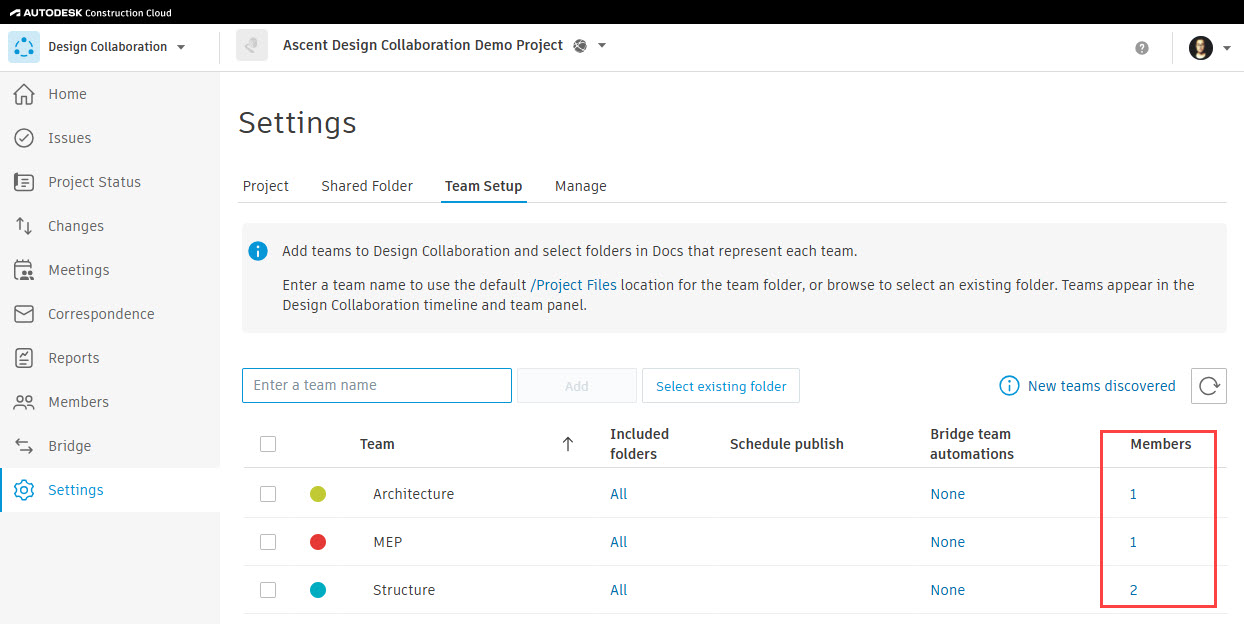
- Alternatively, you can check the box next to the team name and click Manage team members at the bottom of the teams list.
- In the Manage members of <folder name> dialog box, you can enter a name, company or role, then click on Permission level to expand the options. Select a level of permission and click Add.
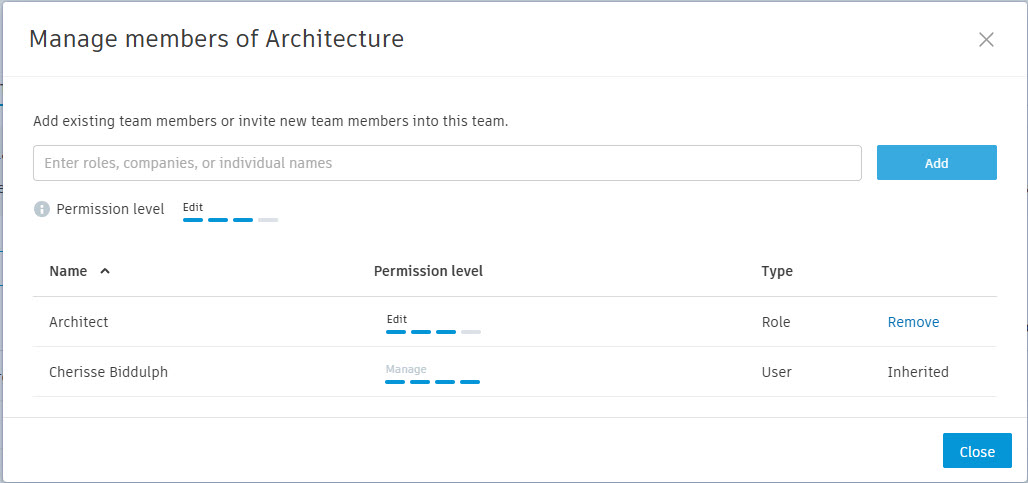
Note: Project administrators will automatically be added to each team and will display as Inherited in the Manage members dialog box. Anyone whose permissions were added in the Docs>Project Files folder will also display as Inherited. This permission setup gives the user inherited permissions for any subfolder under the Project Files folder. Adding users and permissions to the Project Files folder can only be done within the Docs product and not through the Team Setup tab in Design Collaboration. - After members are added in the Manage members dialog box, you can edit their permissions or remove them by clicking Remove.
- Click Close when you are finished adding members.